Linocut Printmaking: Happy New Year 2024
January 6, 2024
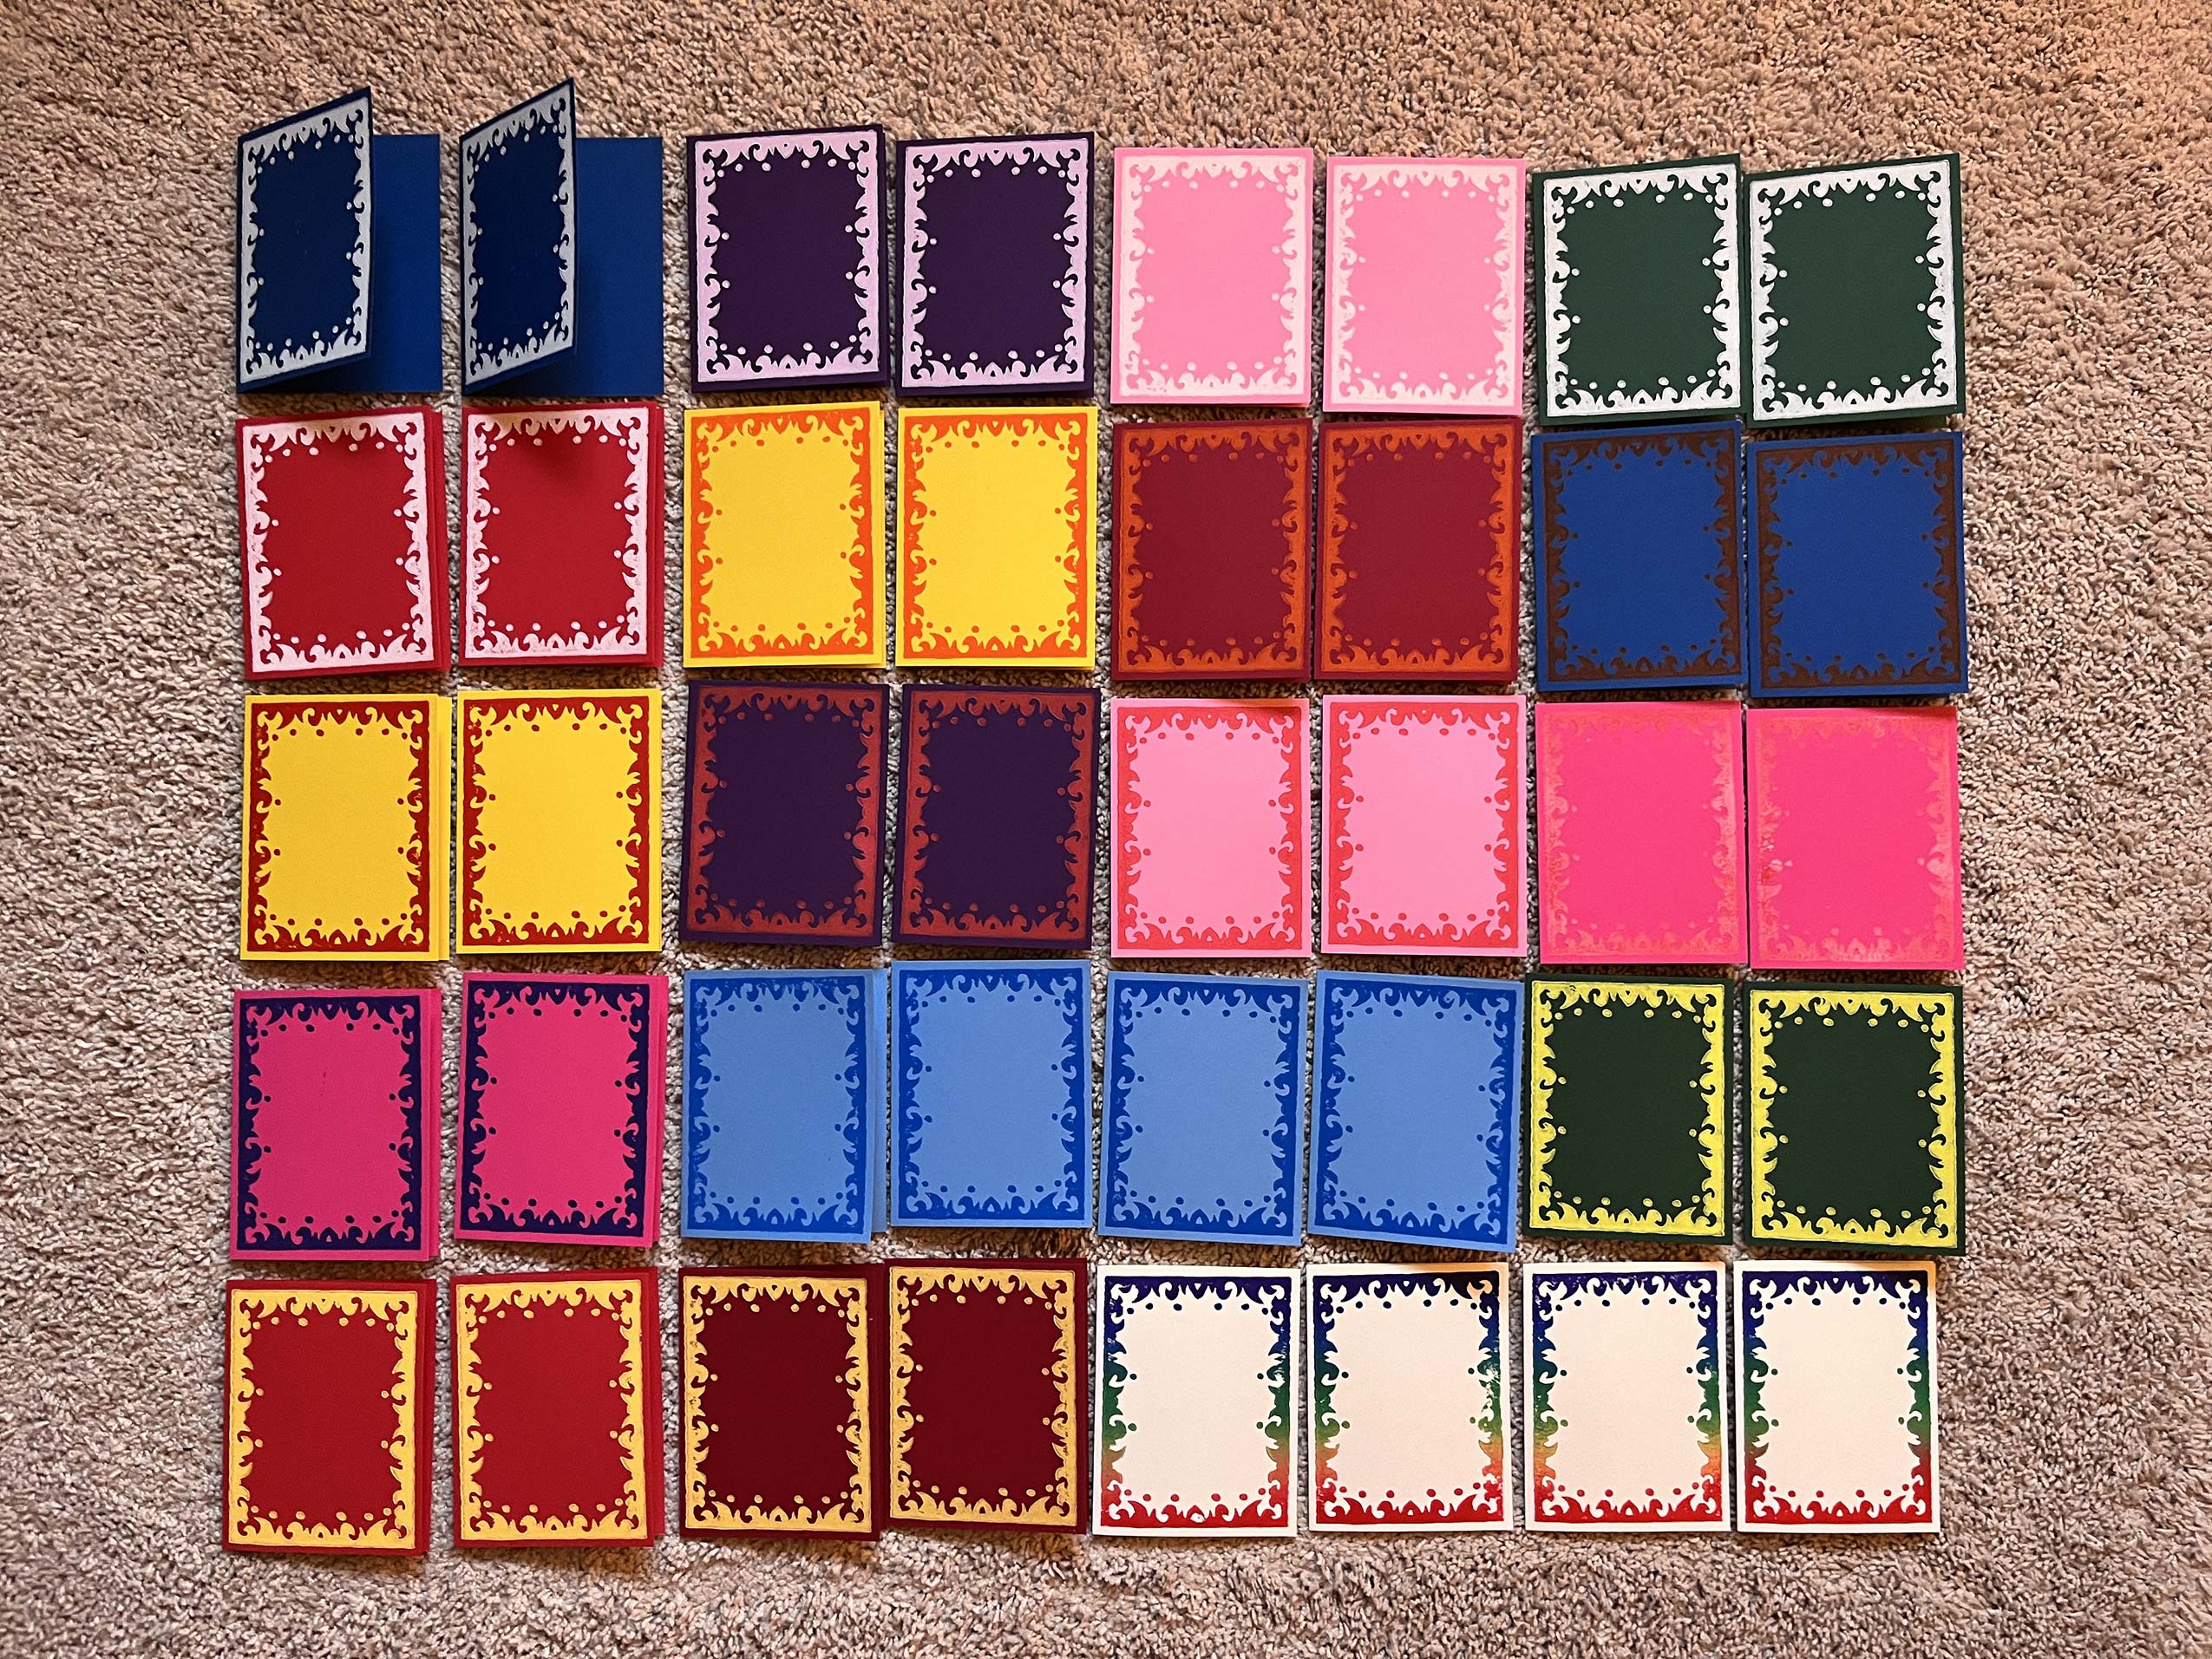
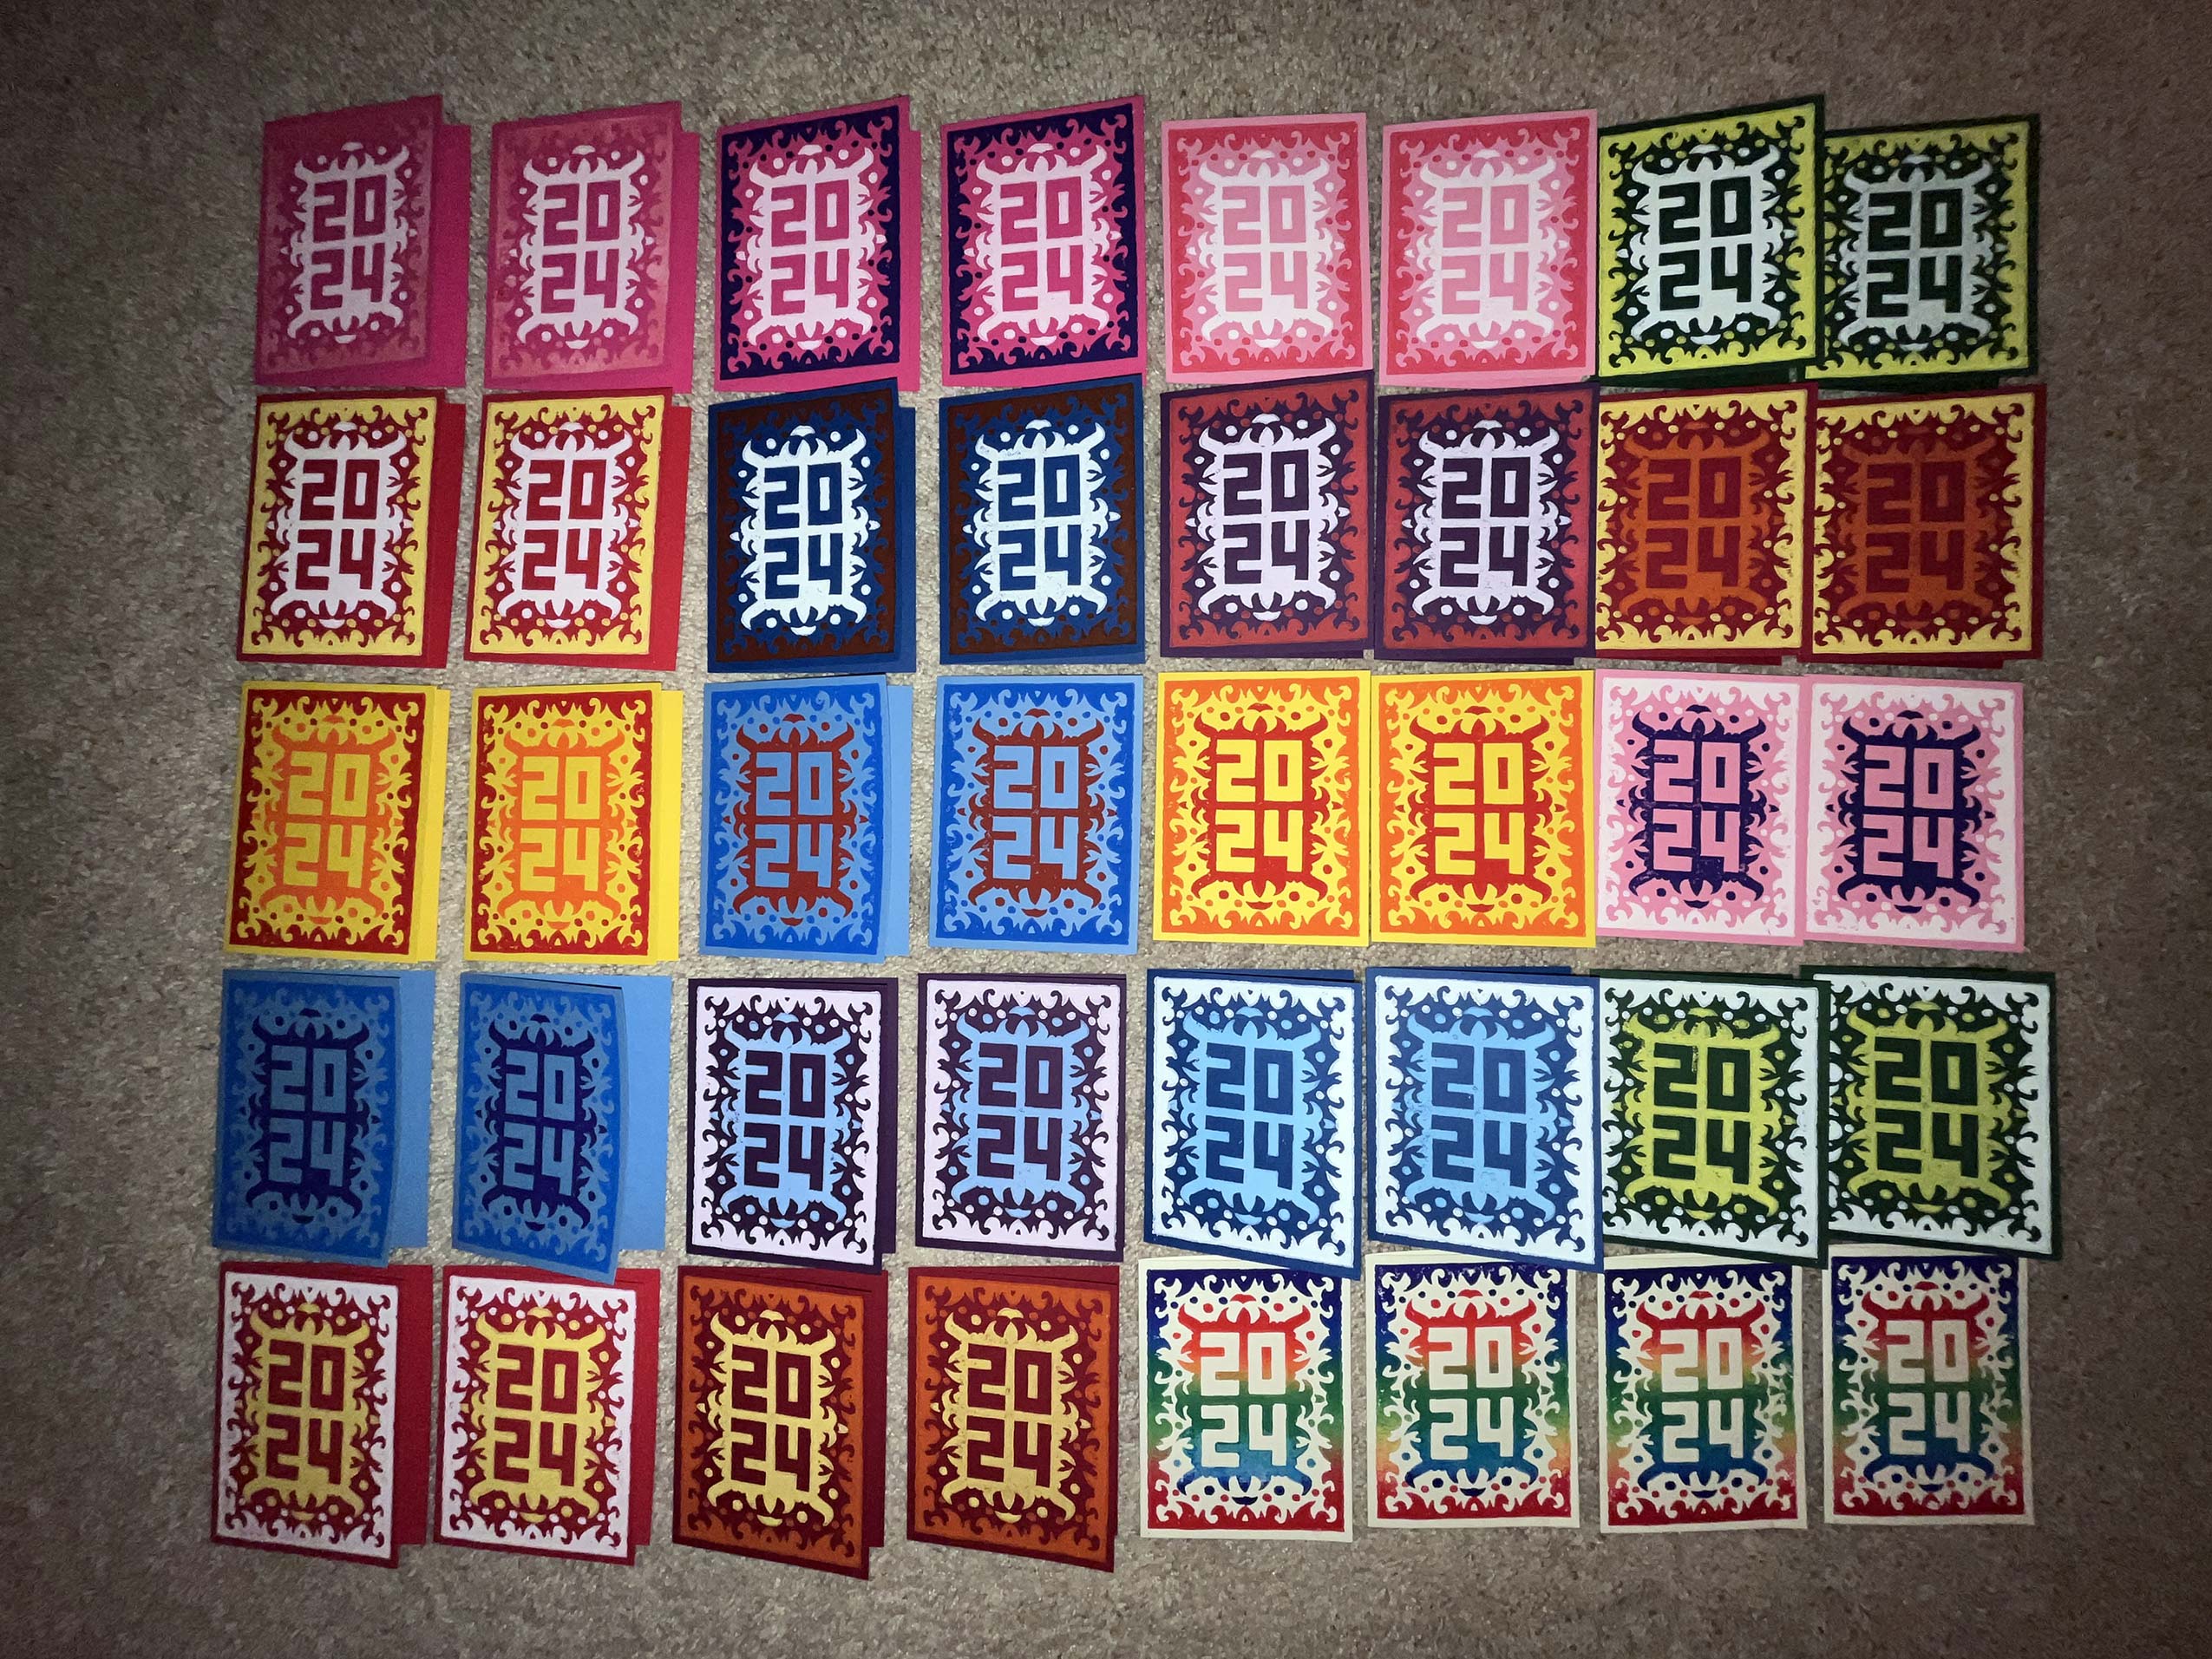
View the Gallery entry for this print to view every combination.
Procrastination. Is it a bug or a feature? A former version of myself set an alert on the day before Thanksgiving to “Begin Happy New Year Print” which I received, then acknowledged and closed… and forgot about. Which meant I was once again, three days after Christmas, making the first cut into the first of two plates for my Happy New Year 2024 greeting cards.
Now, to be clear, this is the second time I’m writing this blog post because, after spending an hour writing the first draft, I must have left a browser window open with a blank content area and saved it, which sent that hard-earned finishing touch to this project into oblivion and left me with no option but to go through it all again. So, if you actually read the entirety of this post and think it’s garbage, I’ll let you know… the first draft was brilliant.
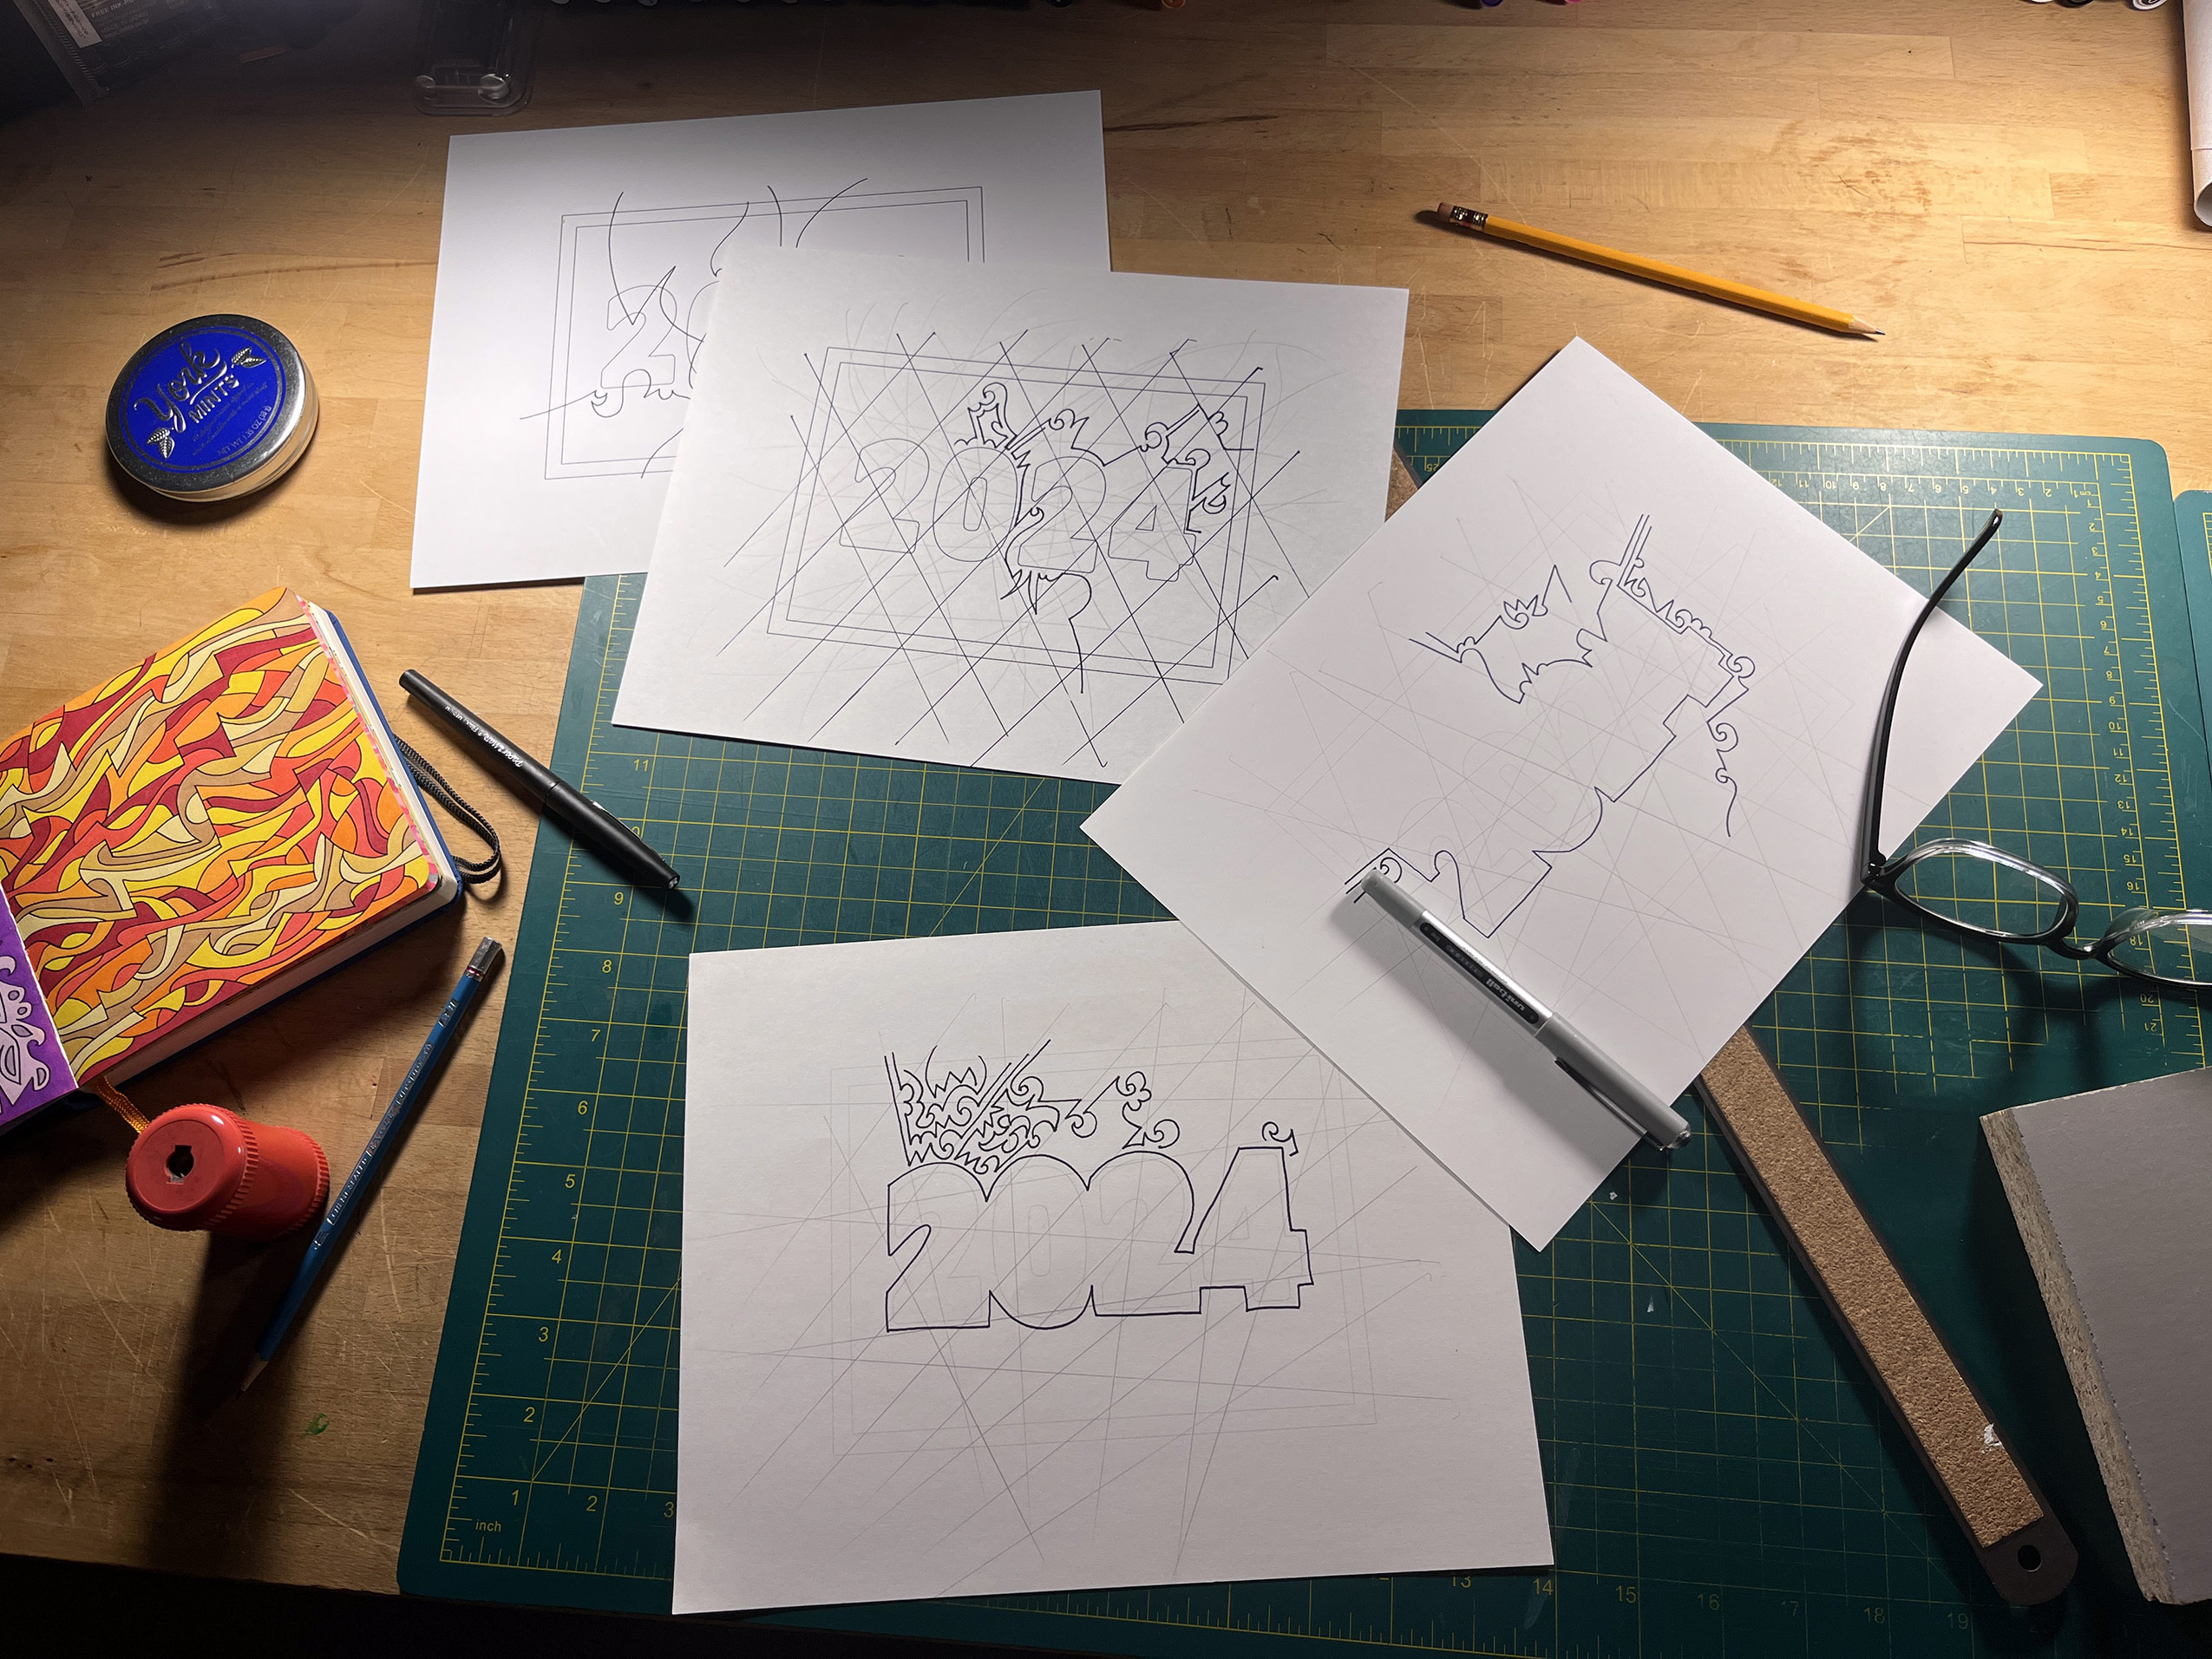
Anyway, as I was saying, I didn’t even begin working on this concept until the middle of December, but all along I knew that I wanted to do something completely original. So far, I’ve been satisfied using designs I found online for my Happy New Year and Happy Birthday prints, simply because I was still learning how to make linocut prints. It seemed rational to learn via designs which were at least proven to be possible. But this is my third year doing these prints, so I wanted to come up with something unique this time.
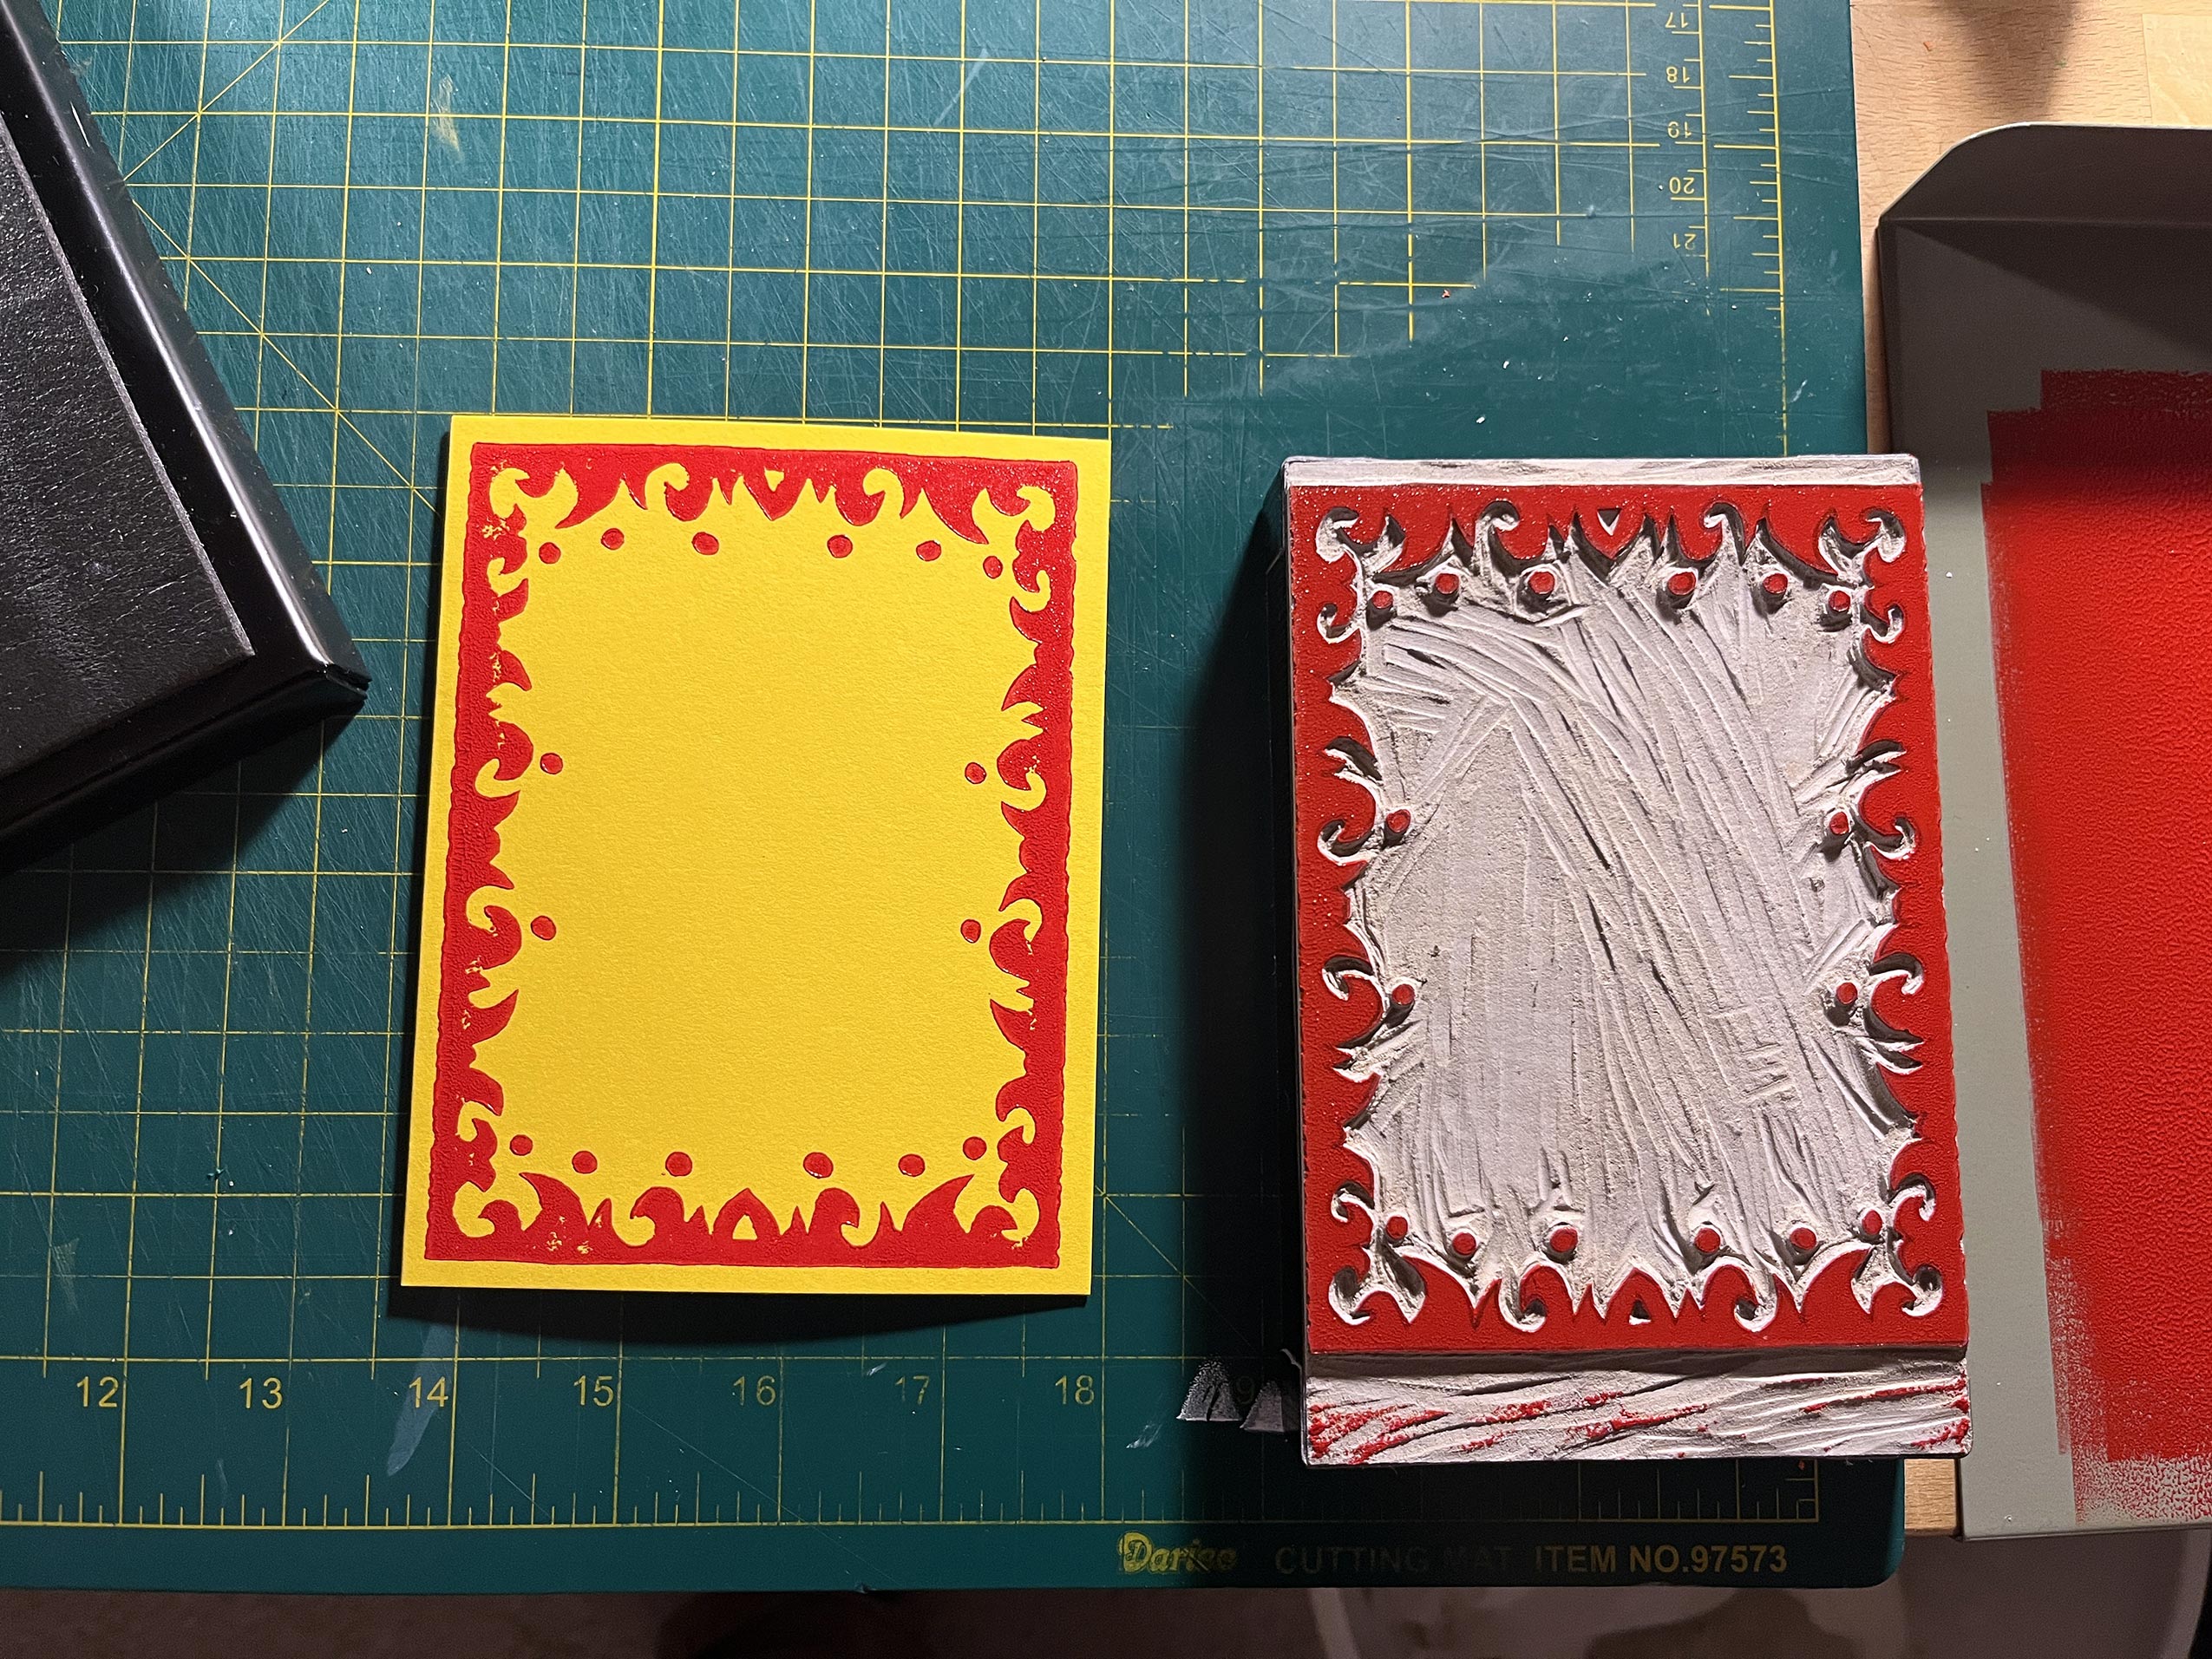
The original concept was going to build-off of the Happy Birthday 2022 print, which featured combinations of a single, gradient print on different colored card stock. The difference would be adding a plate to the print on a larger, 6 x 4 card. Unfortunately, the only multi-colored set of cards that I could find at that size were of such low quality that I had to return them. It was by luck that I was able to figure-out where the cards from the 2022 print came from and that the place where I bought them still had them in stock! So I bought two sets, figuring I’d probably want to use them again for a print in the future.
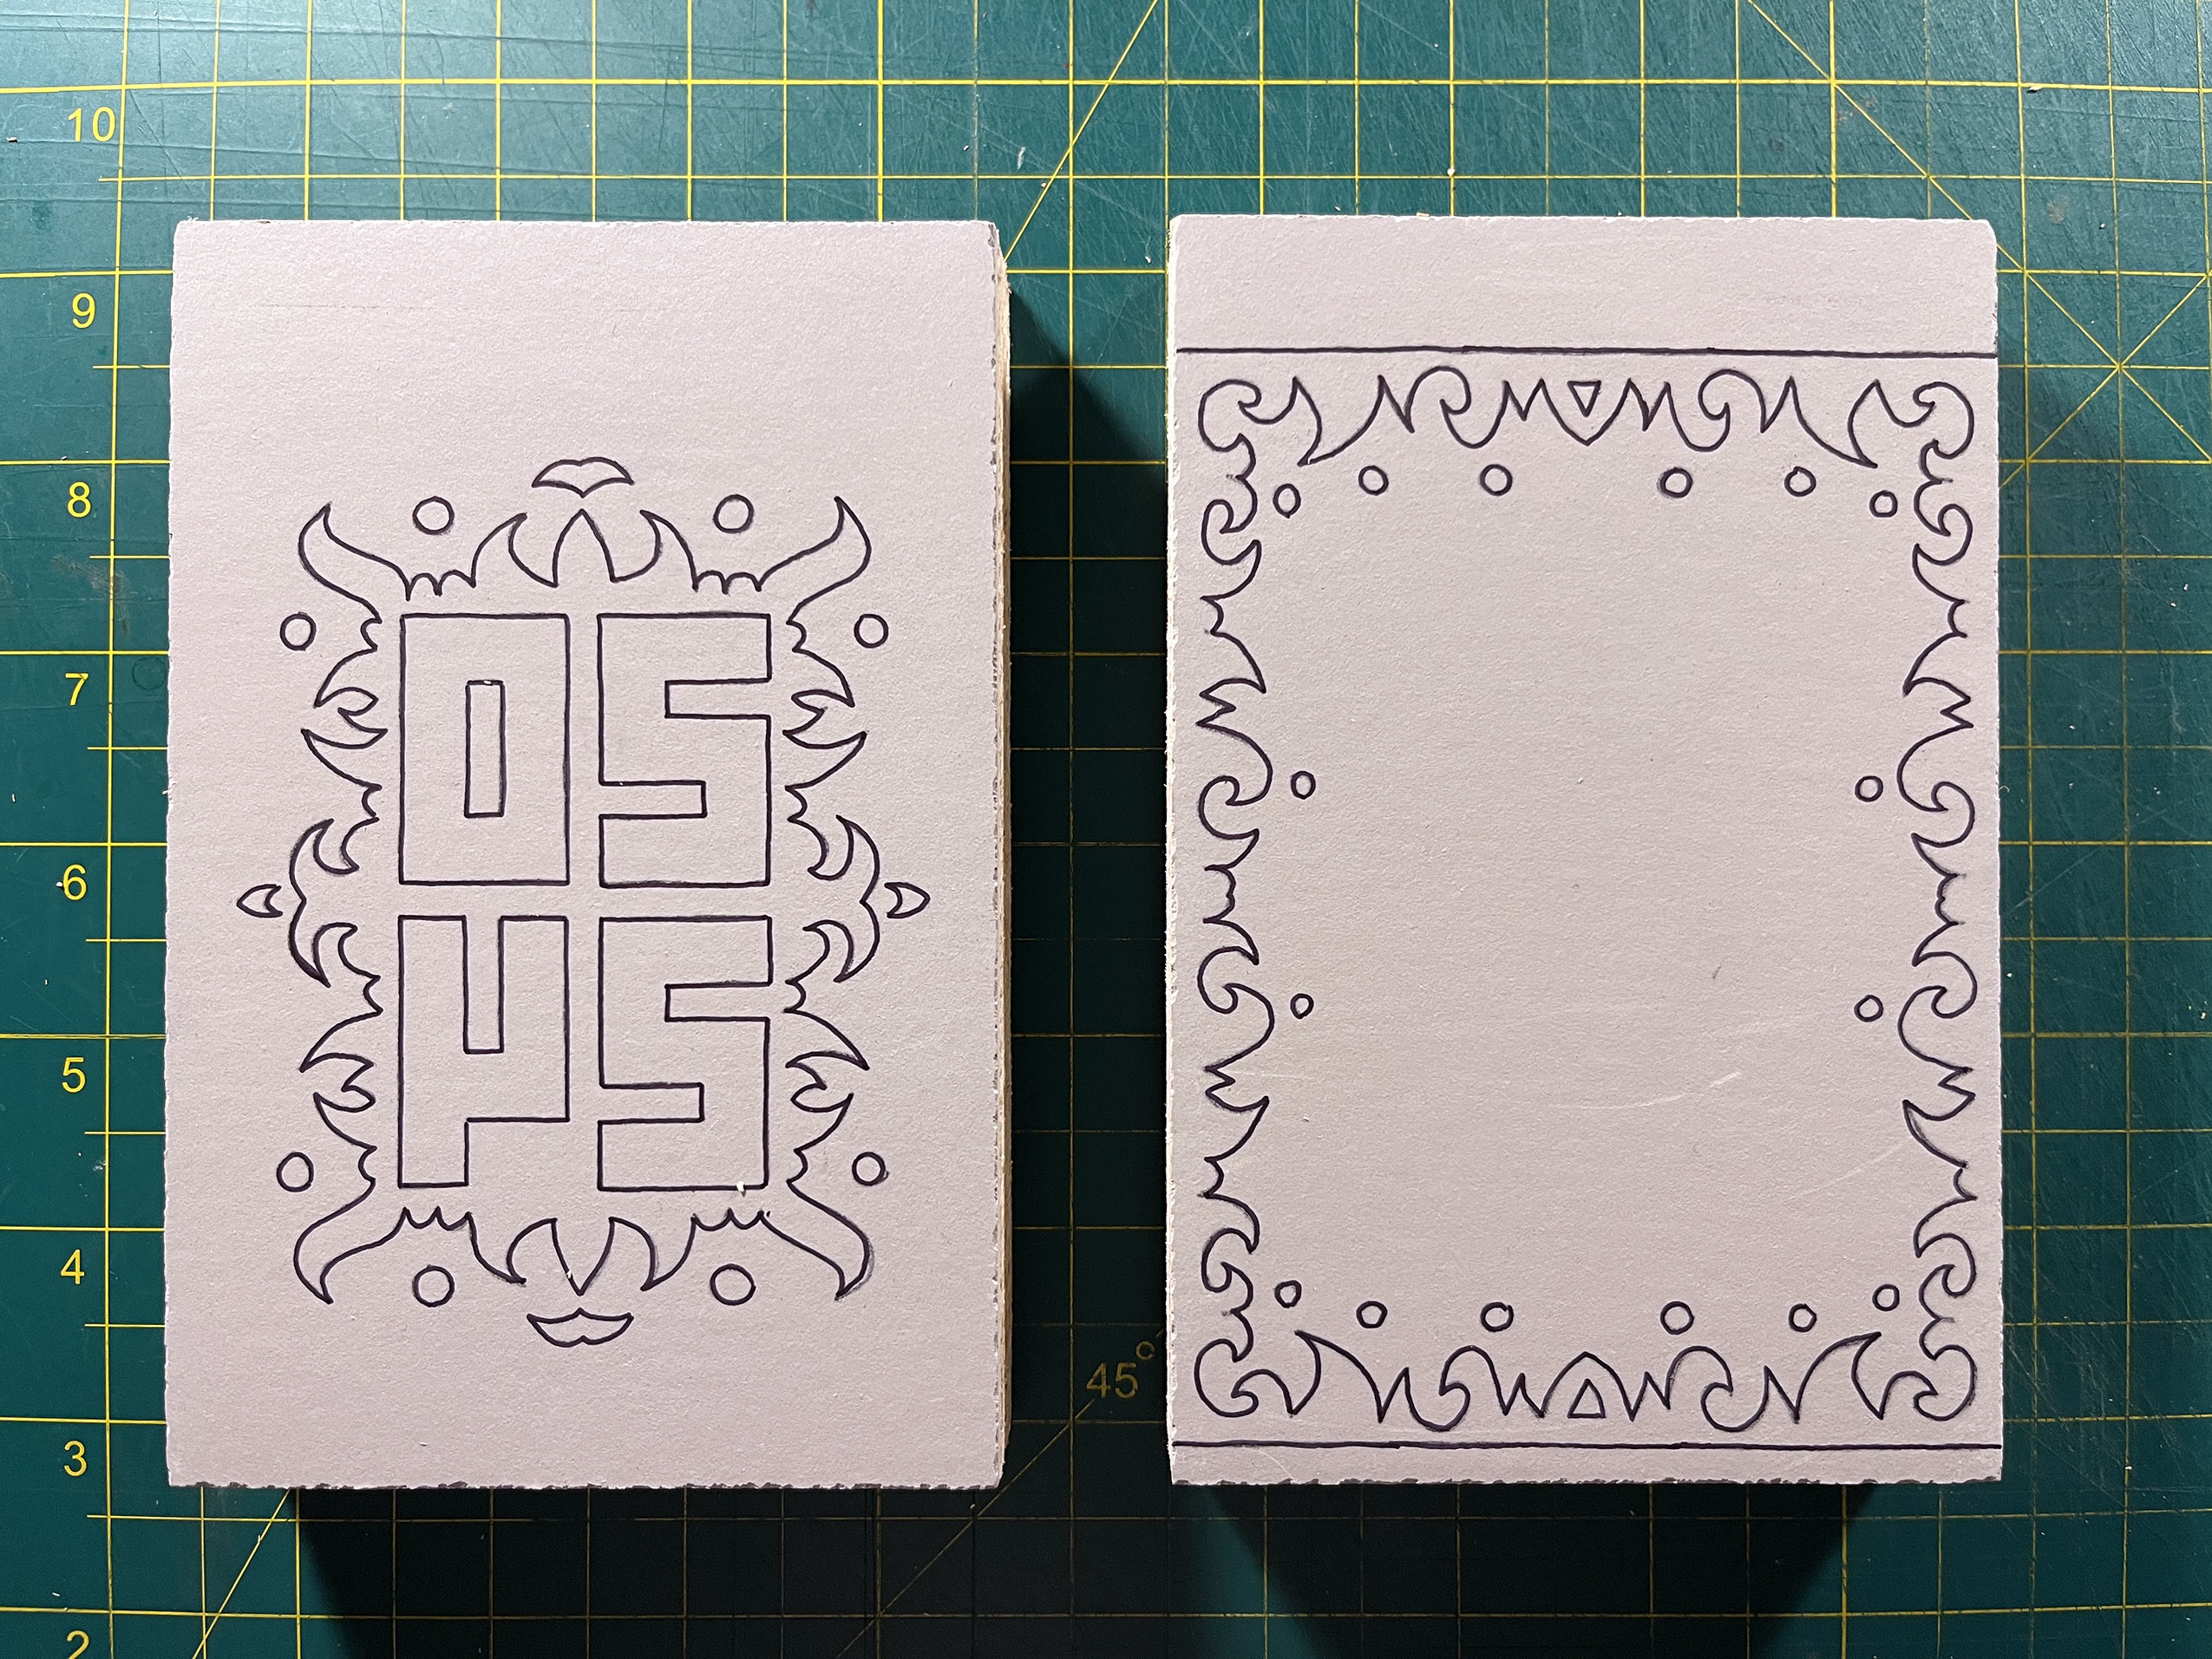
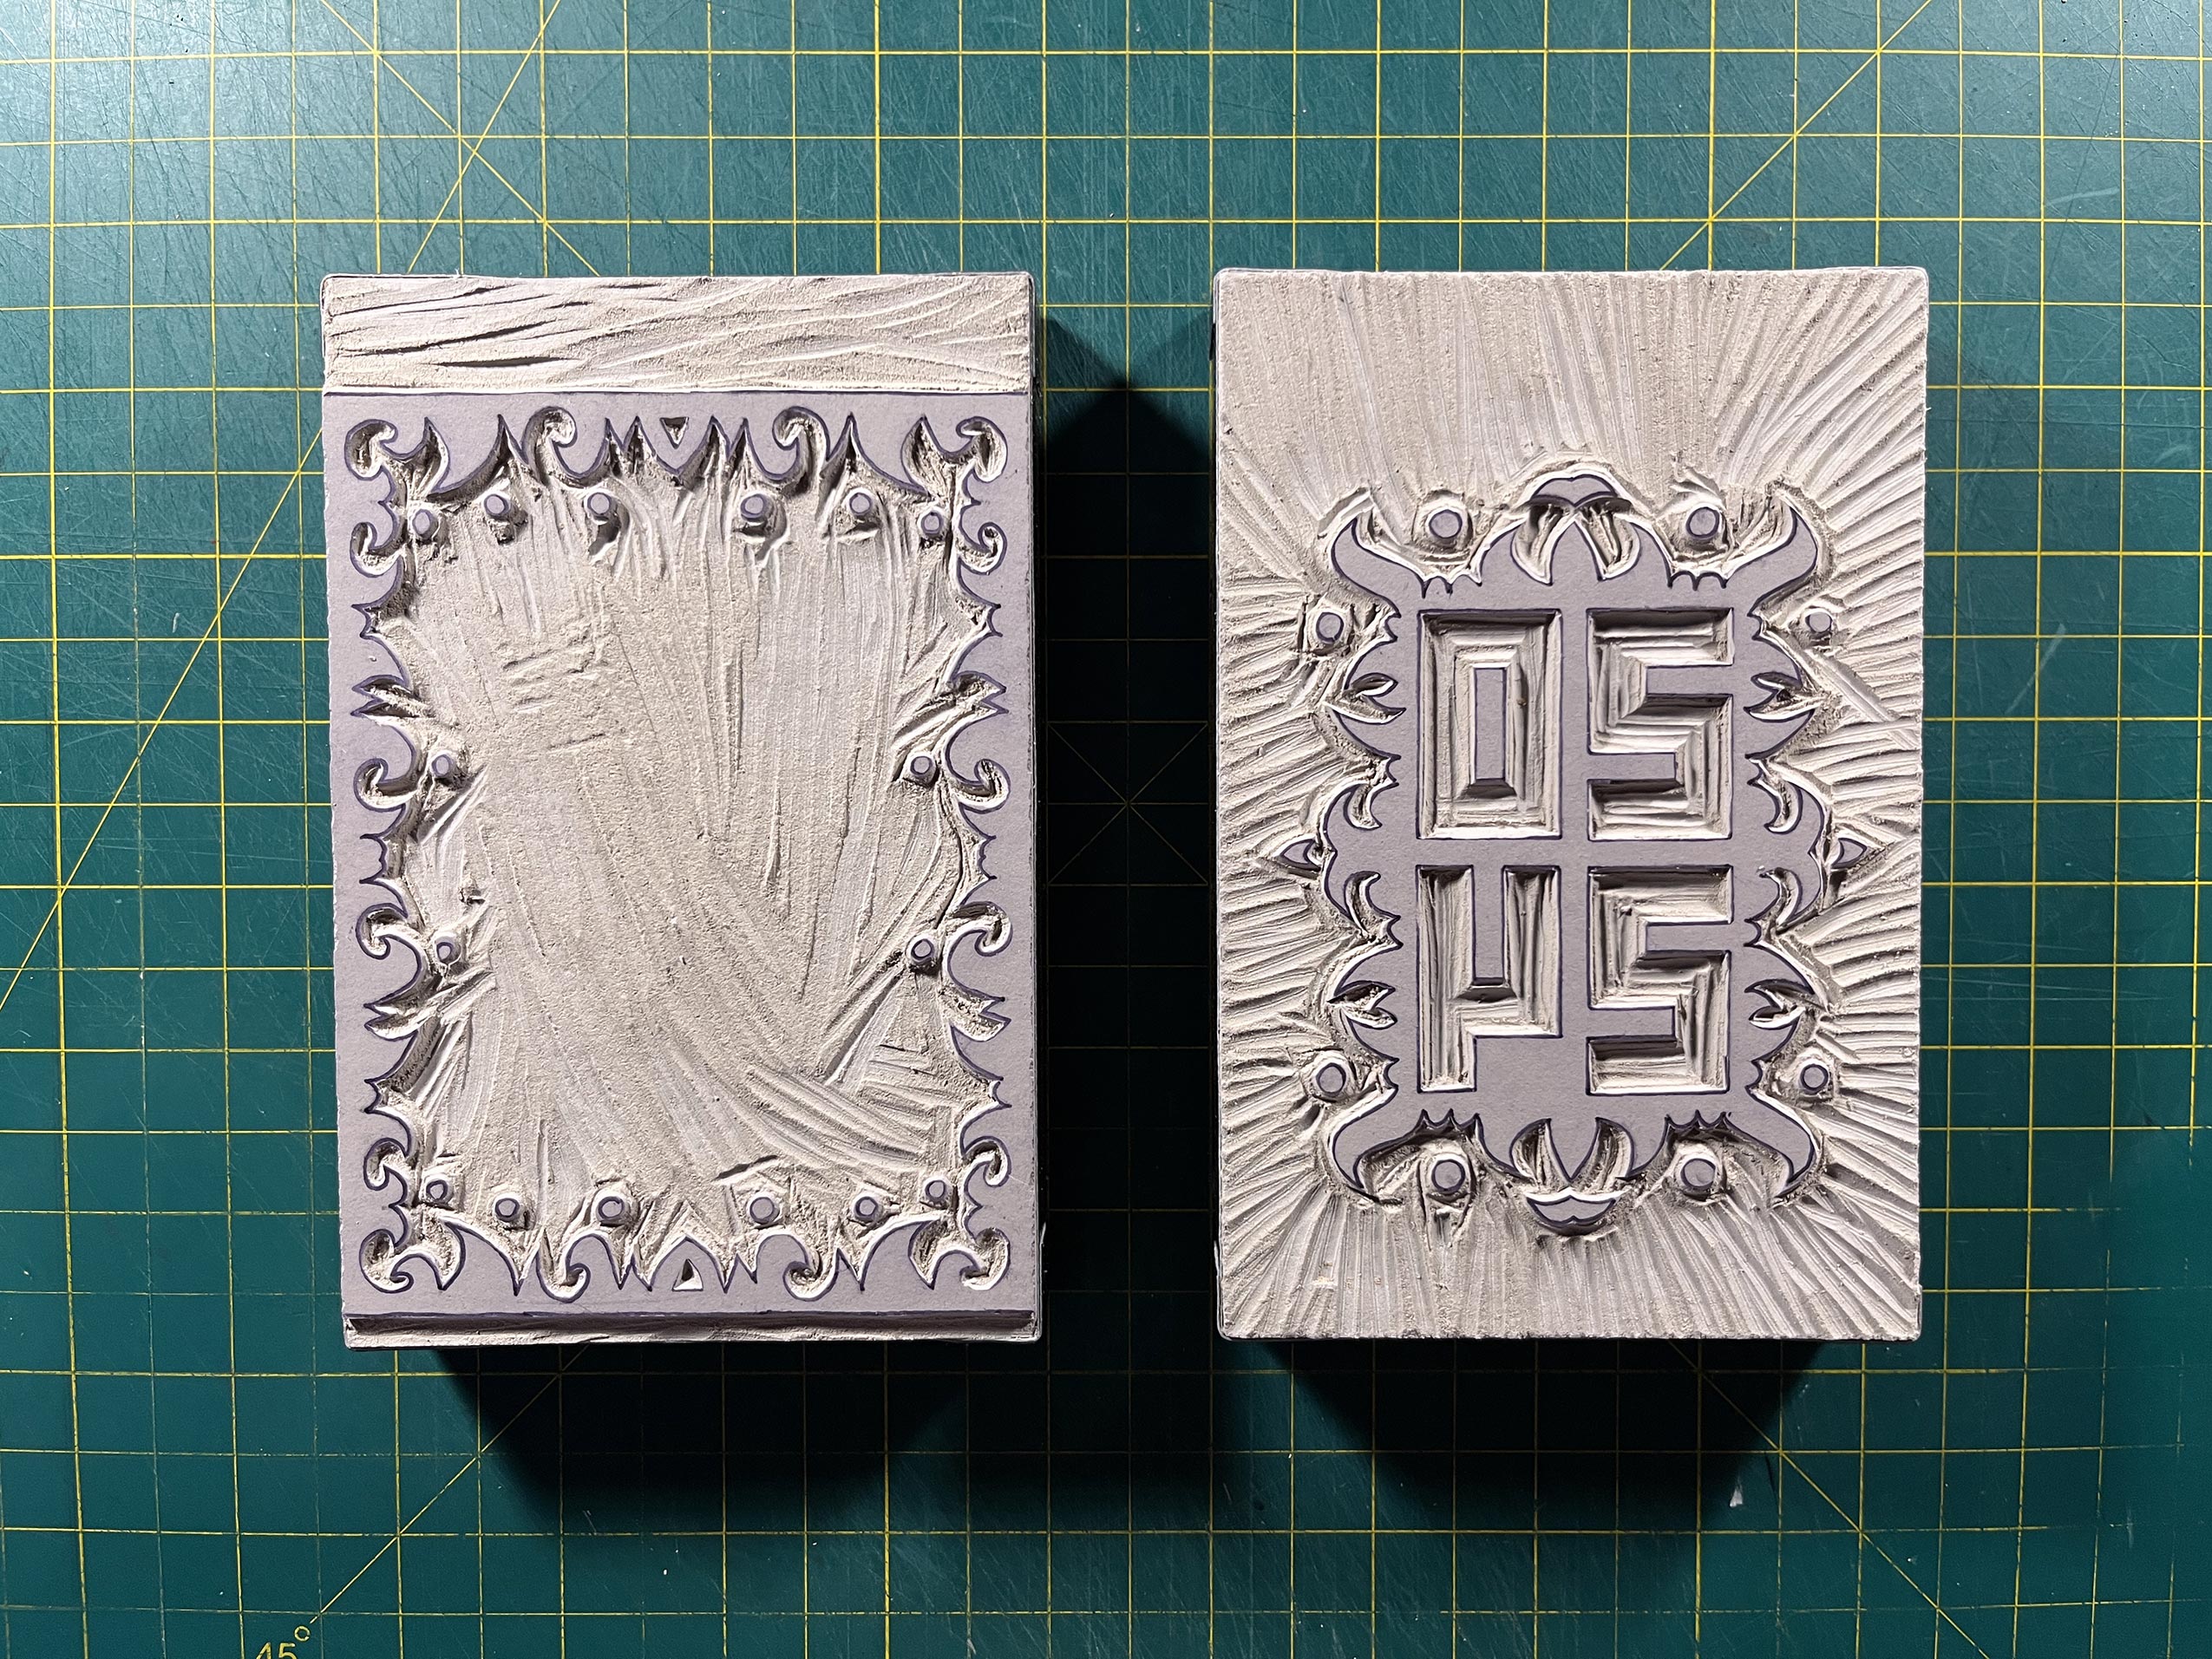
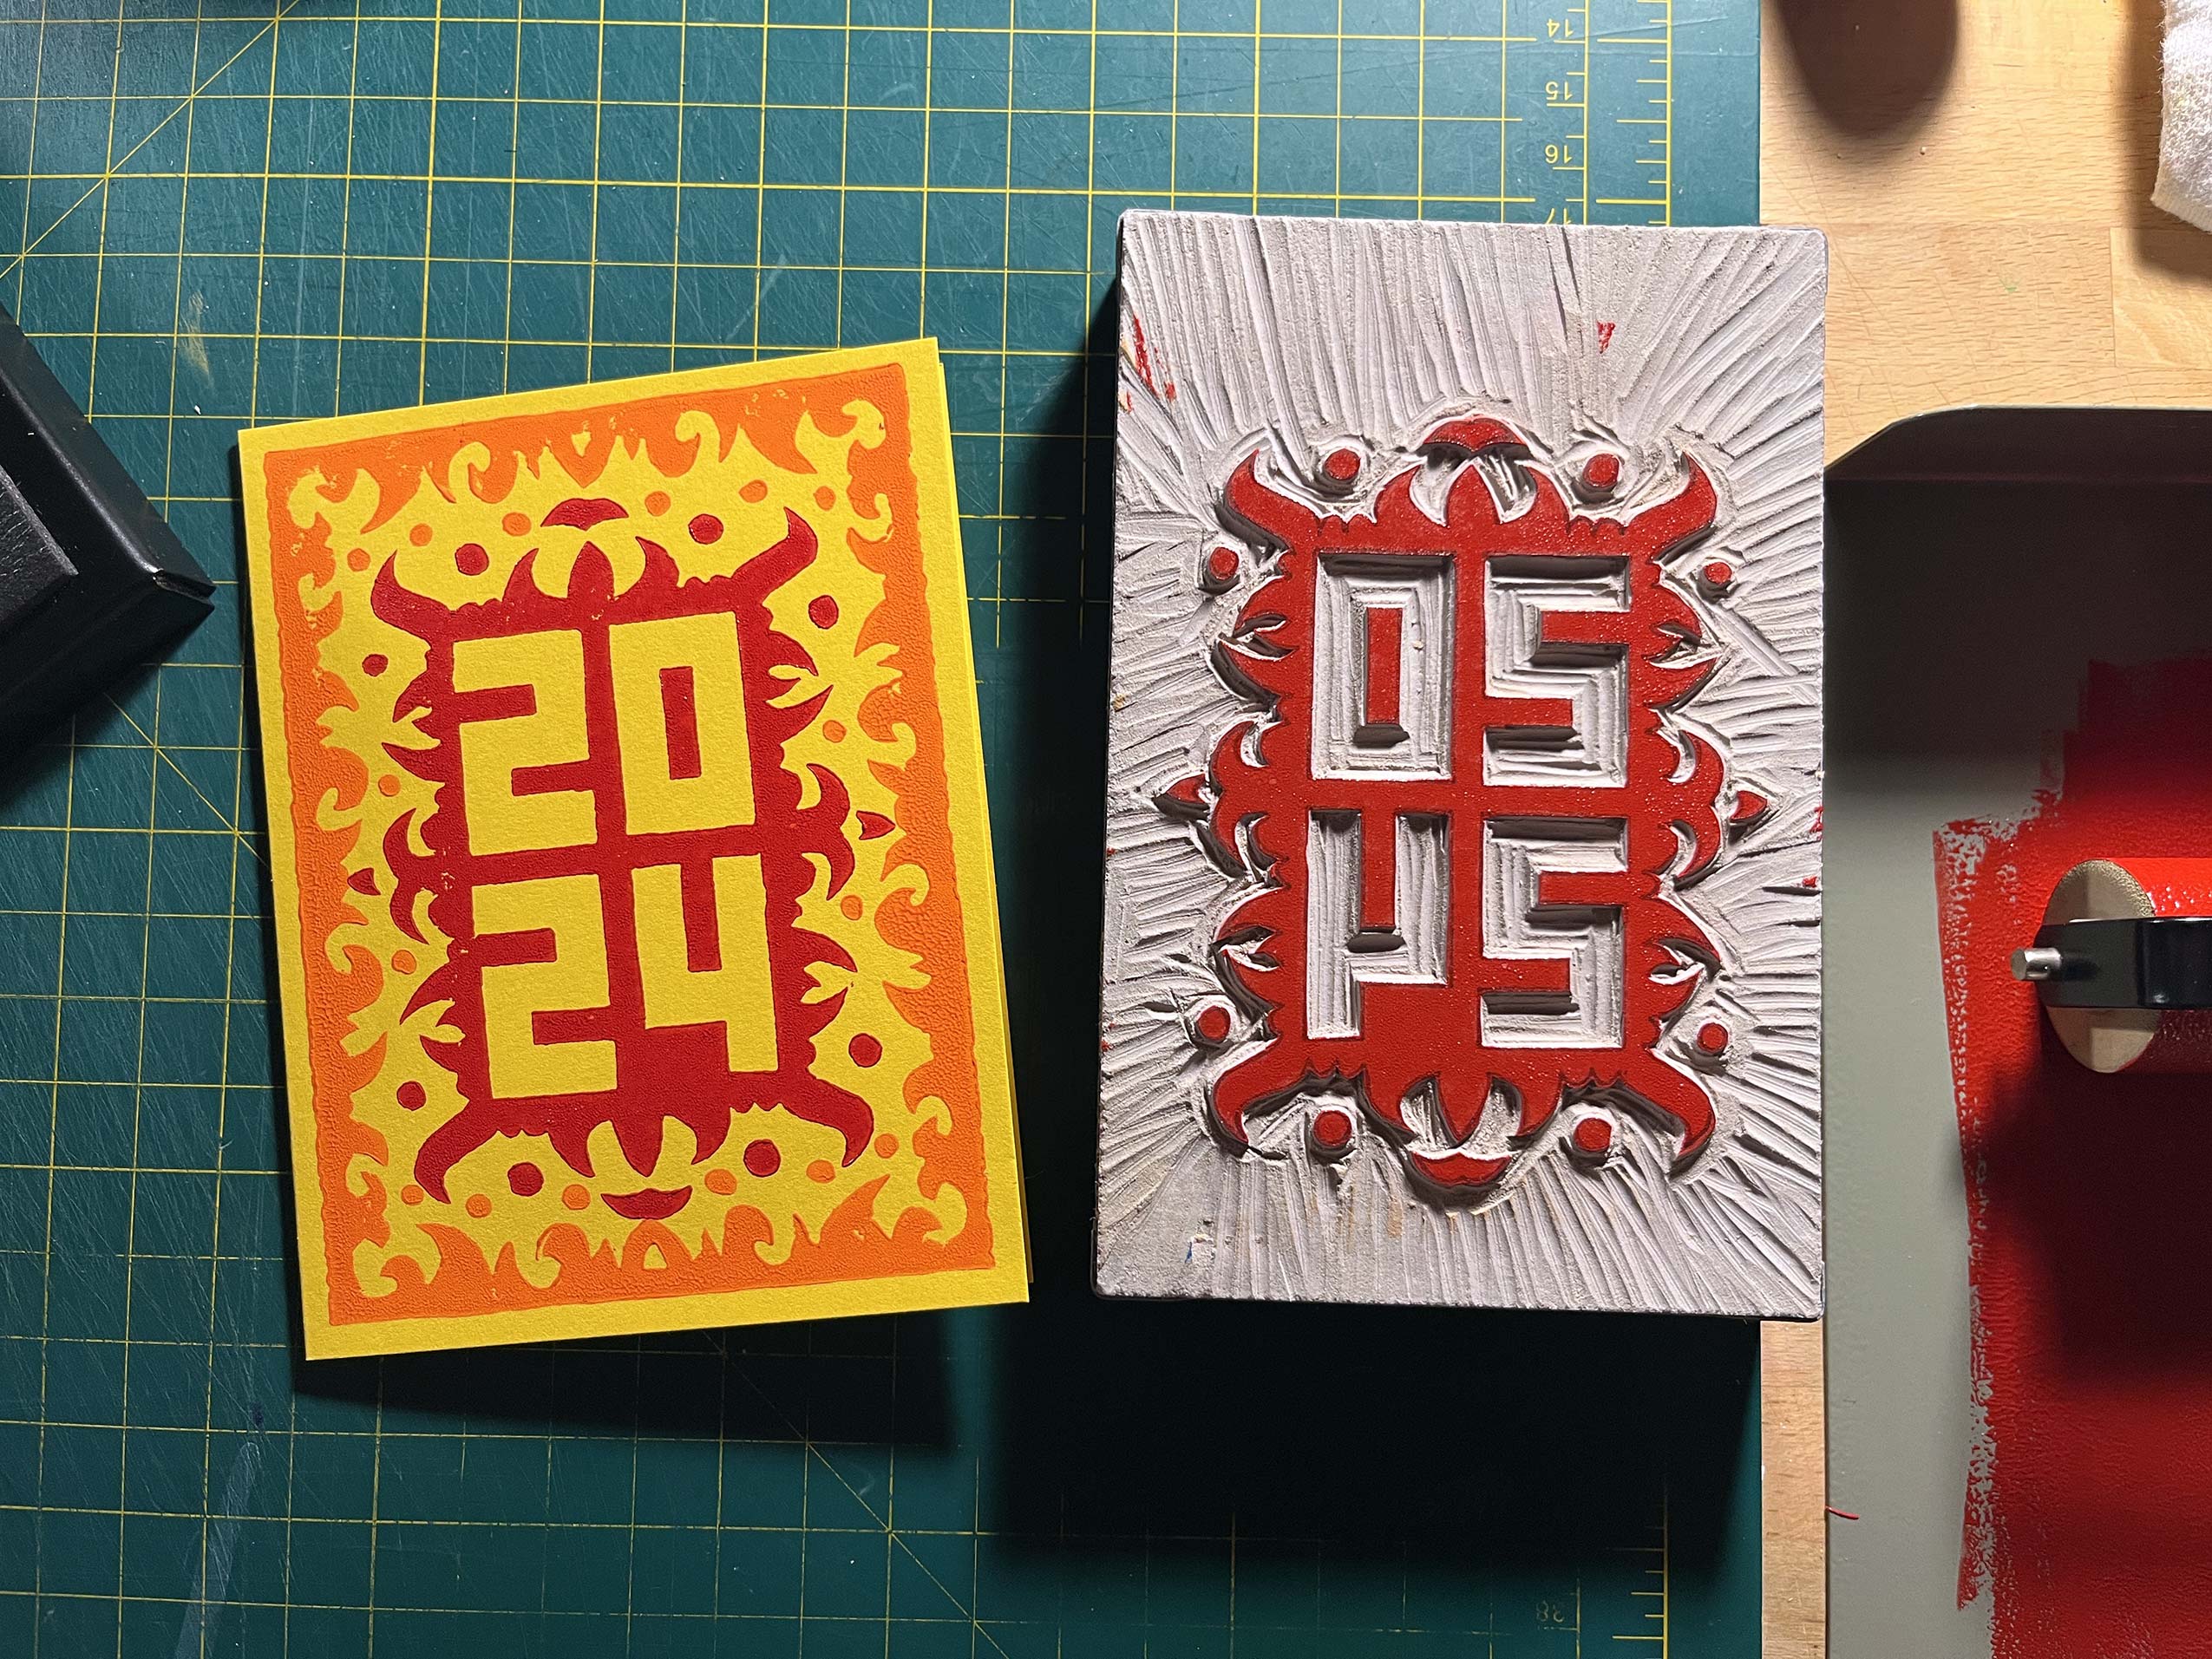
Scaling down the cards meant that I had to simplify the design. From the start, the actual words “Happy New Year” were removed from the equation, which I didn’t mind because letters are difficult to cut-out at such a small size. The initial attempts had “2024” inline, but on the smaller cards it was a tightrope that I couldn’t walk, keeping the numbers large enough to not be a pain in the ass to execute but small enough to allow room around them for a multi-plated design. The breakthrough was stacking the digits which allowed for a preferred portrait orientation. This left me plenty of room to play with around the sides.
The style of the design itself is a familiar one that I use in my “Meditations” which you can see through the gallery of this site. They’re called “Meditations” because they only serve the purpose of being a mindful exercise for me to complete that doesn’t involve screens and/or stress me out. The original idea involved lines that would cut through the finished designs, but I decided to save that concept for another time.
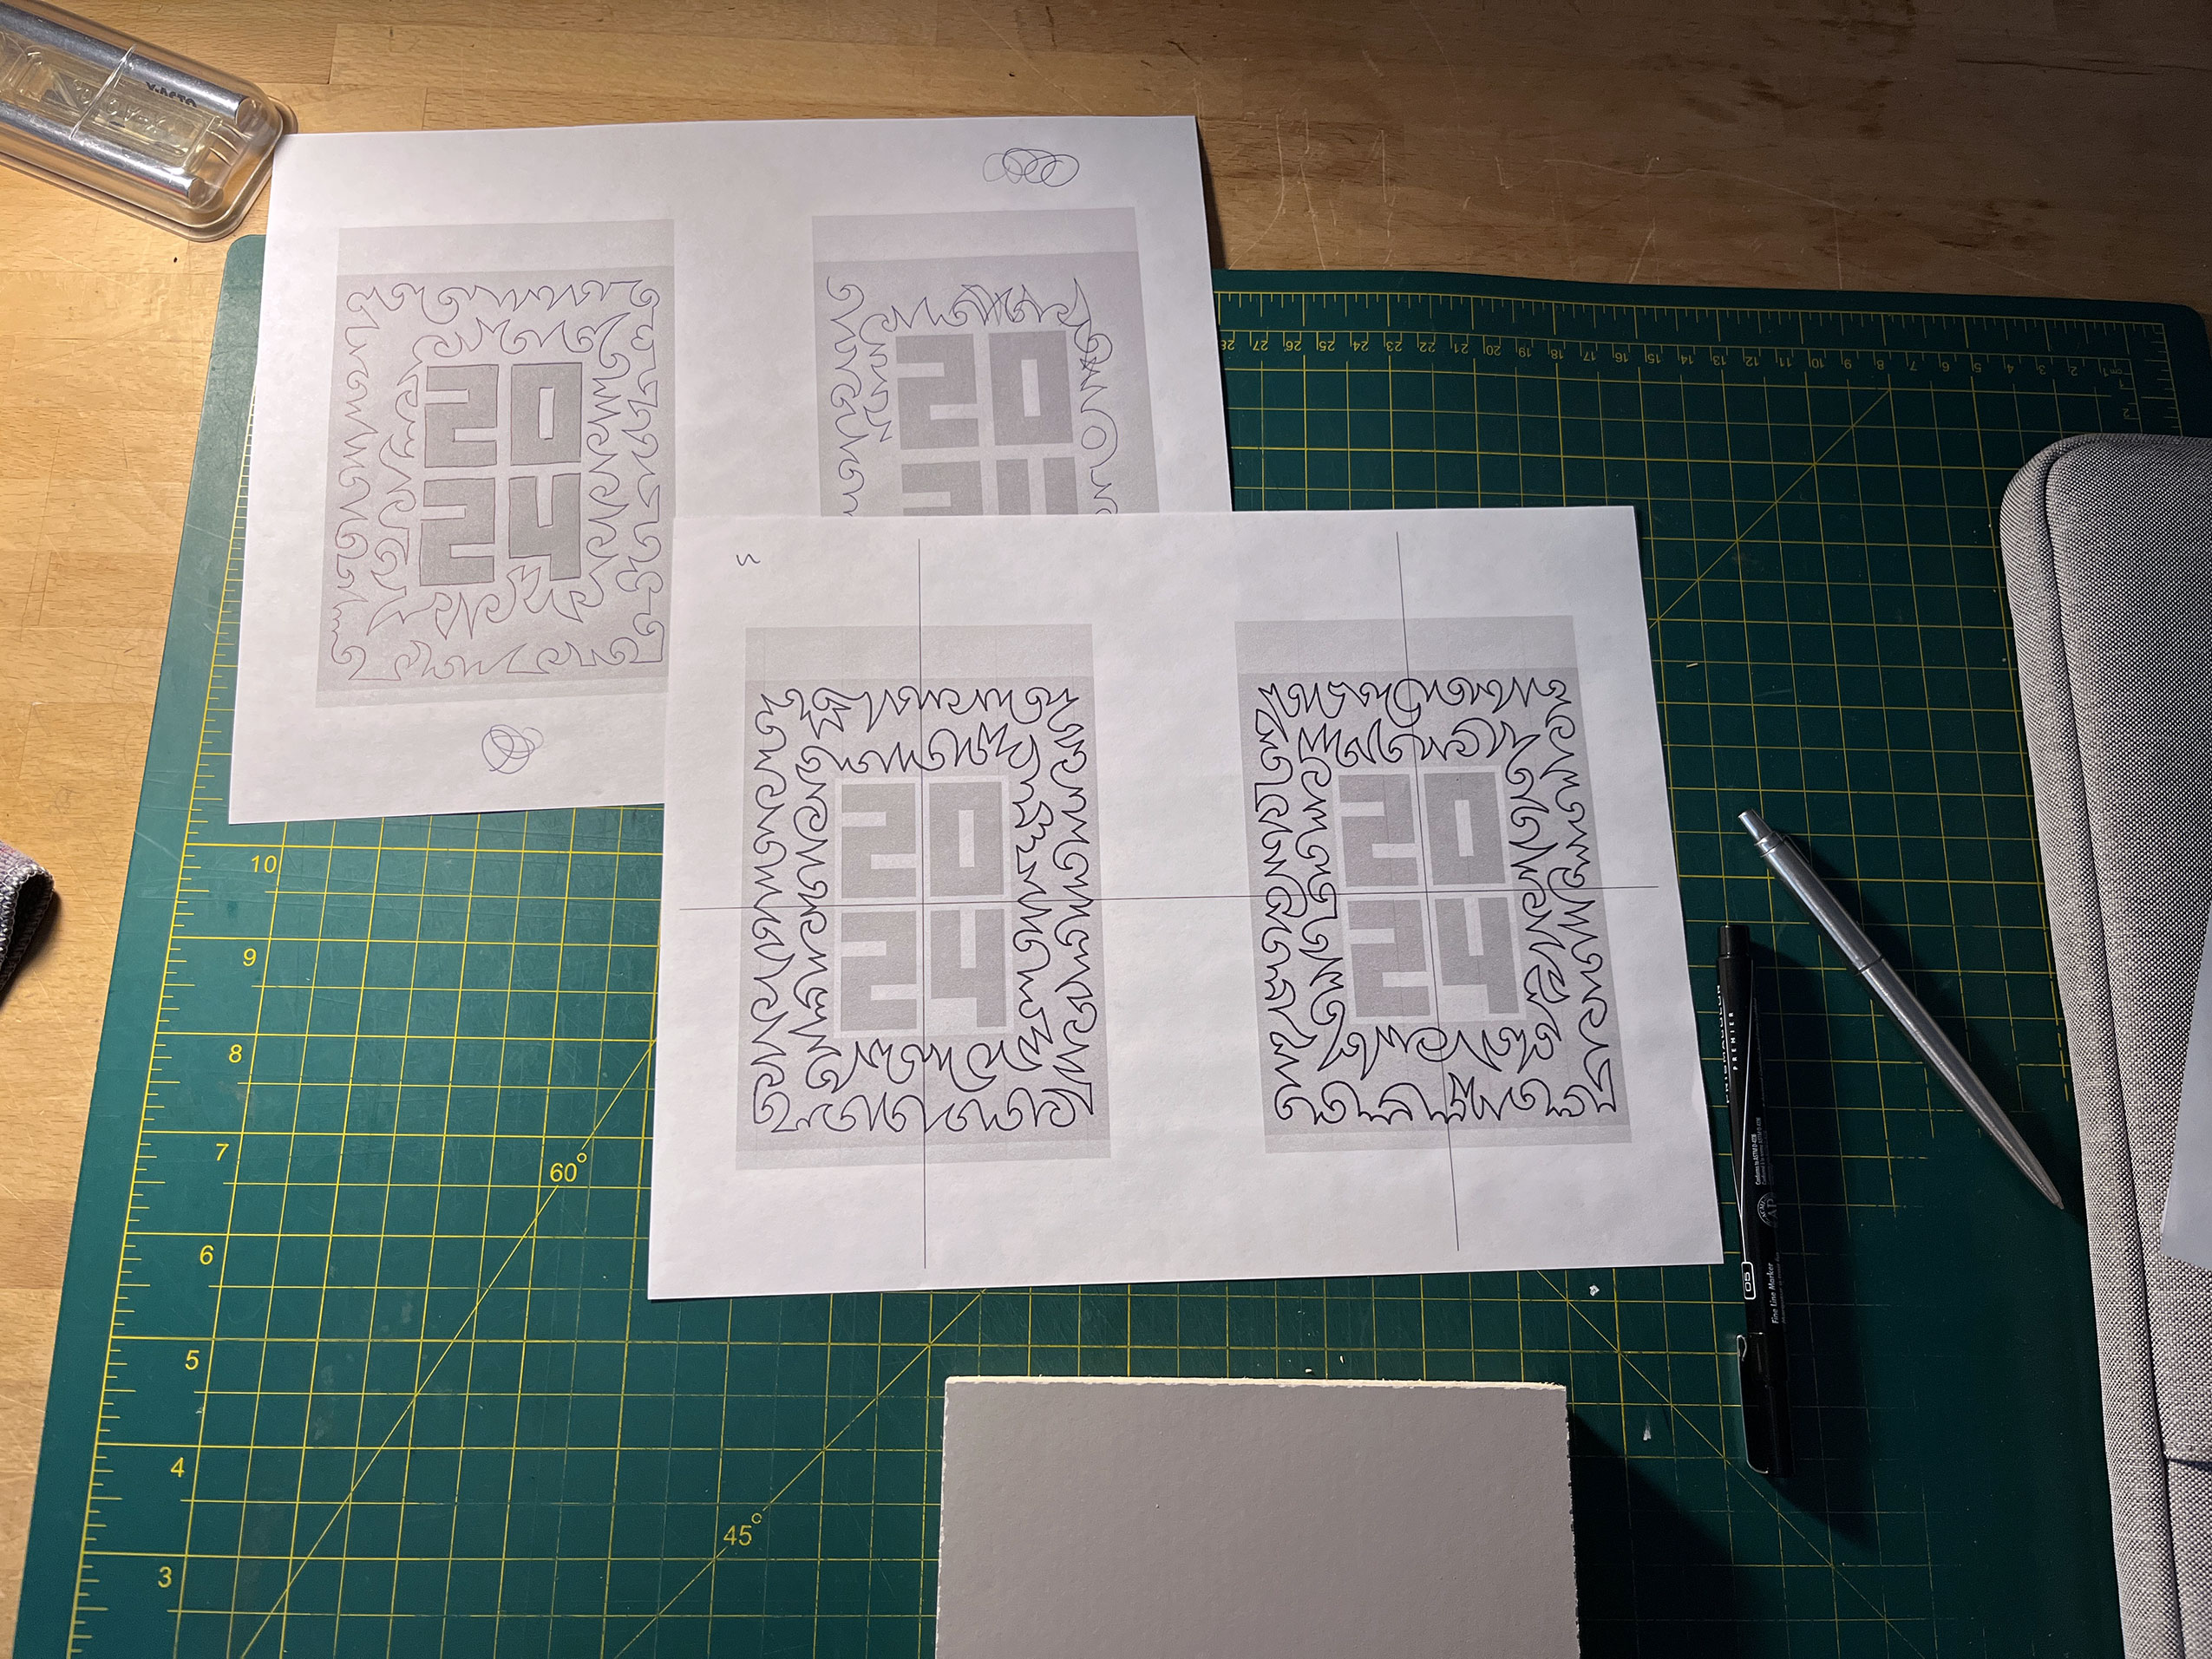
The final concept involved using felt tipped marker on paper templates which were divided into quadrants to create ten sketches. These sketches were then scanned and opened in Photoshop, where I then mirrored each quadrant, leaving me with forty kaleidoscopic options to choose from. After deciding which one I liked best, I then borrowed a few pieces from the other options to come up with the final guides for the linoleum blocks.
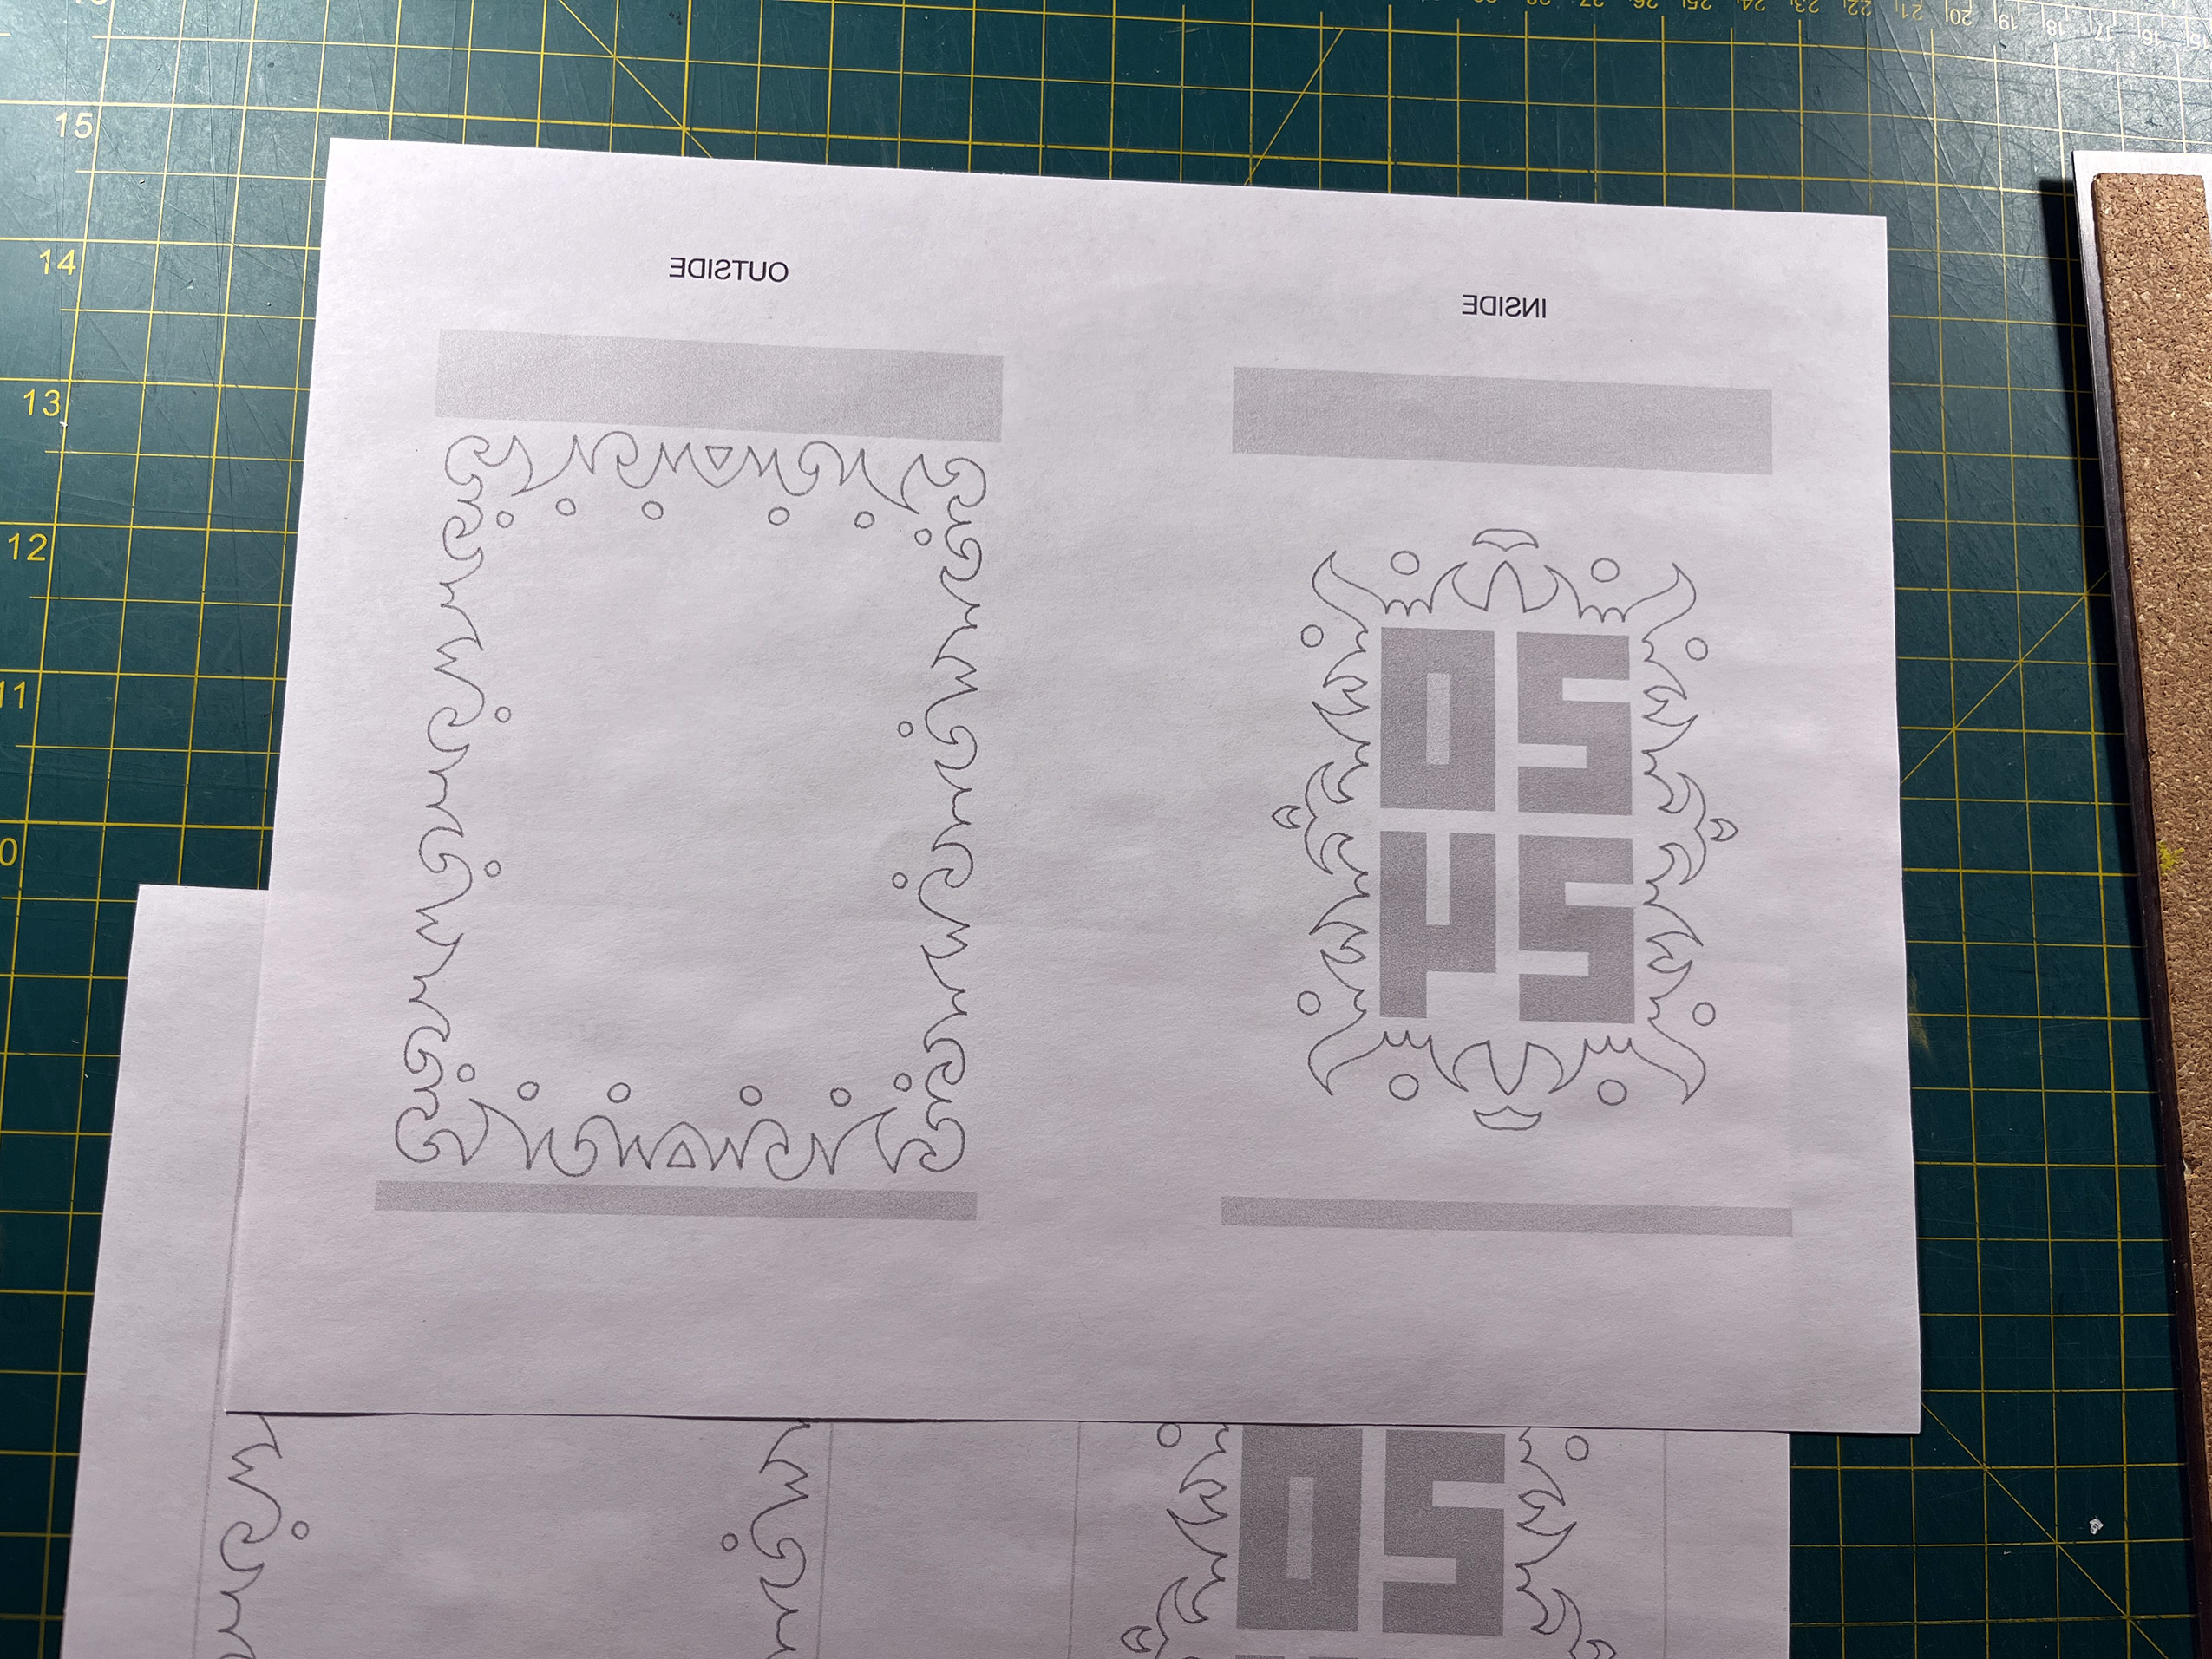
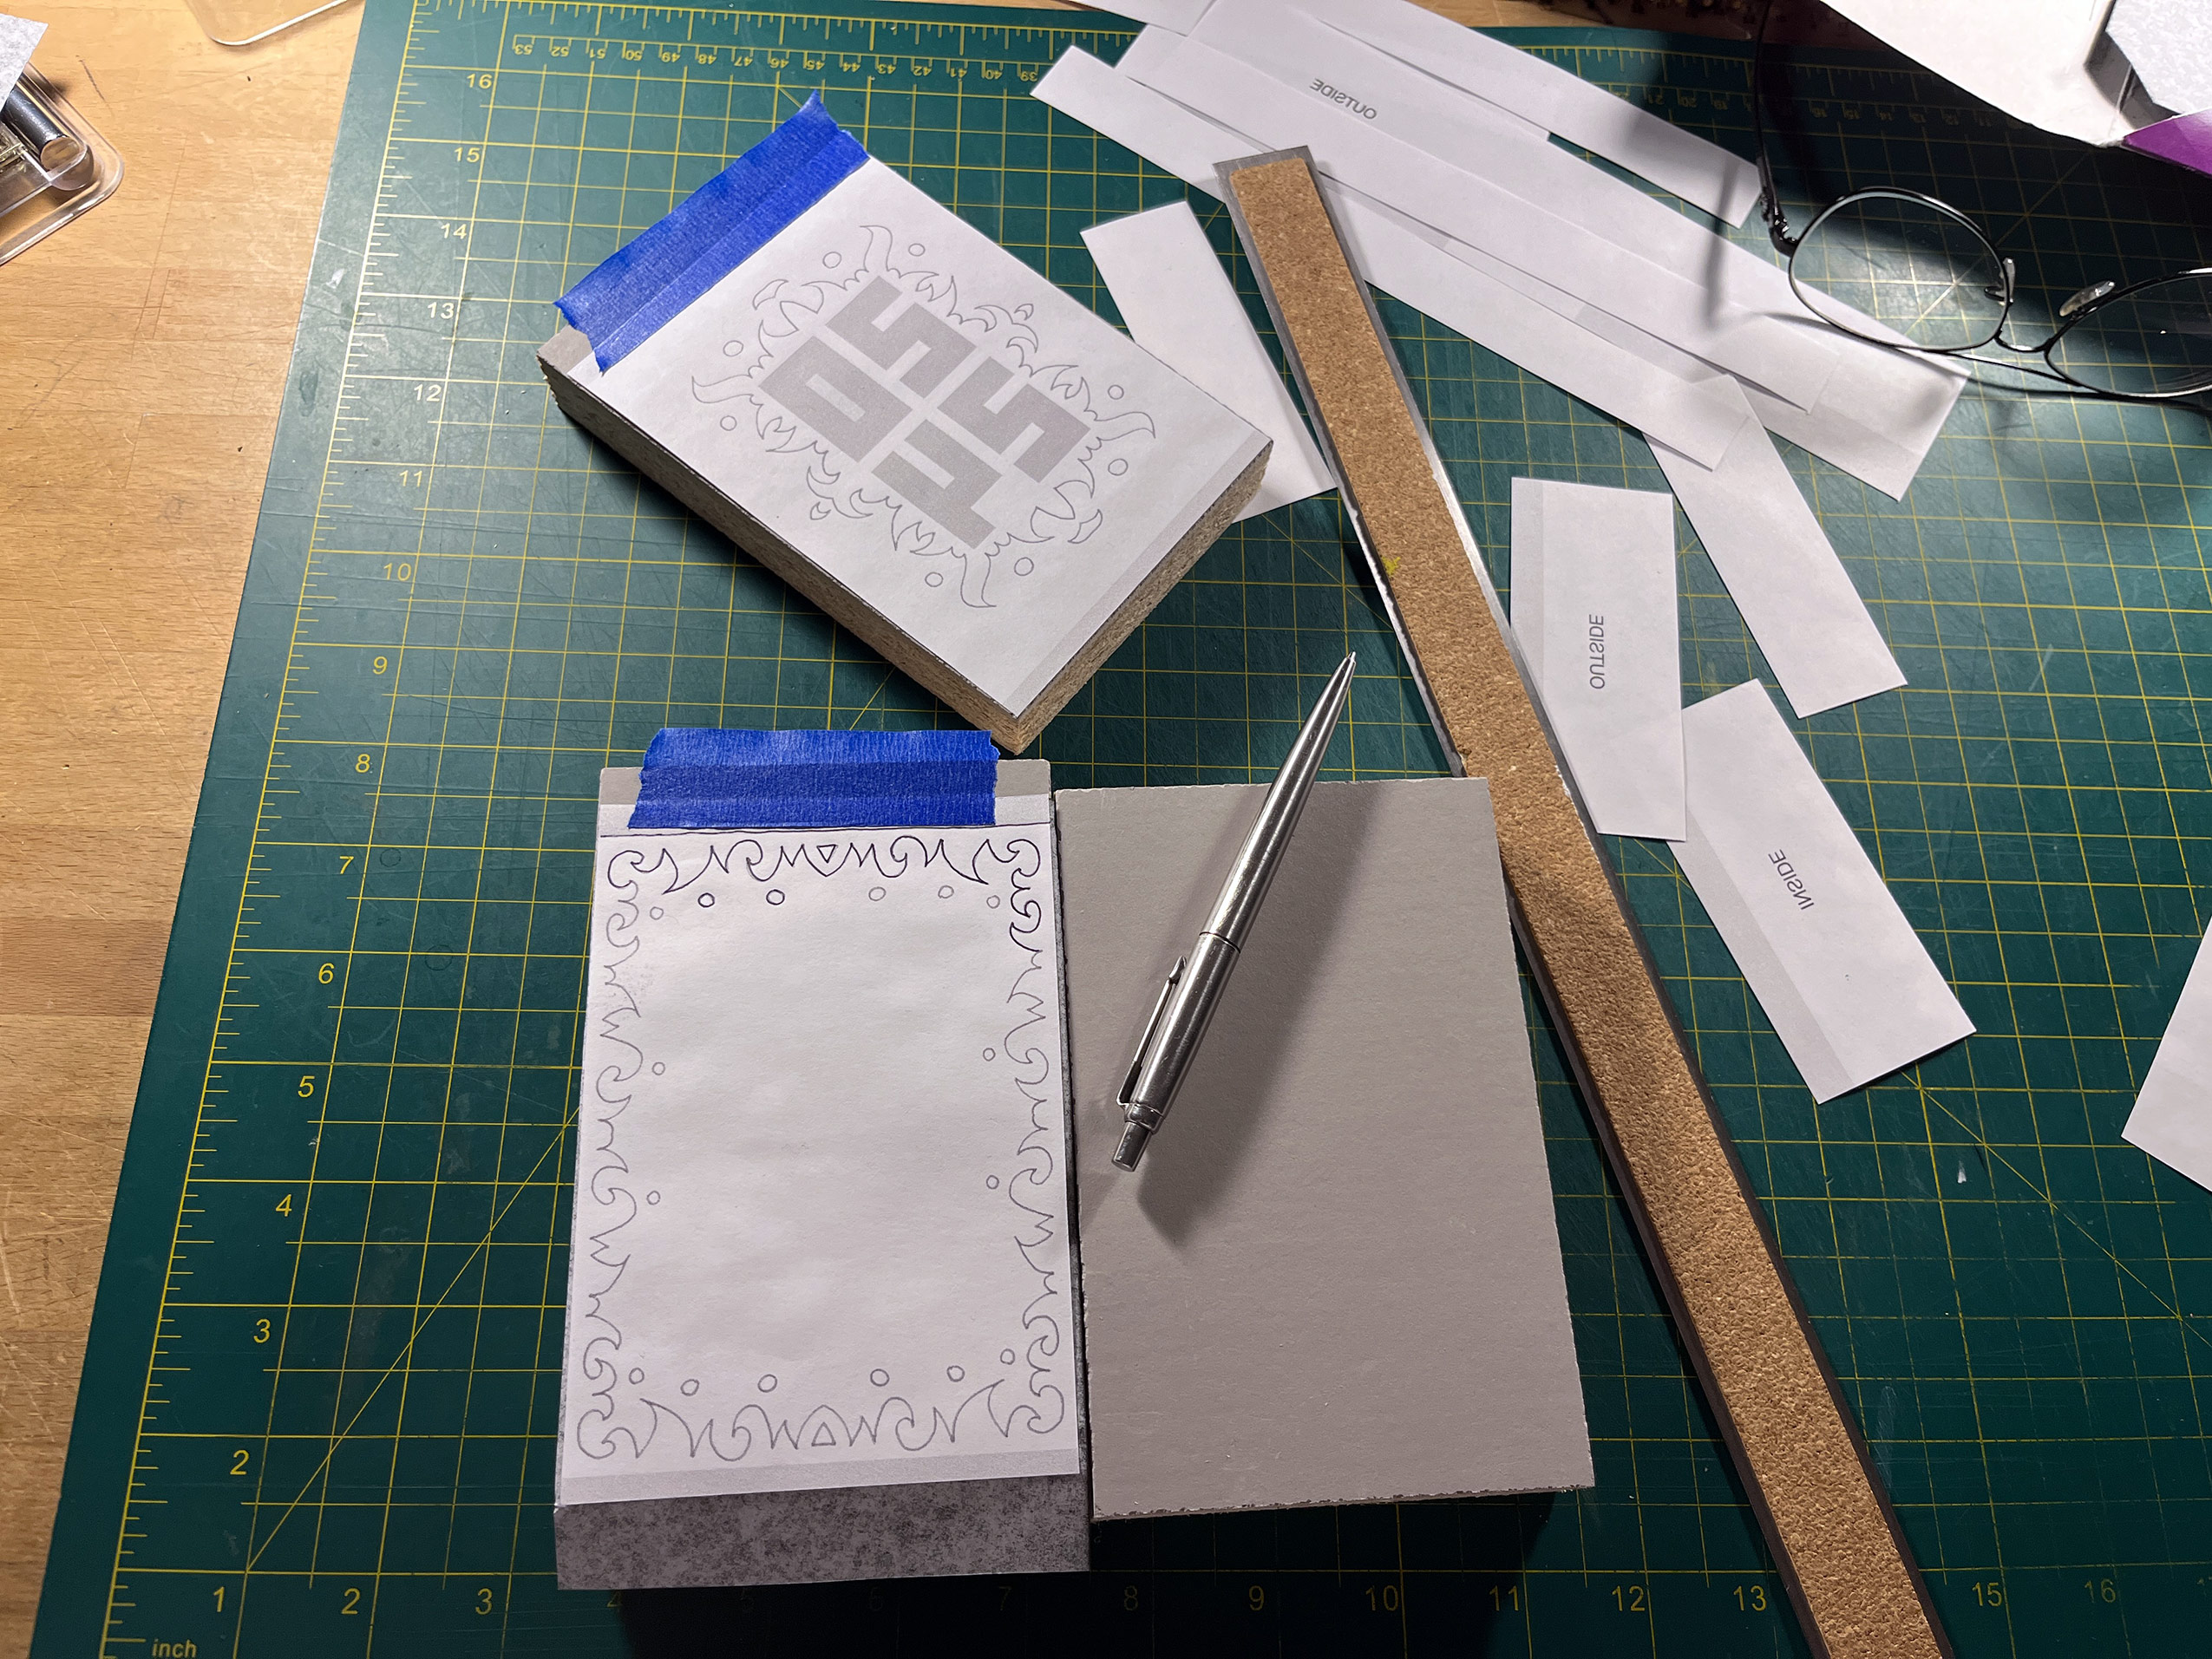
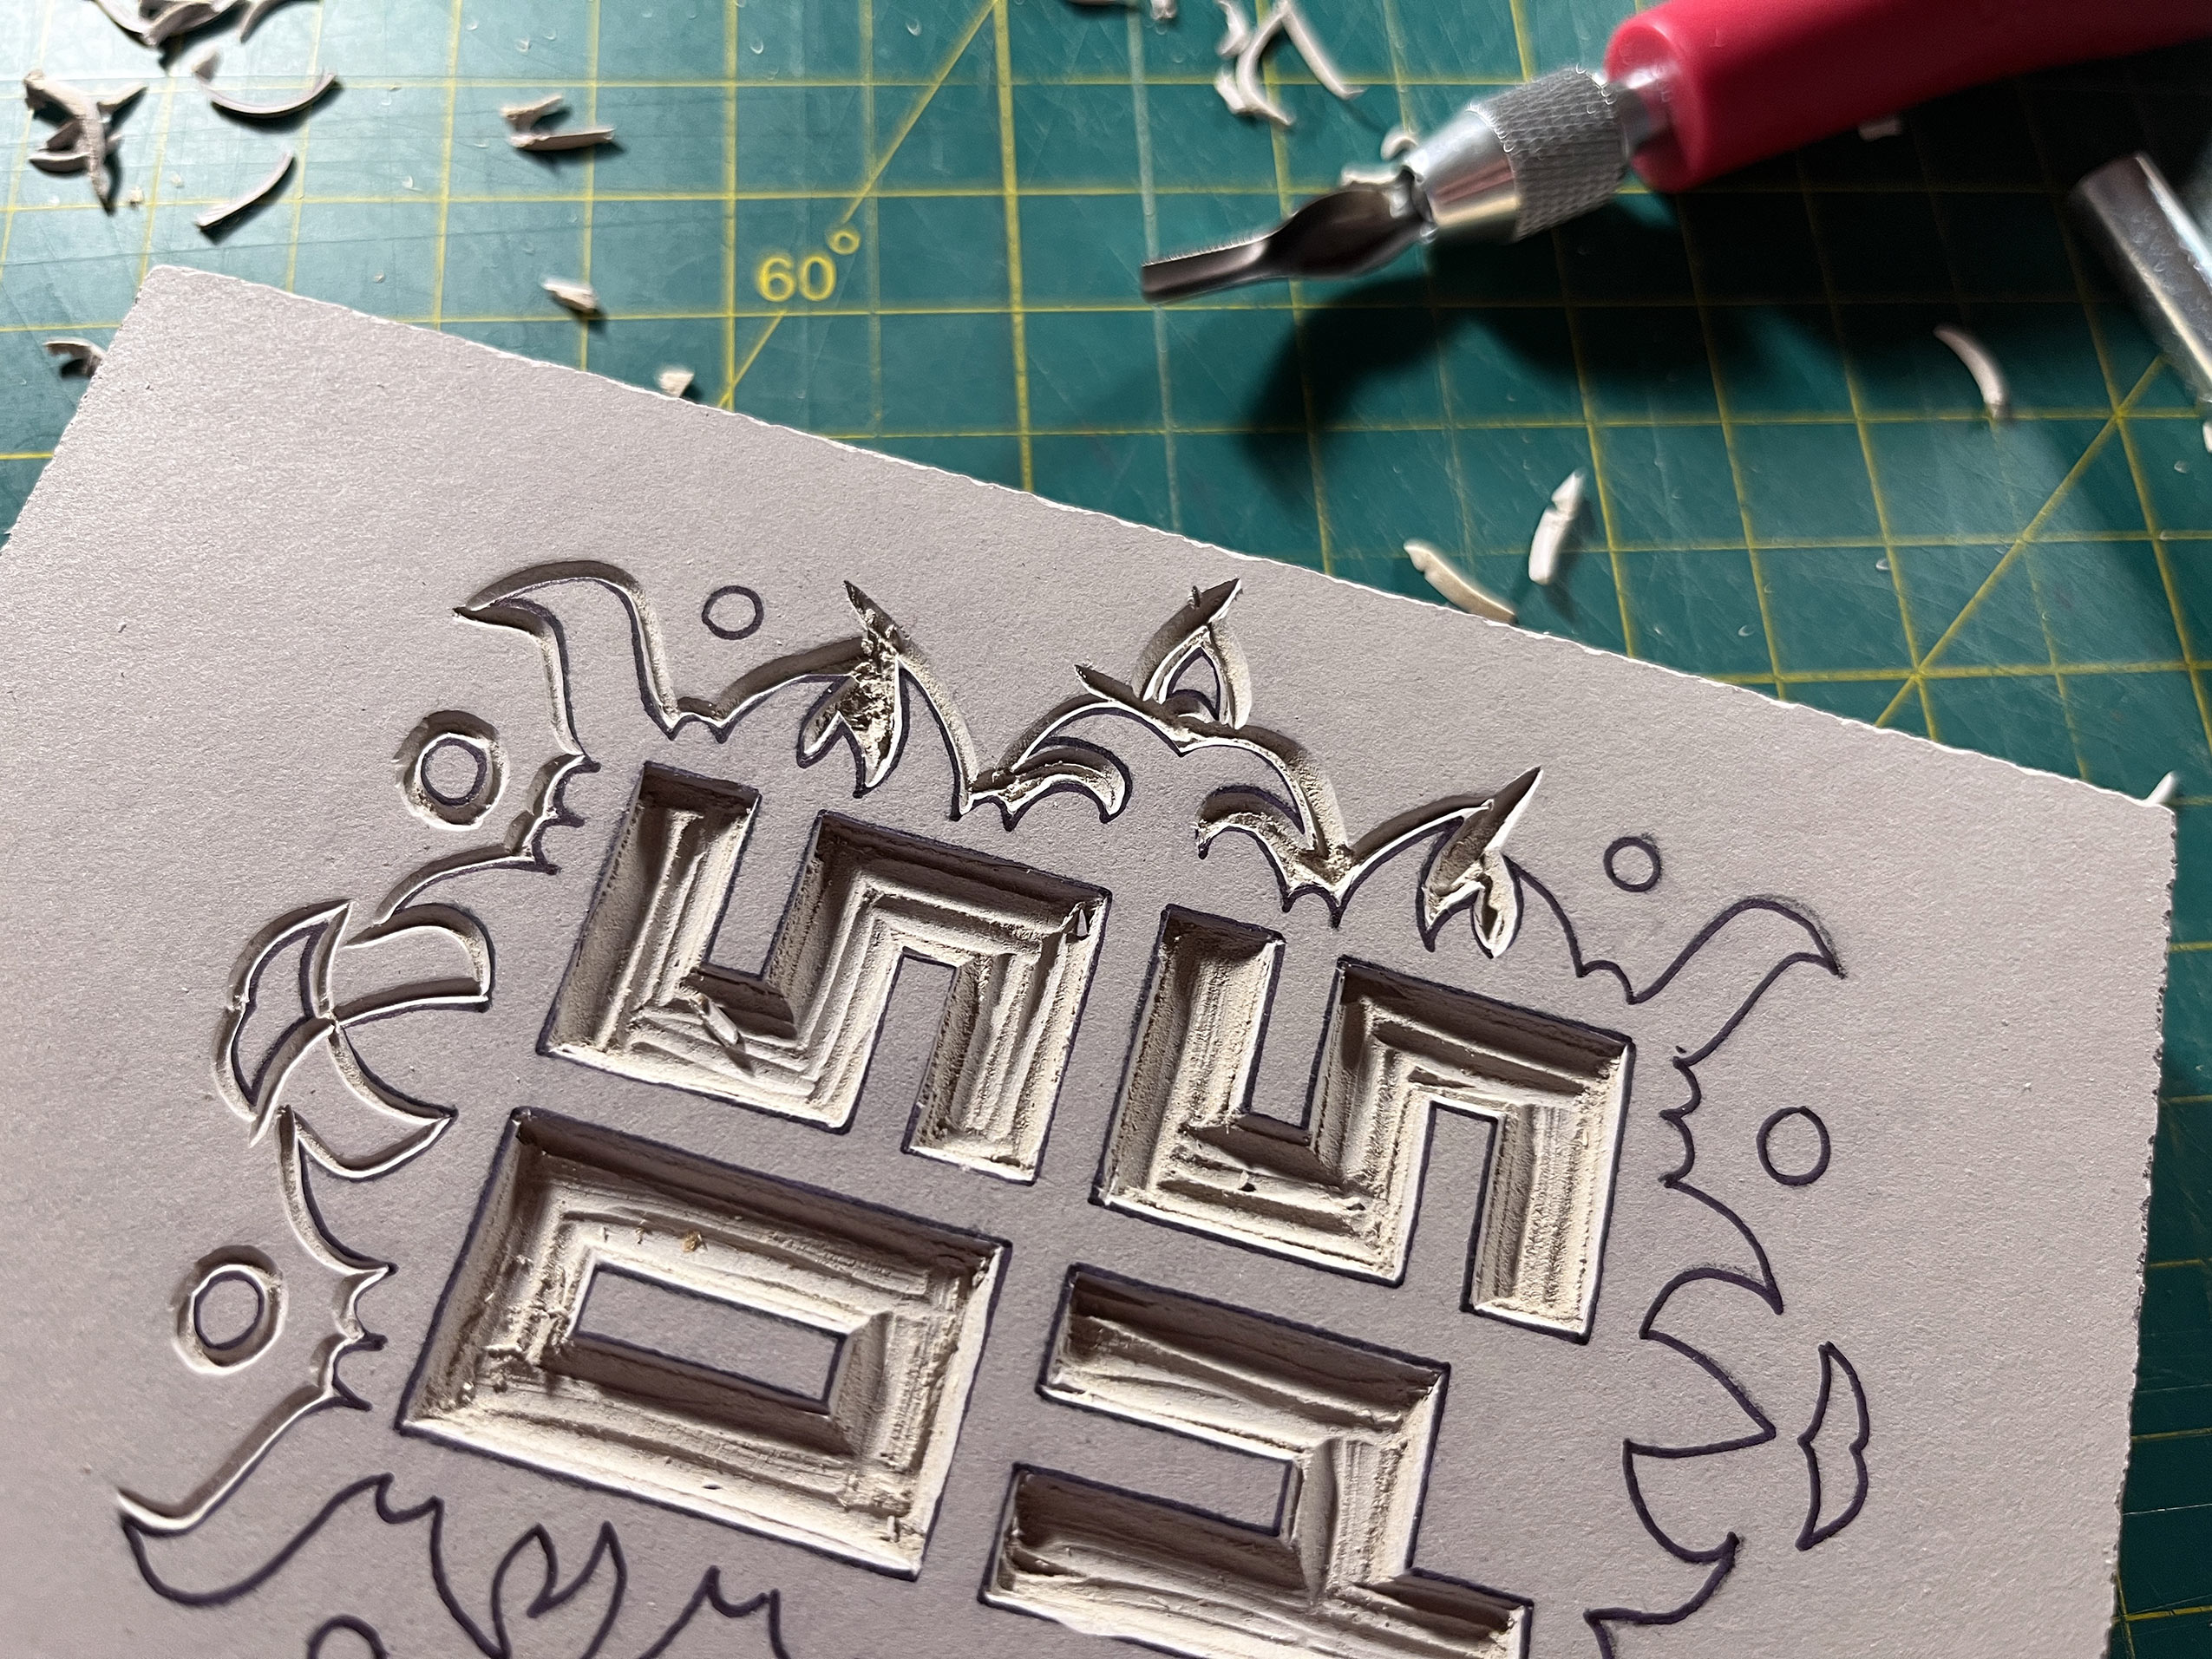
The guides amount to reversed and sized prints which are then transferred to the linoleum block using carbon paper. Because these carbon transfers smudge easily, they are immediately inked into place using a Sharpie marker. Then the cutting of the linoleum block begins.
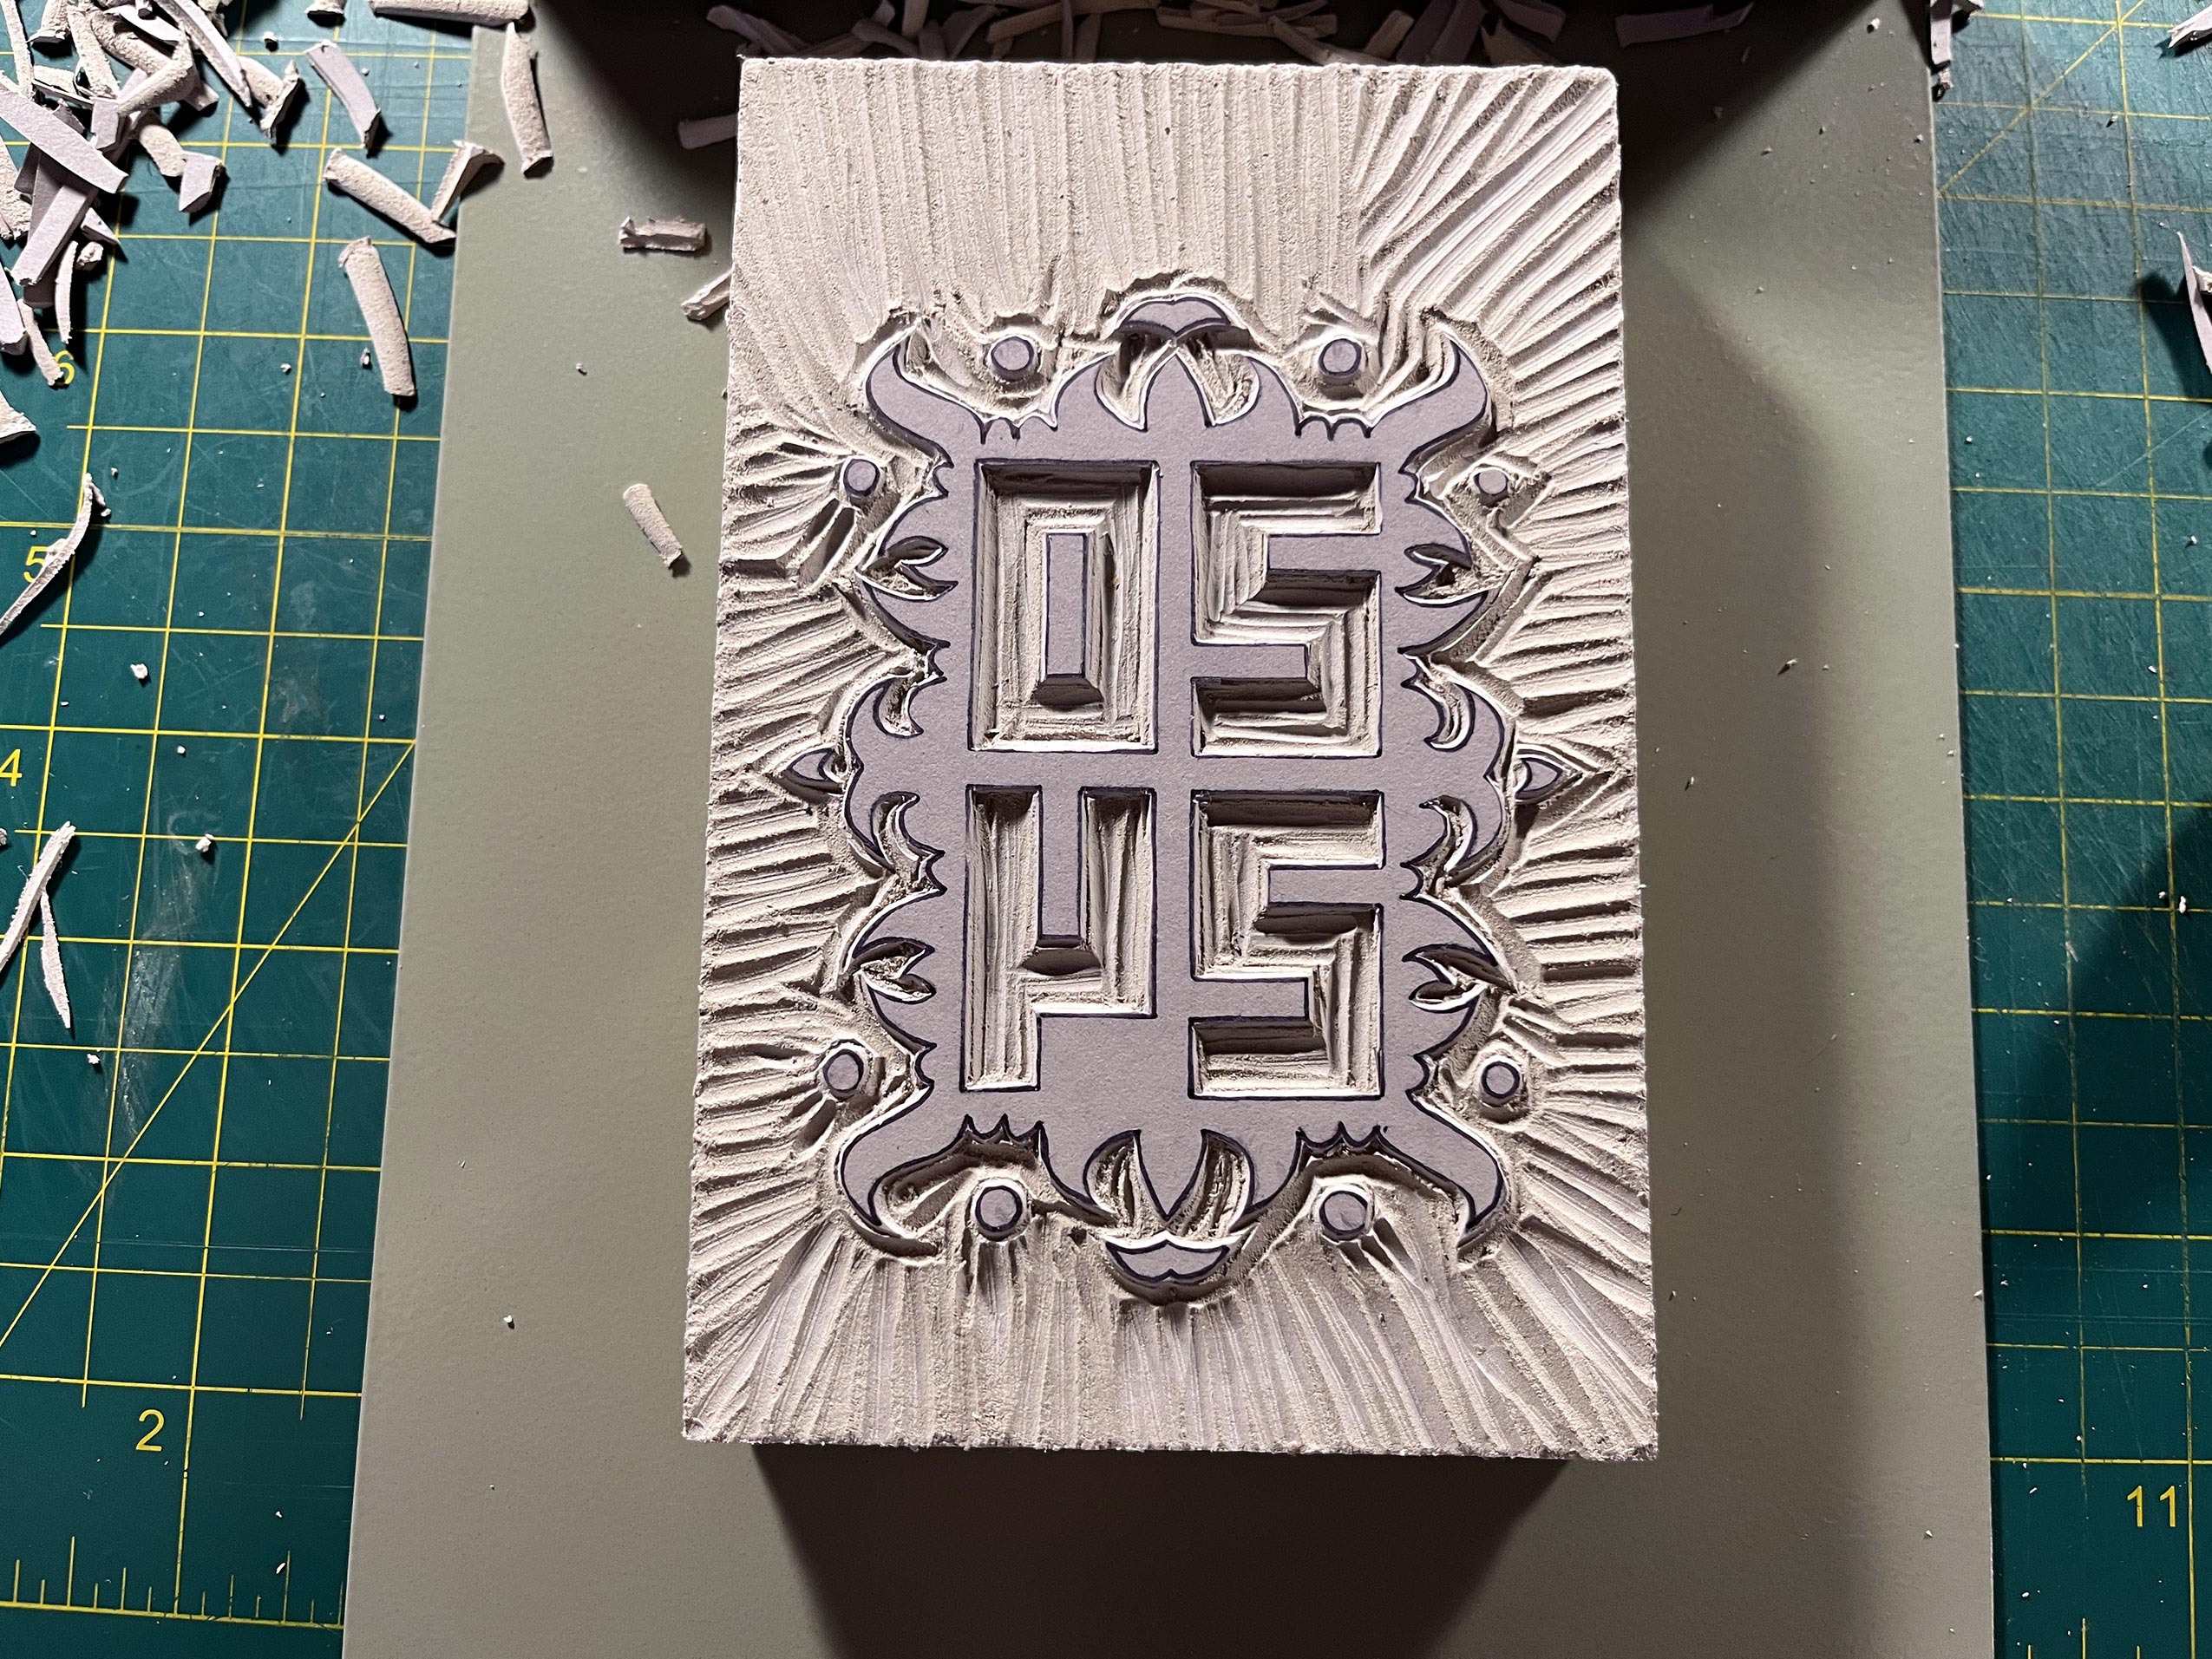
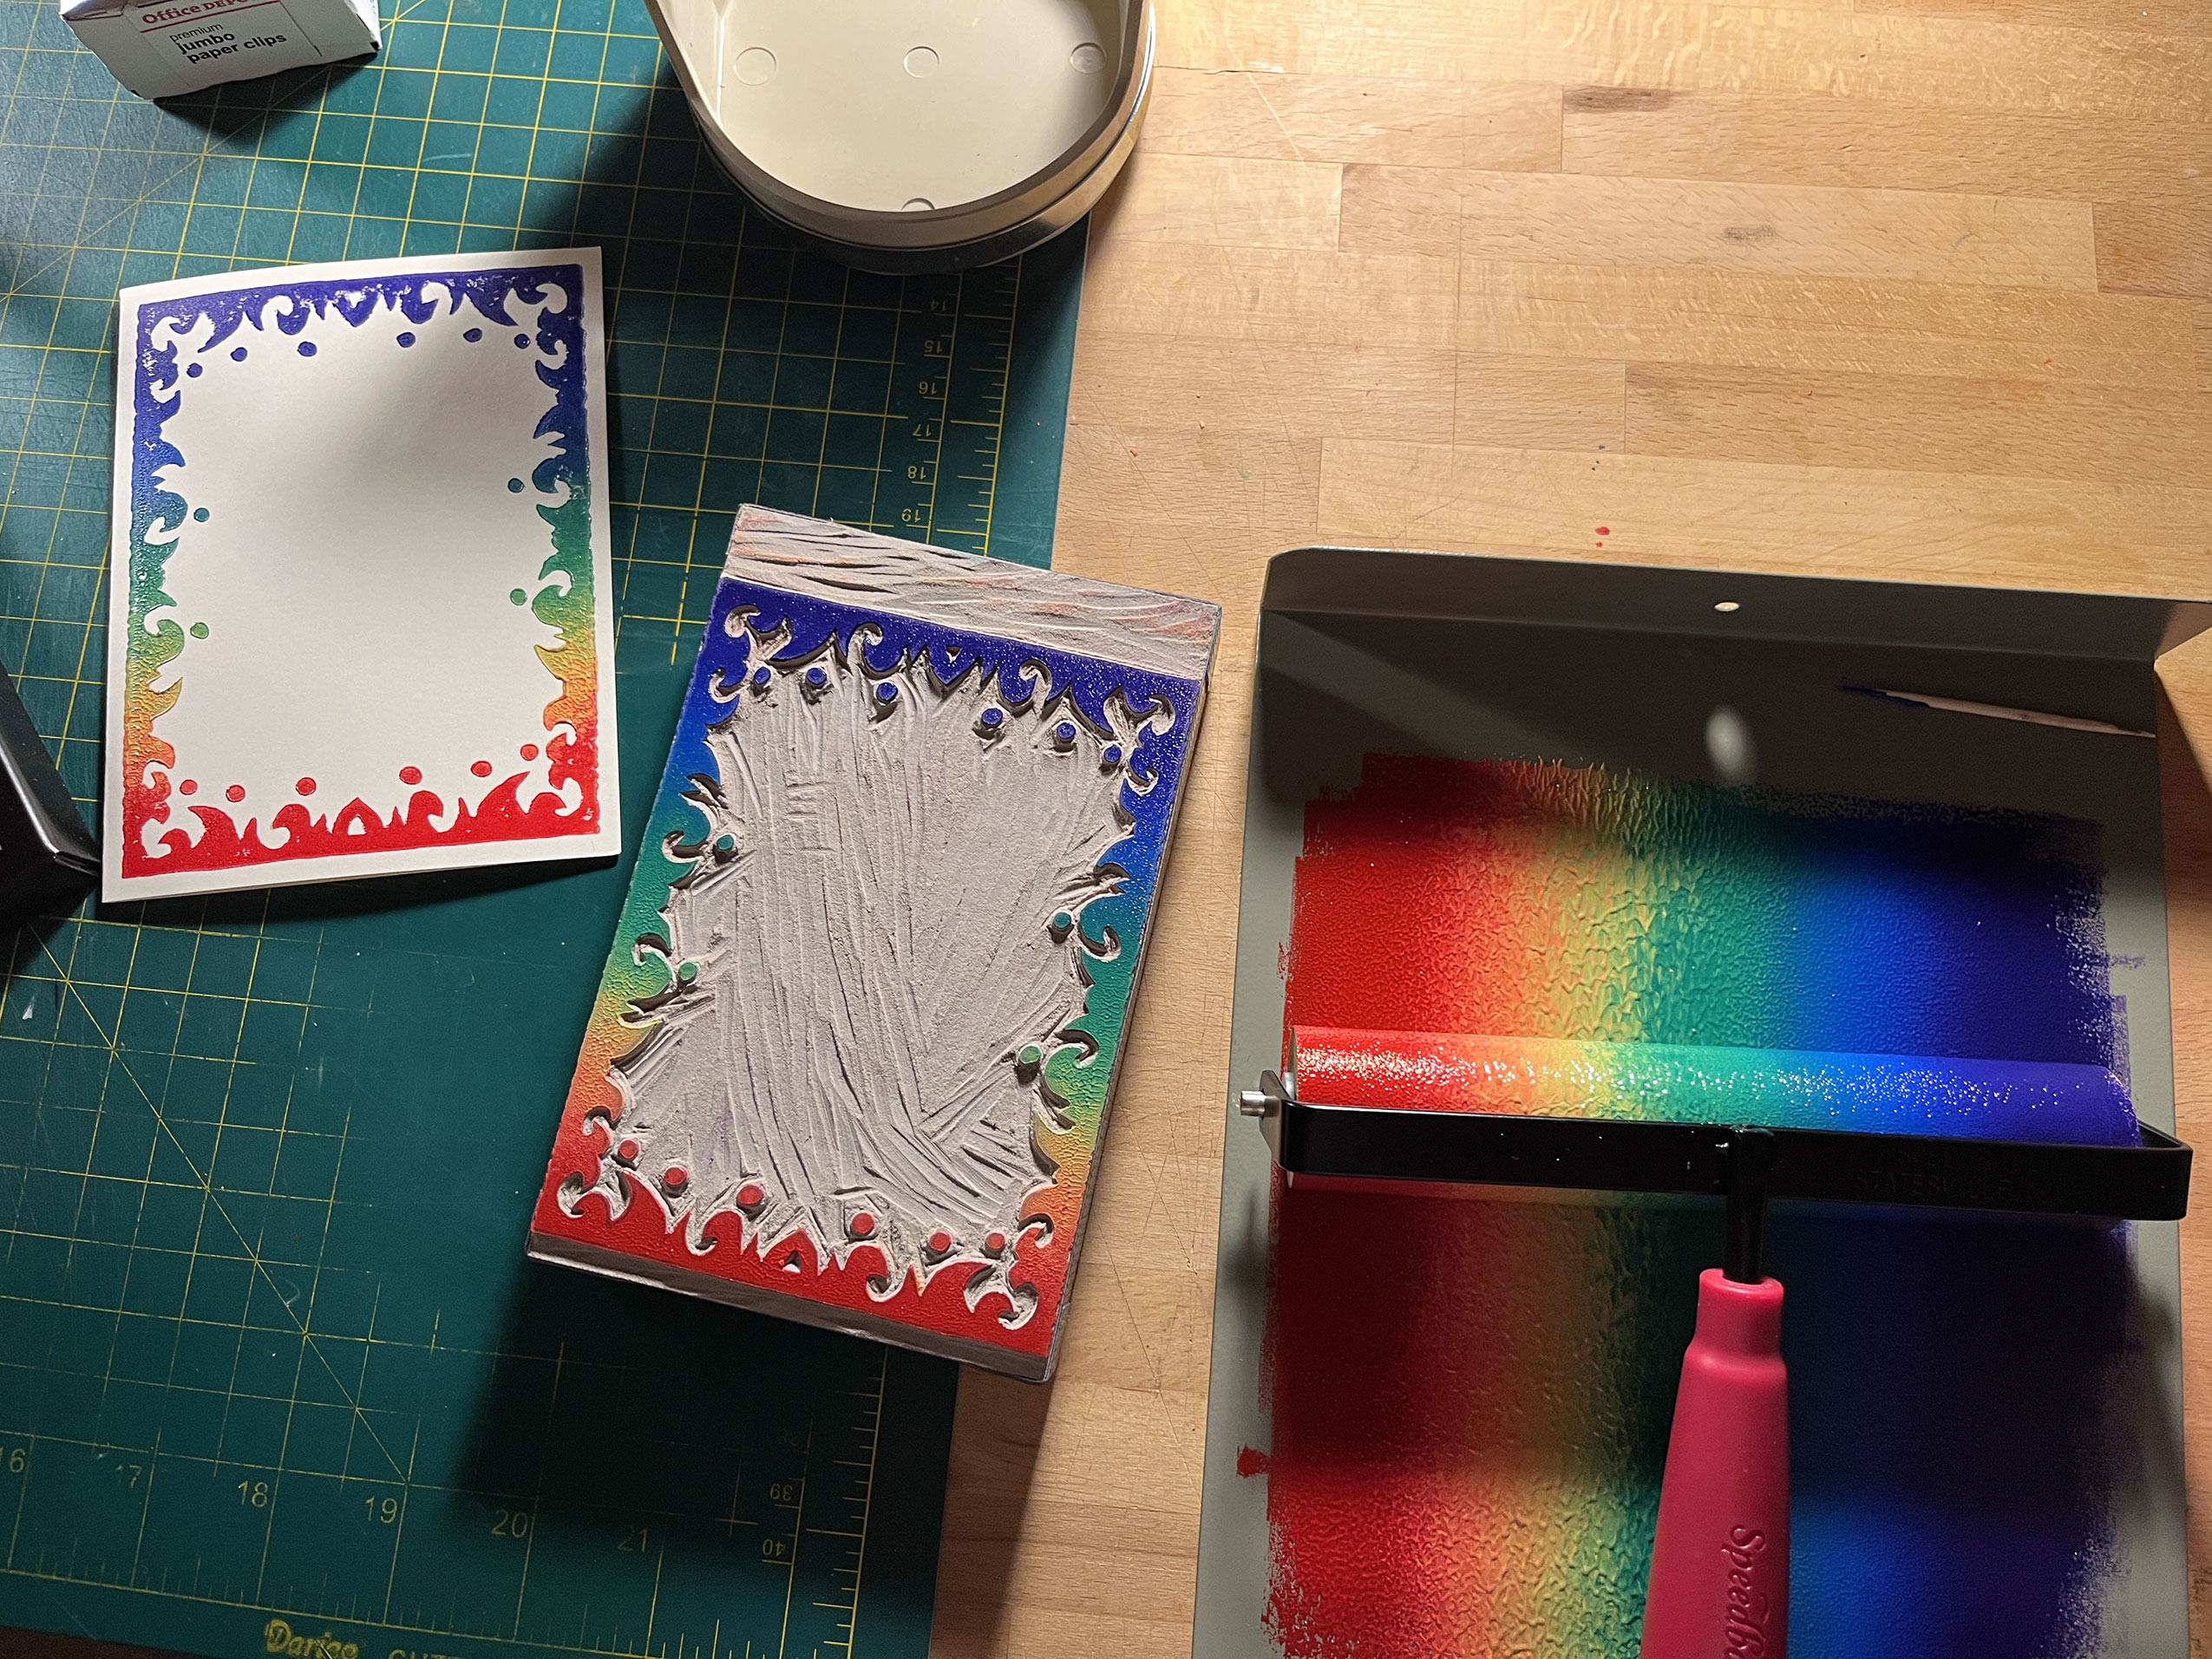
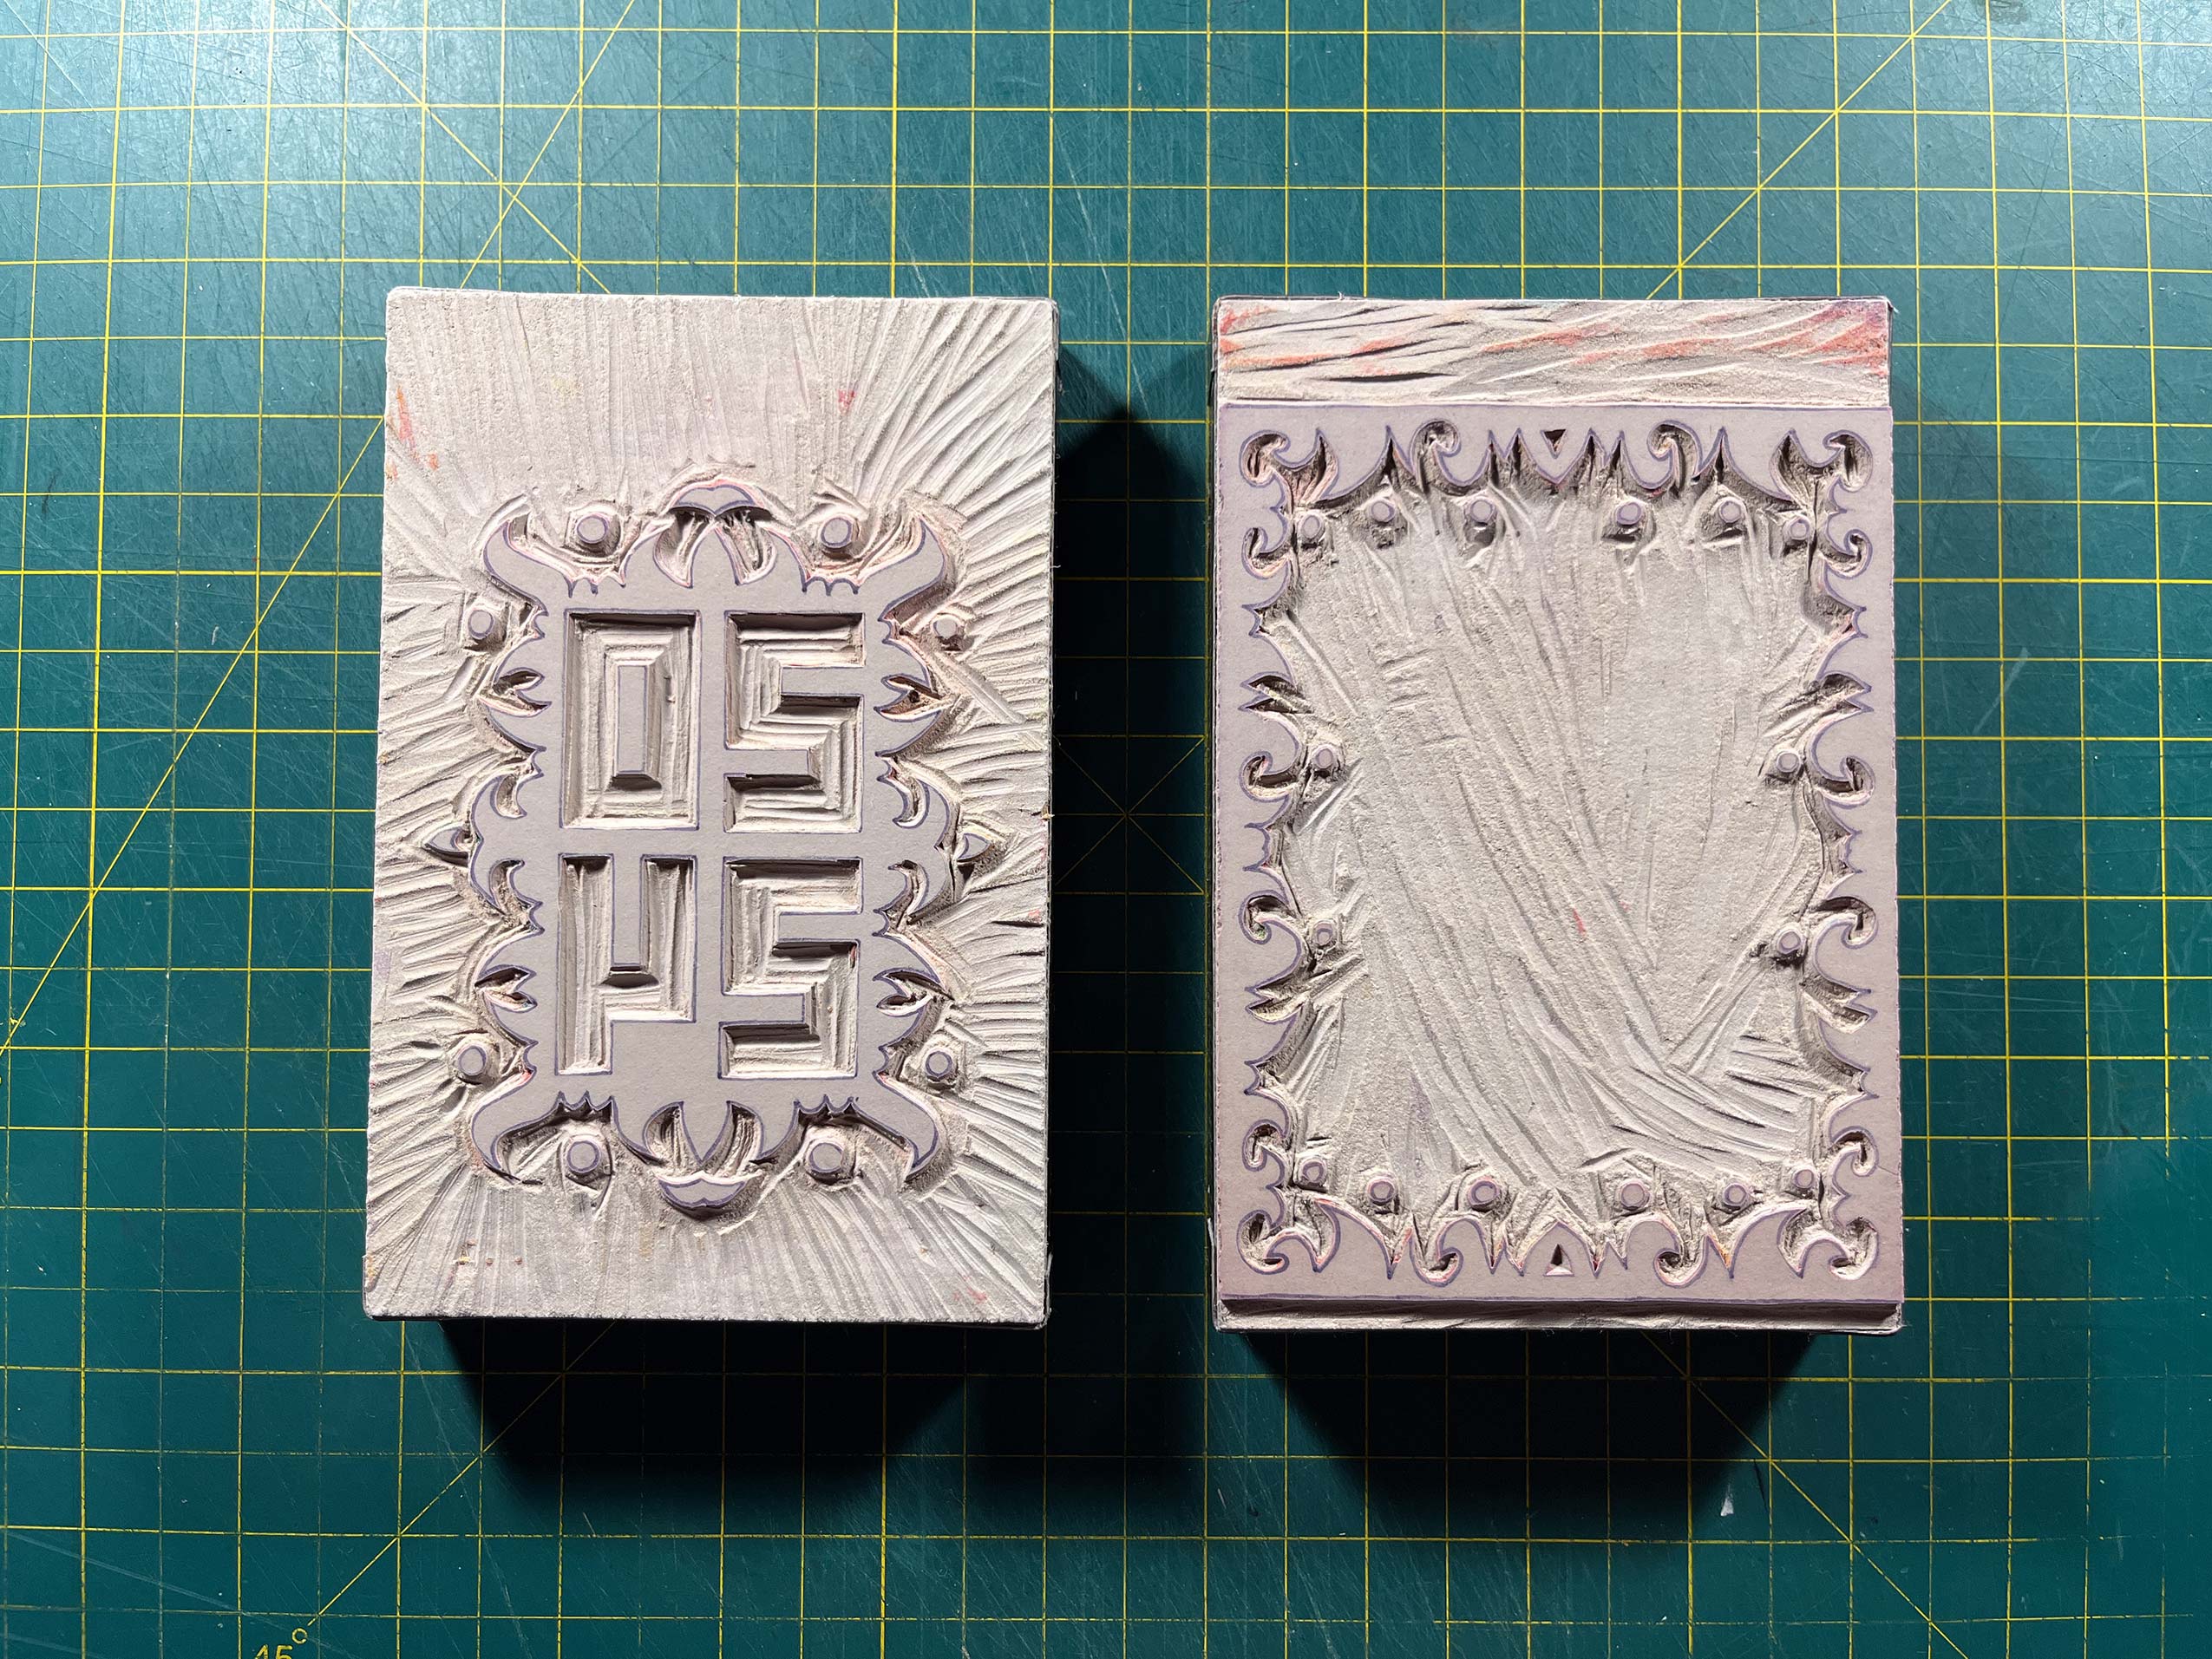
These were without a doubt the most difficult plates I’ve cut up to this point. The endless curves were exceptionally difficult to execute without tearing the remaining linoleum surface, which I somehow managed to avoid. Upon making those first cuts, I realized that I’d graduated to a higher level and was in need of better tools because the basic, grade school level Speedball linoleum cutting tool wasn’t going to cut it anymore, pun intended.
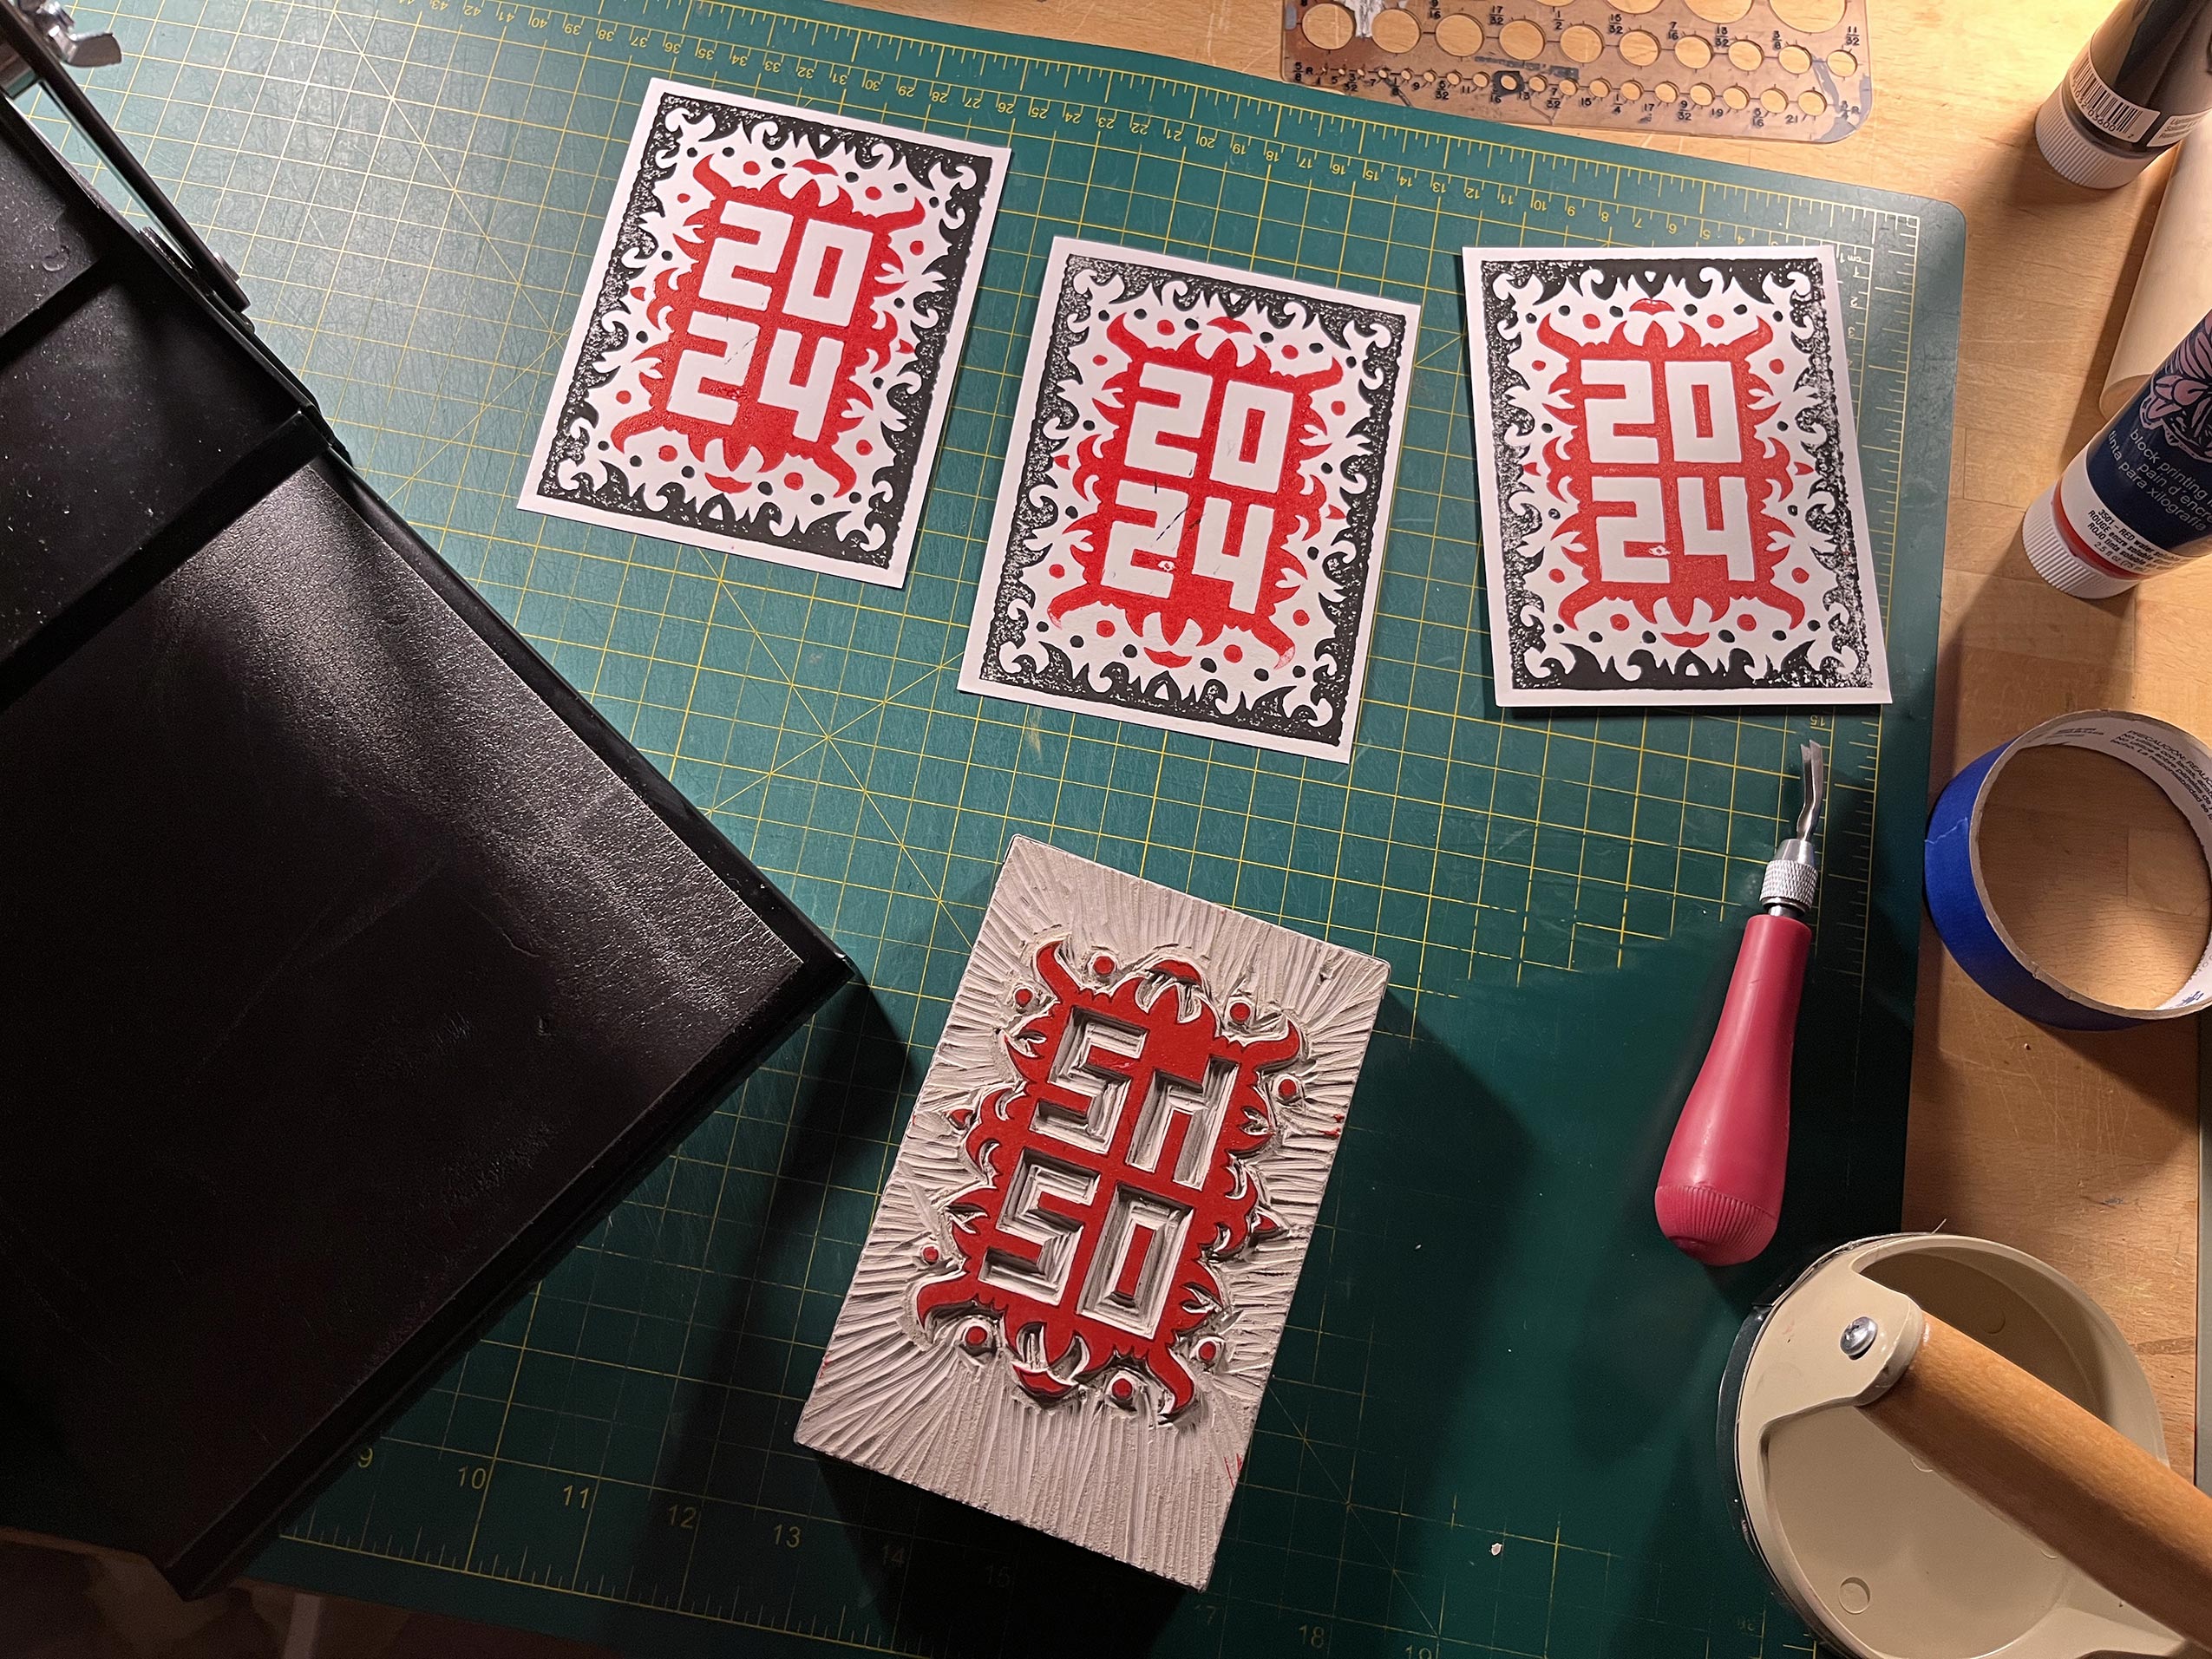
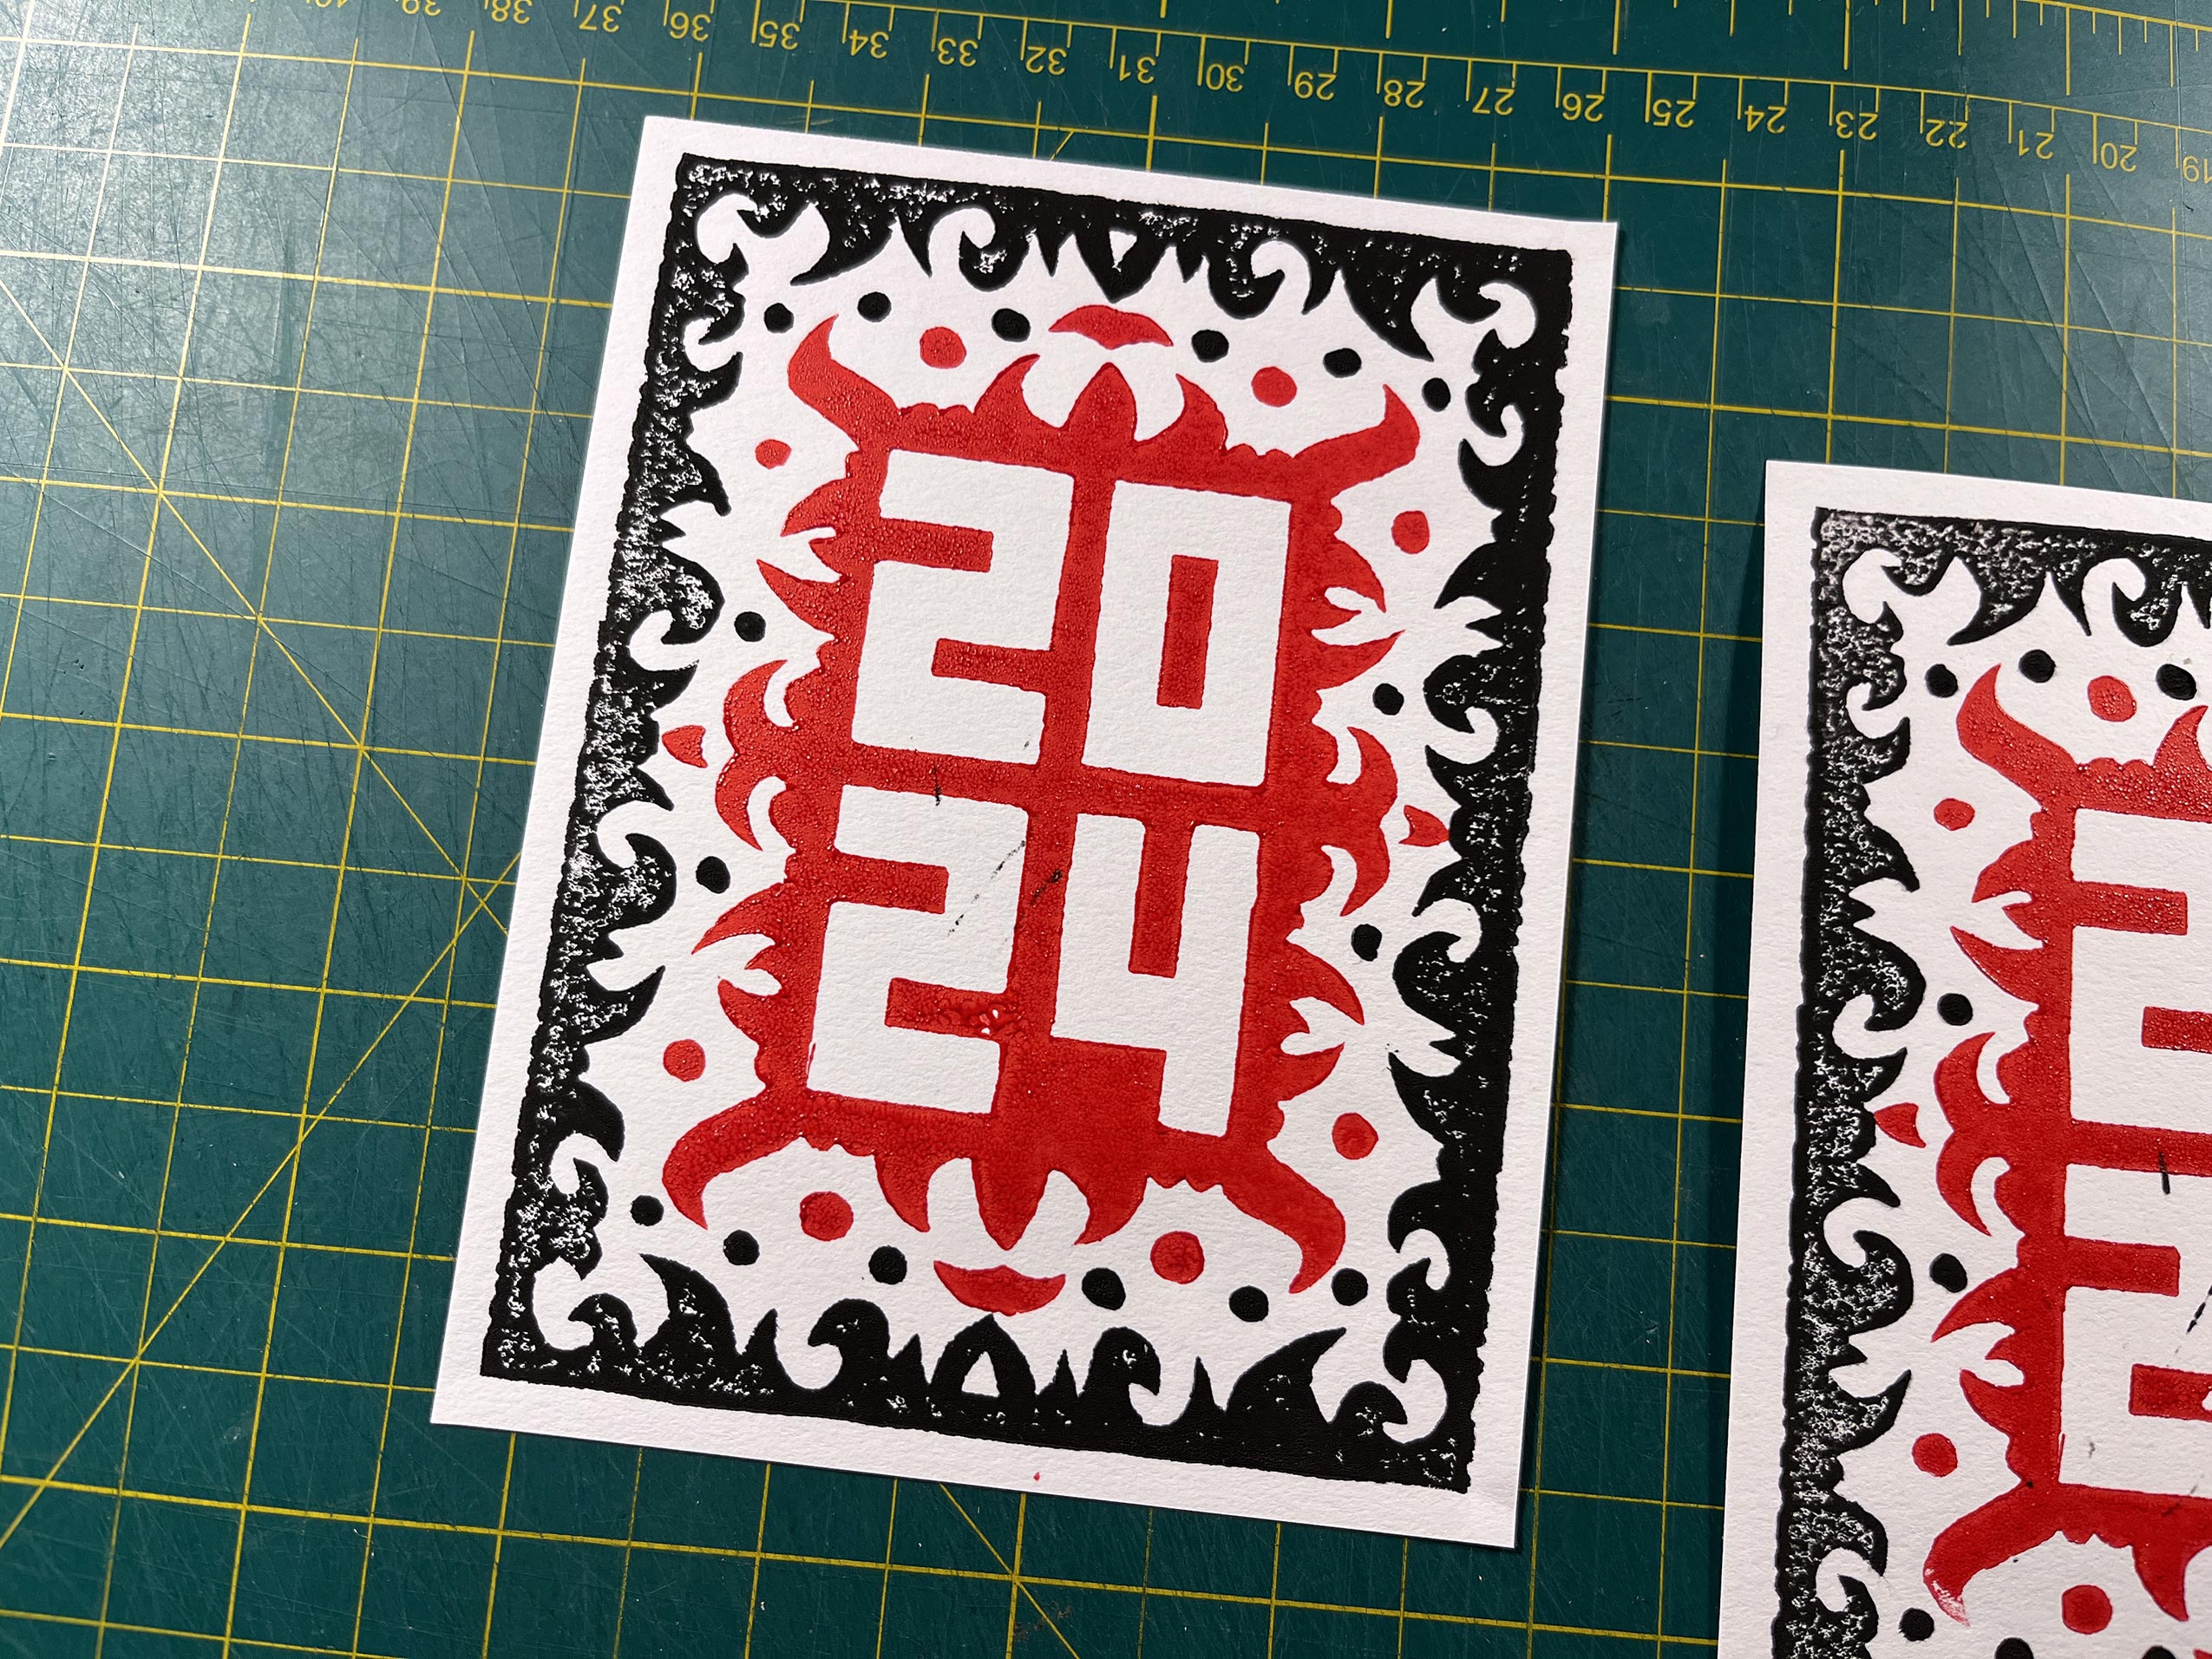
The first test prints I made after completing the plates gave me equal amounts of relief and pride. There was little that I had to tweak, really only needing to file down some of the higher points in the cleared-out spaces that were still catching ink from the roller. However, a problem was quickly discovered once I started printing the actual cards.
As I stated earlier, these are the same cards I used for the Happy Birthday 2022 print, but that print used a single plate, while this one used two. The problem involved the physics of a pre-folded card. You see, the card wants to open. So, as I’m attempting to place the inked block down on top of the card, the card is trying to open into the block, which requires me to use the pinky finger on the right side of the block to keep it closed, while I’m still trying to accurately position and place the block with the remaining fingers! (This makes me wish I’d done a time-lapse of the process, as I’d planned, so you could see what I’m trying to describe here.)
This is bad enough on a blank card with a single plate. If it’s a bit off-center, it’s not that big of a deal. However, this scenario is even more stressful when you’re trying to place a second block, accurately enough to execute the design. All of this made the time between the first plate drying and beginning the second plate rather anxious for me. Fortunately, there was only a single example where I couldn’t pull-off these acrobatics and ended-up with a smeared print.
As the second plate was finished and I began to assemble the finished cards on the floor to dry, I have to admit I felt a bit of pride. Again, I’m sure I’ve expressed this in my previous posts involving my printmaking, but the thing that I love about this process is that I don’t truly know what the final product is going to be like, which is similar to how I felt when I first started multi-tracking my own music. What was this idea going to sound like when I finish laying down all the pieces and I mix it together? At first, it was all unknown and experiencing the final product was magical. Over the years, however, the experience I gained from the process removed the unknowns and it became less fun, feeling much more like work… and I just didn’t want to do it anymore. So, while I love the process of linocut printmaking and wonder why I don’t do it more often, sometimes I think maybe it’s because I want to keep it an unknown for as long as possible.
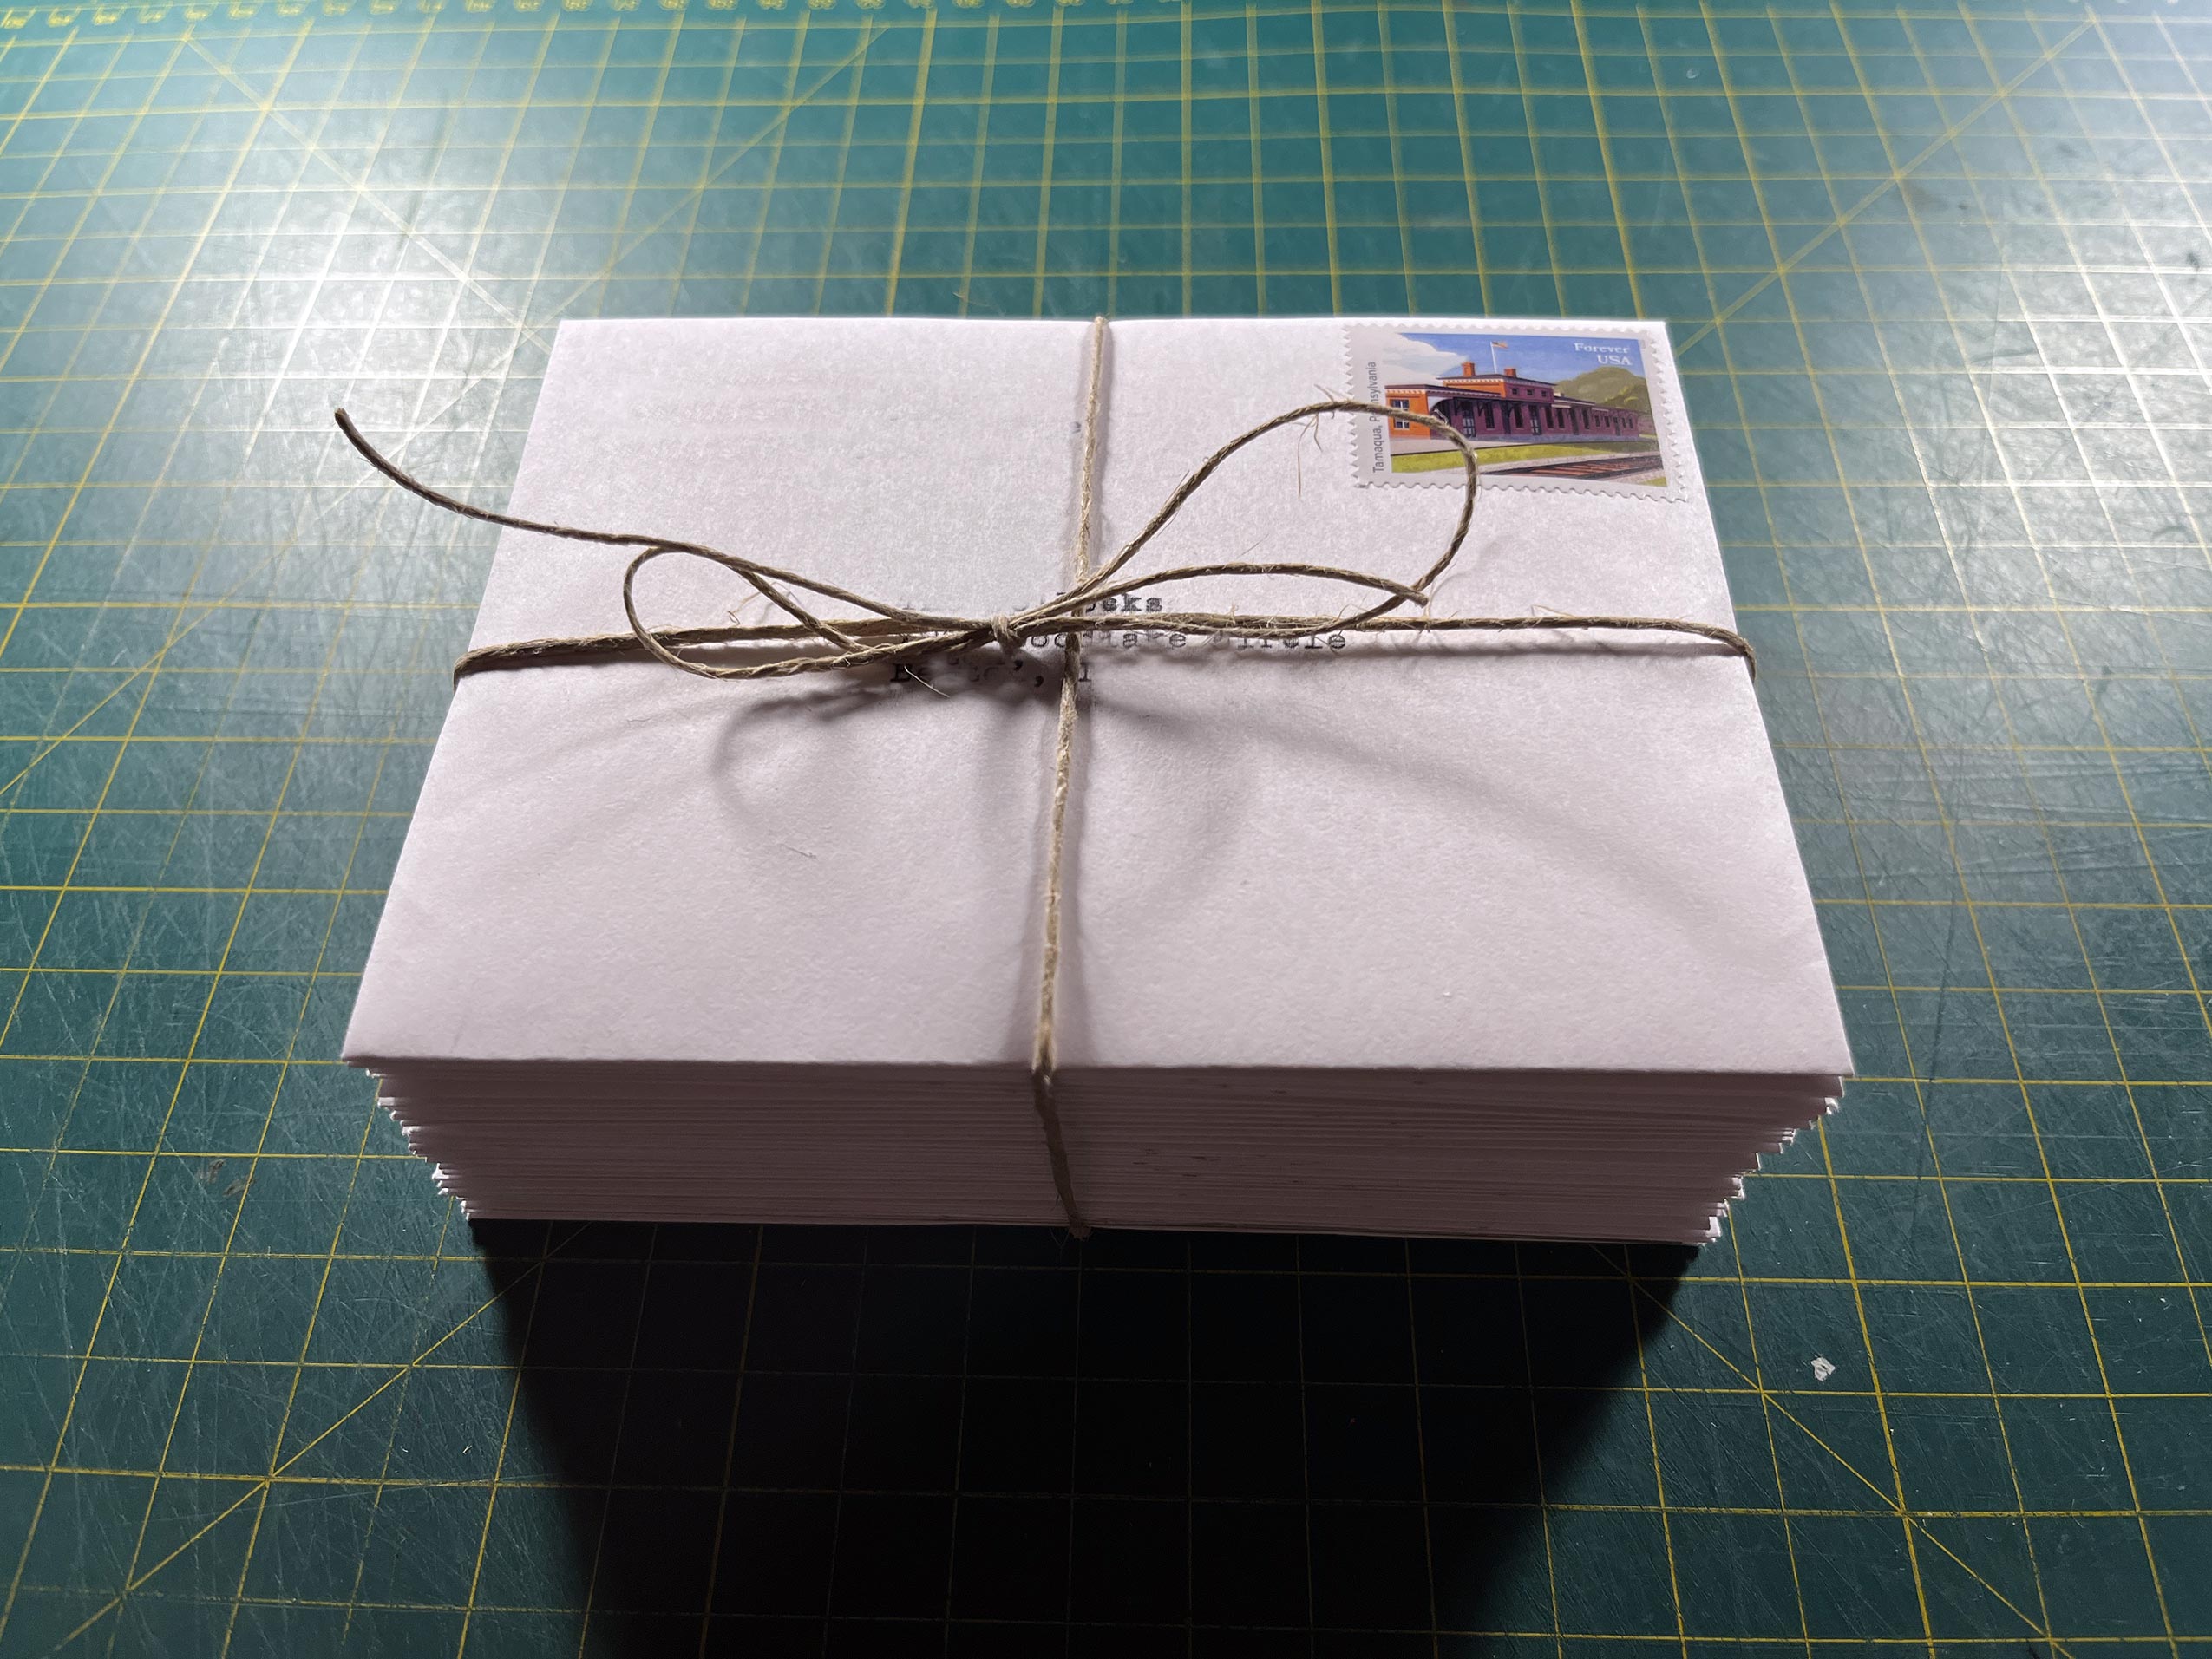
And, now the fun part was over. All that’s left is deciding who gets which print, then I have to type out the envelopes, add the inscriptions and messaging to the cards, pack them up and ship them off. Oh, yeah, and then I have to write this blog post… for the second time!
All I want to do now is take a break, but, because of my procrastination and the fact that it’s someone’s birthday tomorrow, I’ve got to jump right into my next print. It looks like those new tools will have to wait until next year.
Image Gallery
- Initial Ideas The card was originally going to be a 6 x 4 print and much more complicated, but I couldn't get anything to work.
- Final Concept Eventually, I got to this idea where I made sketches and then modified them in Photoshop until I settled on a design.
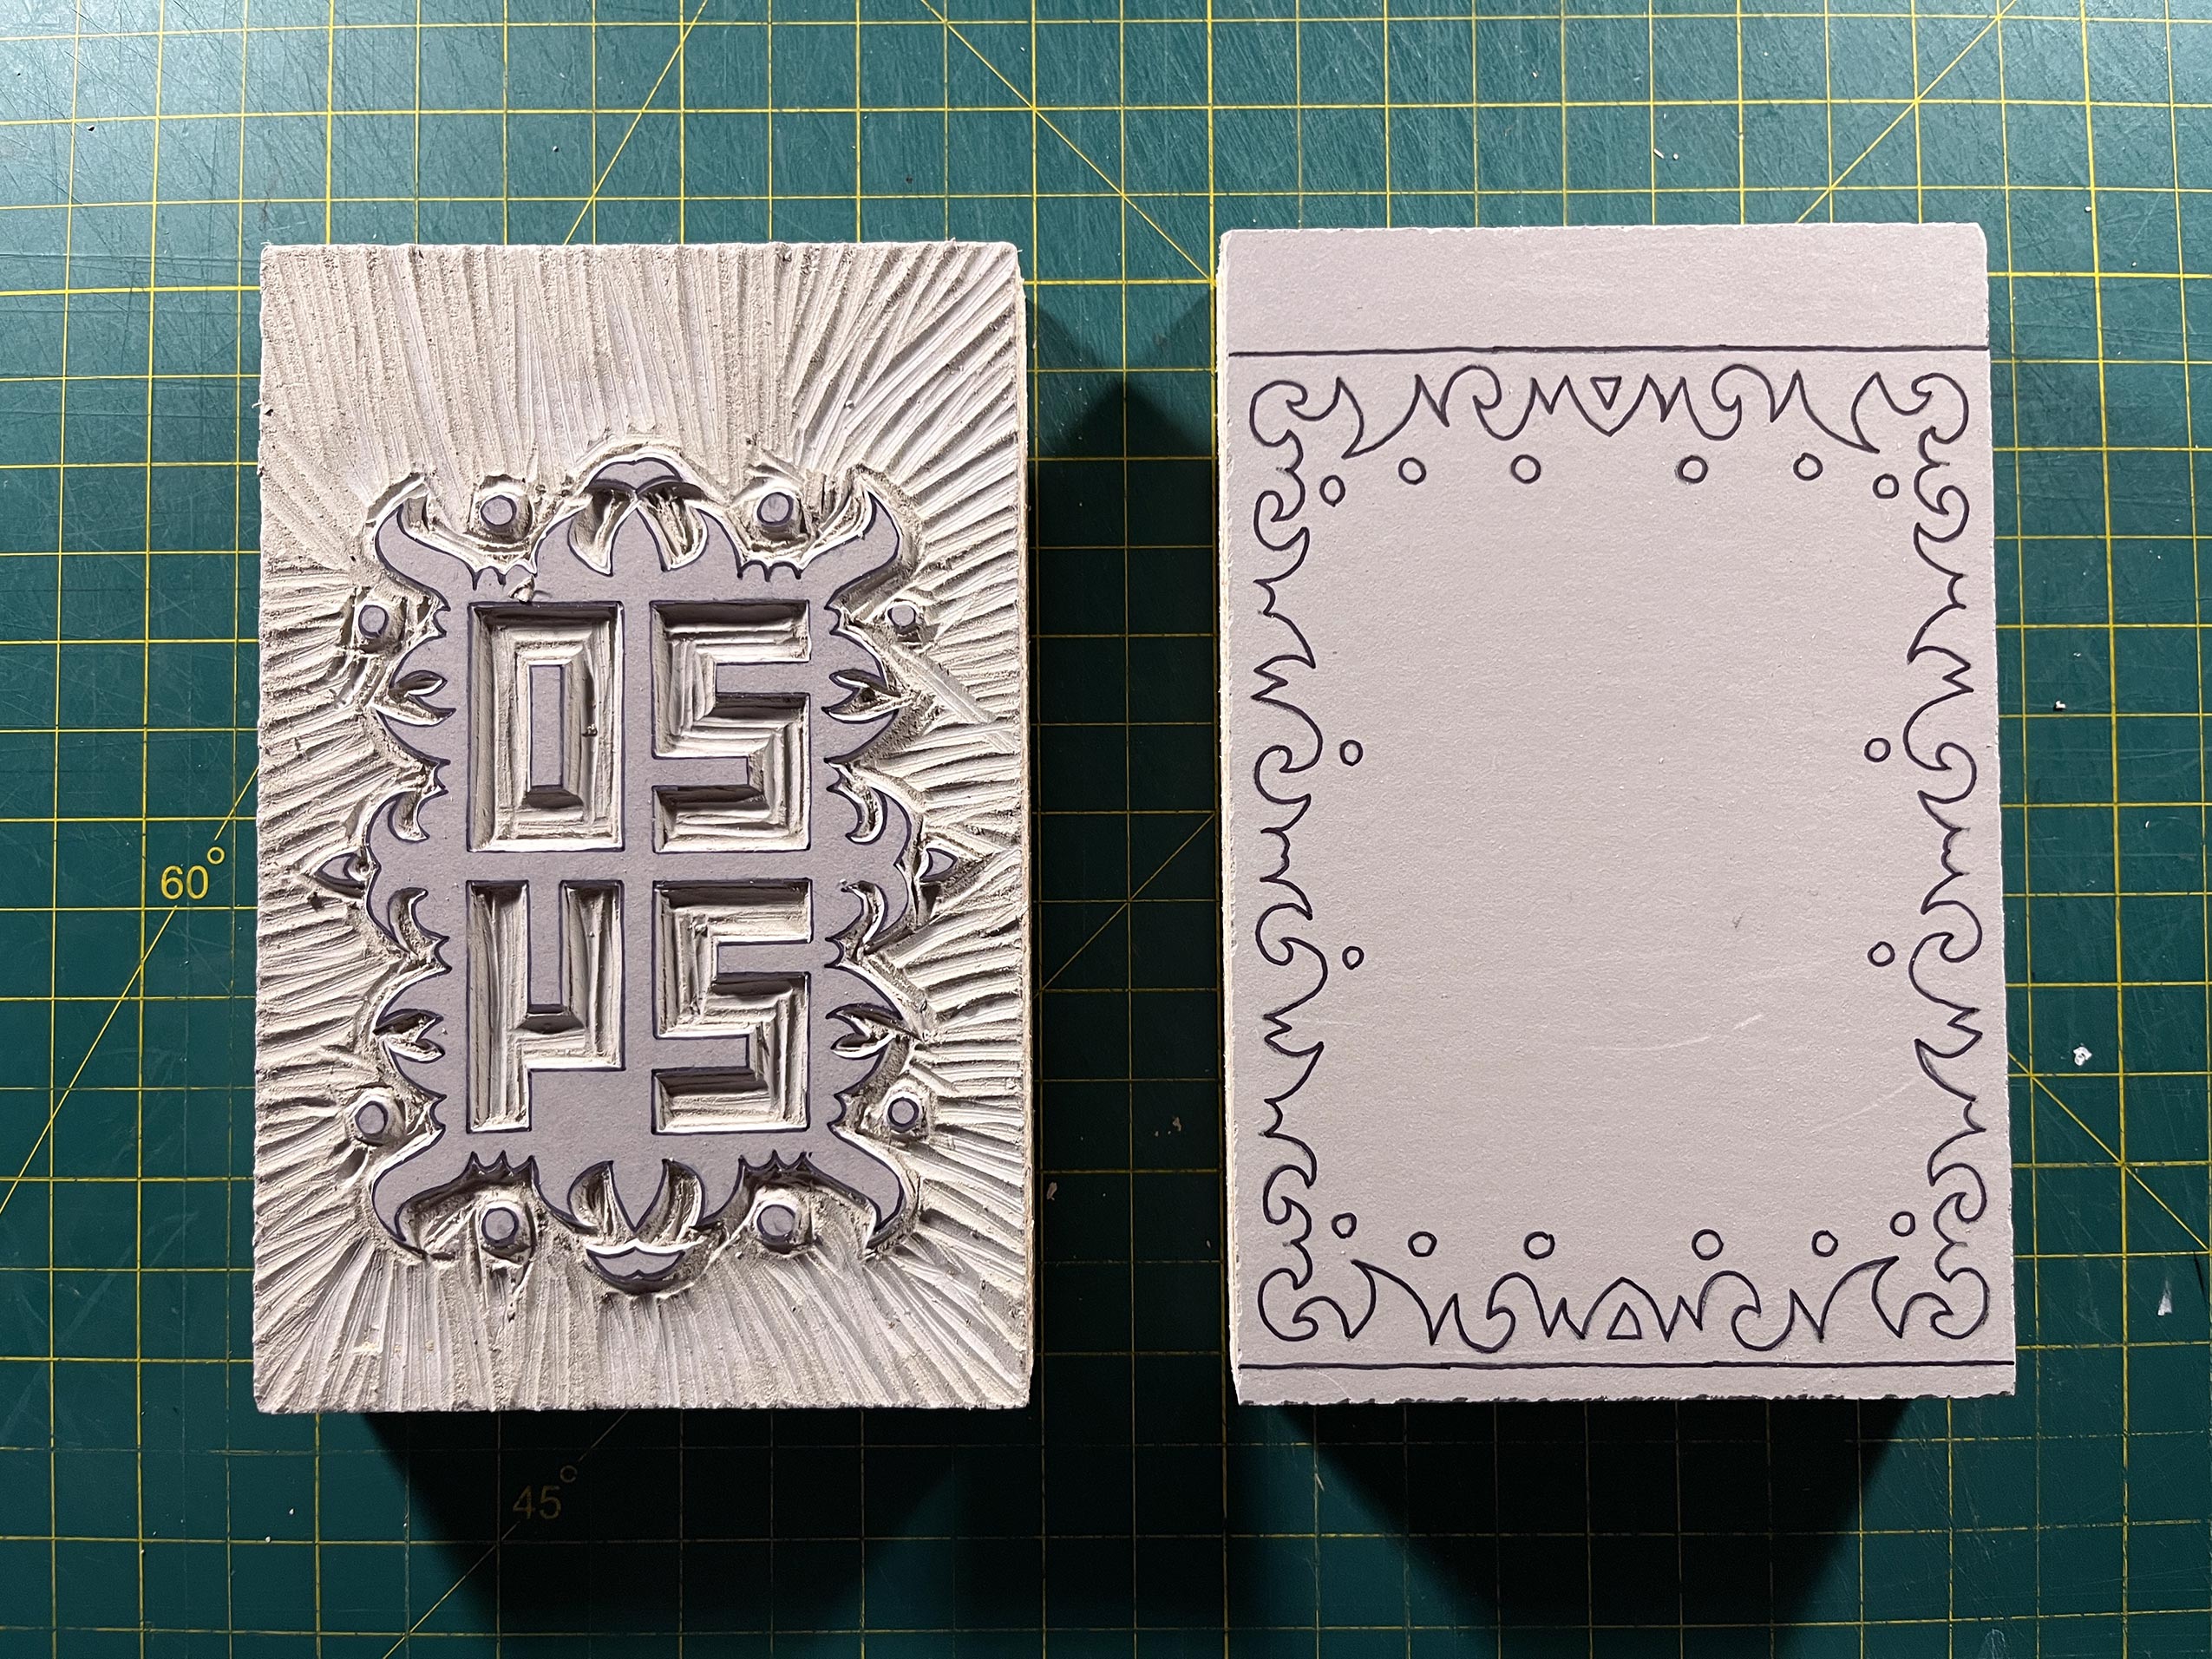
- Block Guides The reversed guides for transferring the designs to the linoleum blocks.
- Transferring The Design The designs being transferred to the linoleum blocks using carbon paper.
- Designs Transferred The carbon-based imprints are ready to be inked.
- Plates Inked The designs have been inked over with a Sharpie marker to keep them from smudging-off during the cutting process.
- The First Cut The first cut is the hardest for me. Once I get past this, it goes quickly.
- Discovering I Need Better Tools This Speedball linoleum block tool has been adequate until now. At this point, I realized I need to get better tools if I keep doing these.
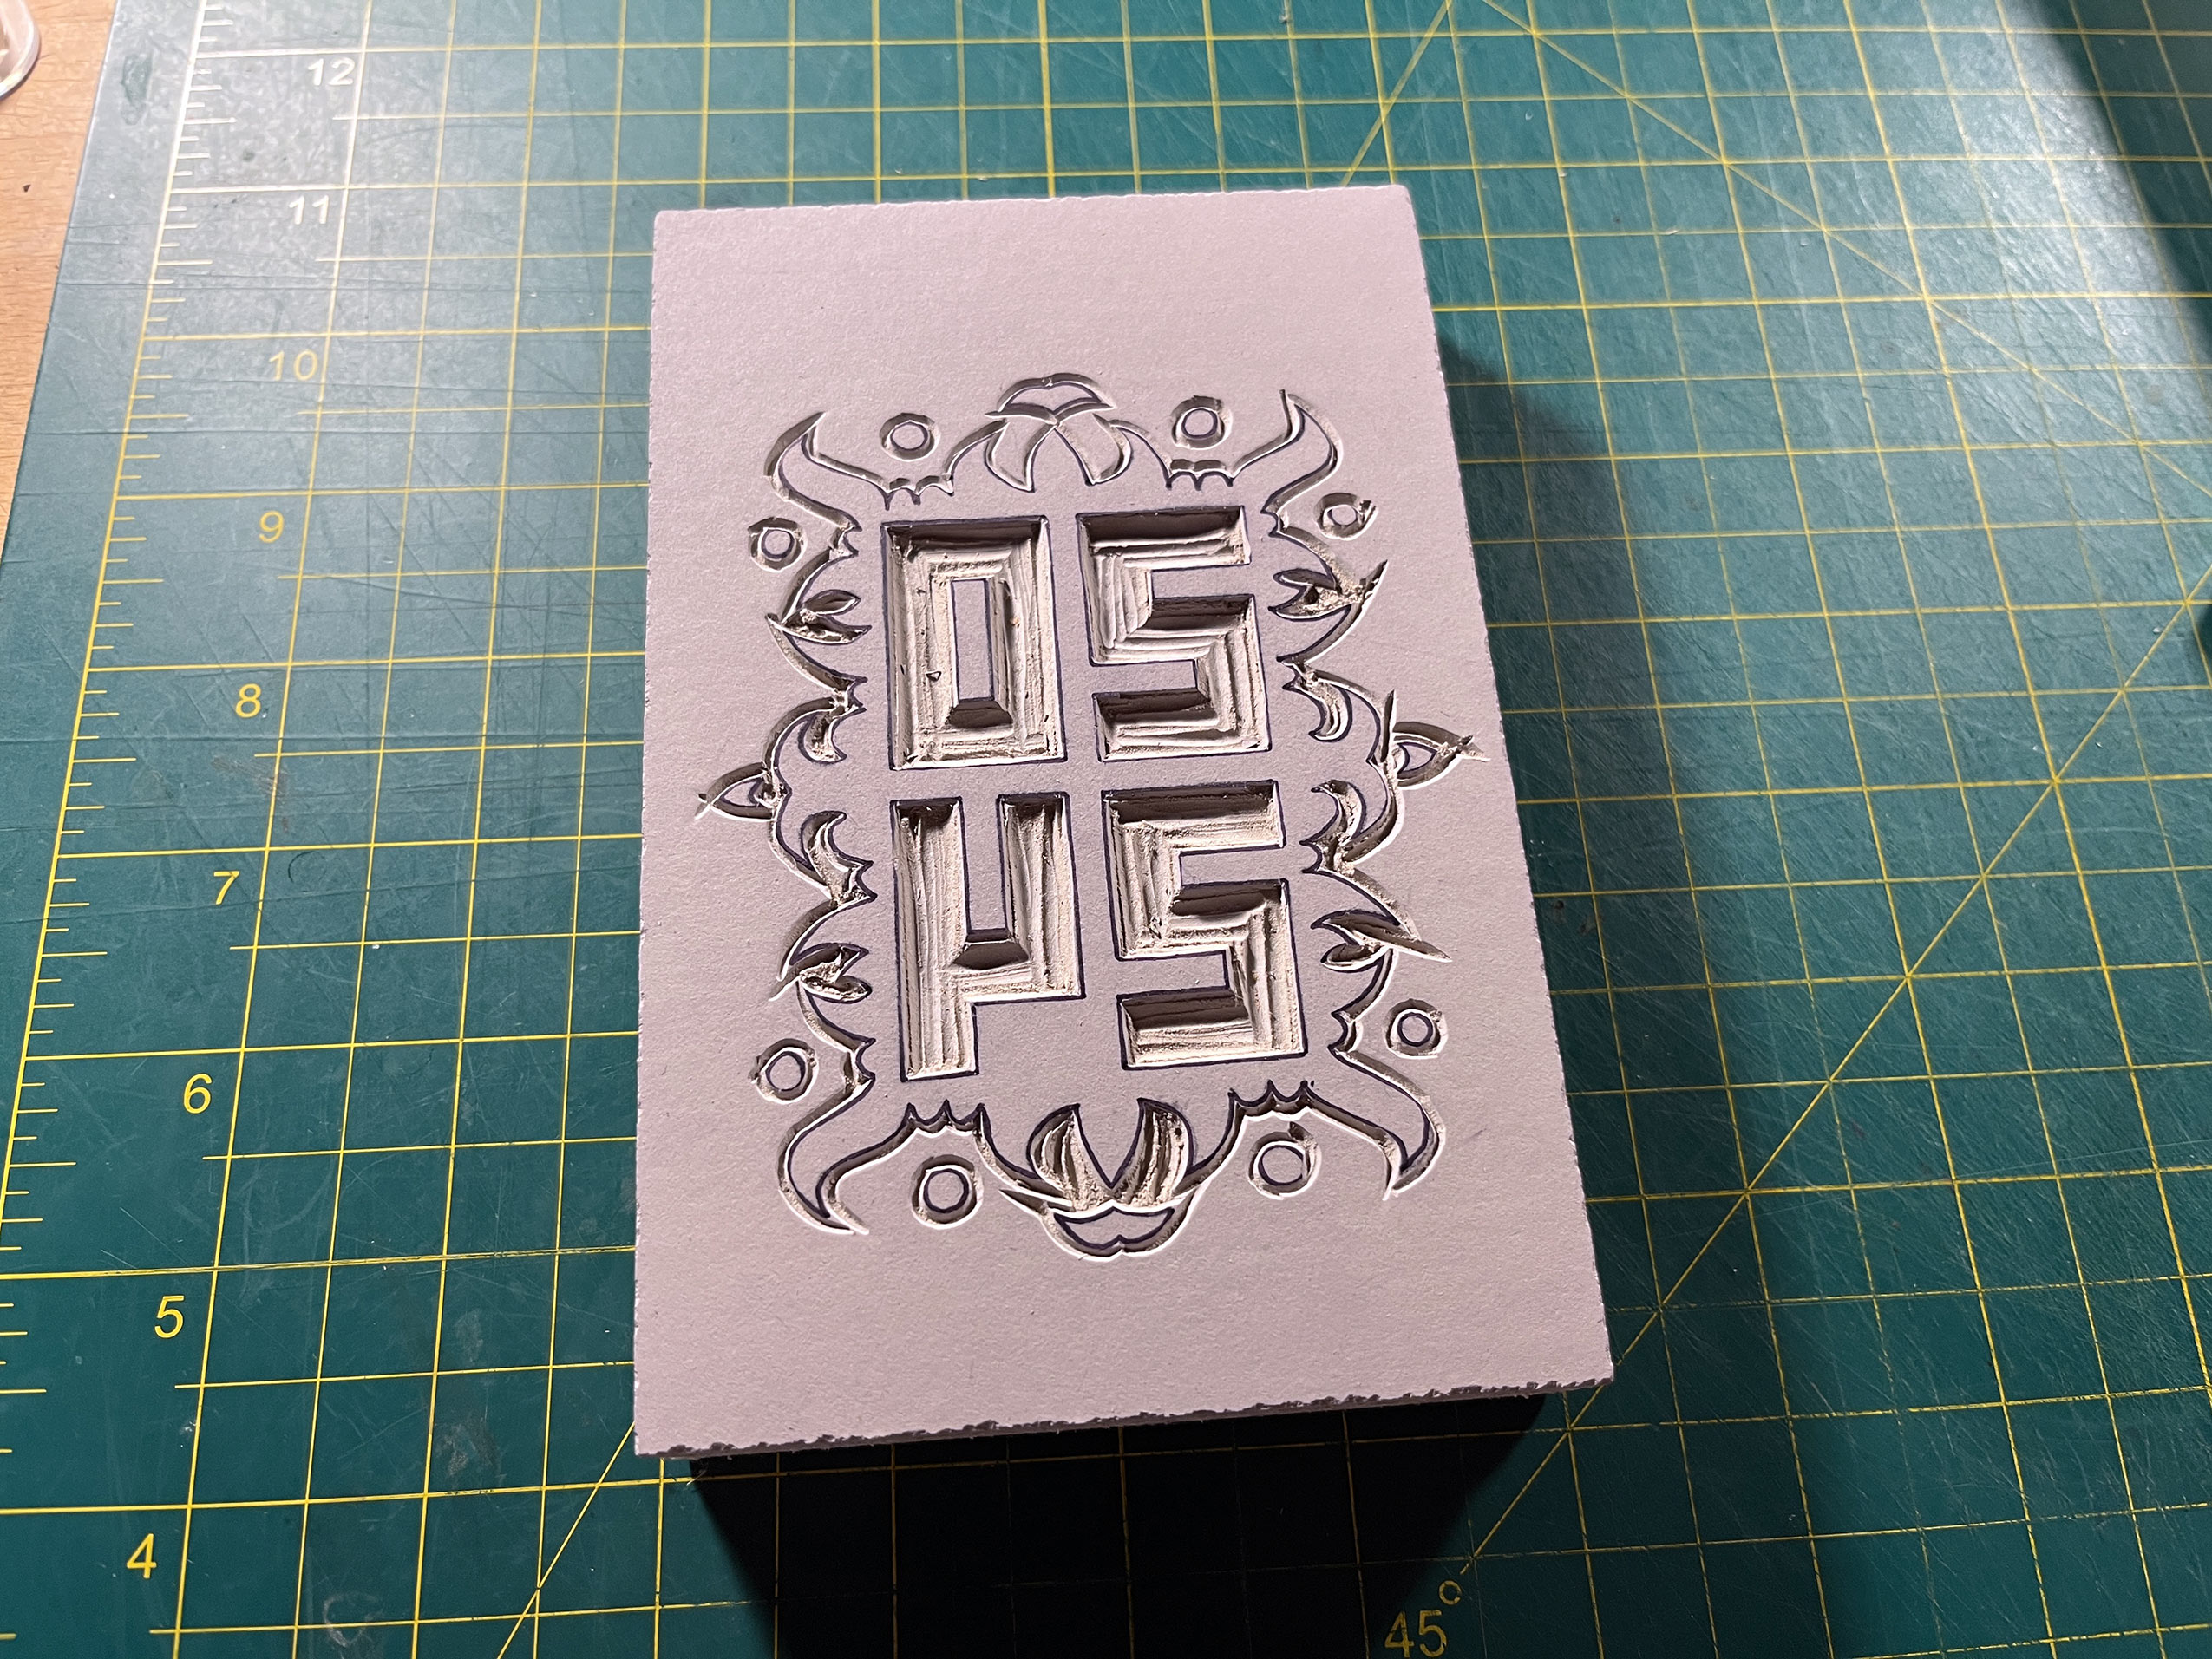
- Detail Finished This was the toughest cutting I've performed... so far.
- Making Space The next step was making some space around the fine outlines so the rest of the block can be cut away without damaging the fine parts.
- Just About Finished At this point, the highest ridges of the cleared space need to be trimmed-down a bit more to avoid catching ink from the roller.
- One Down, One To Go
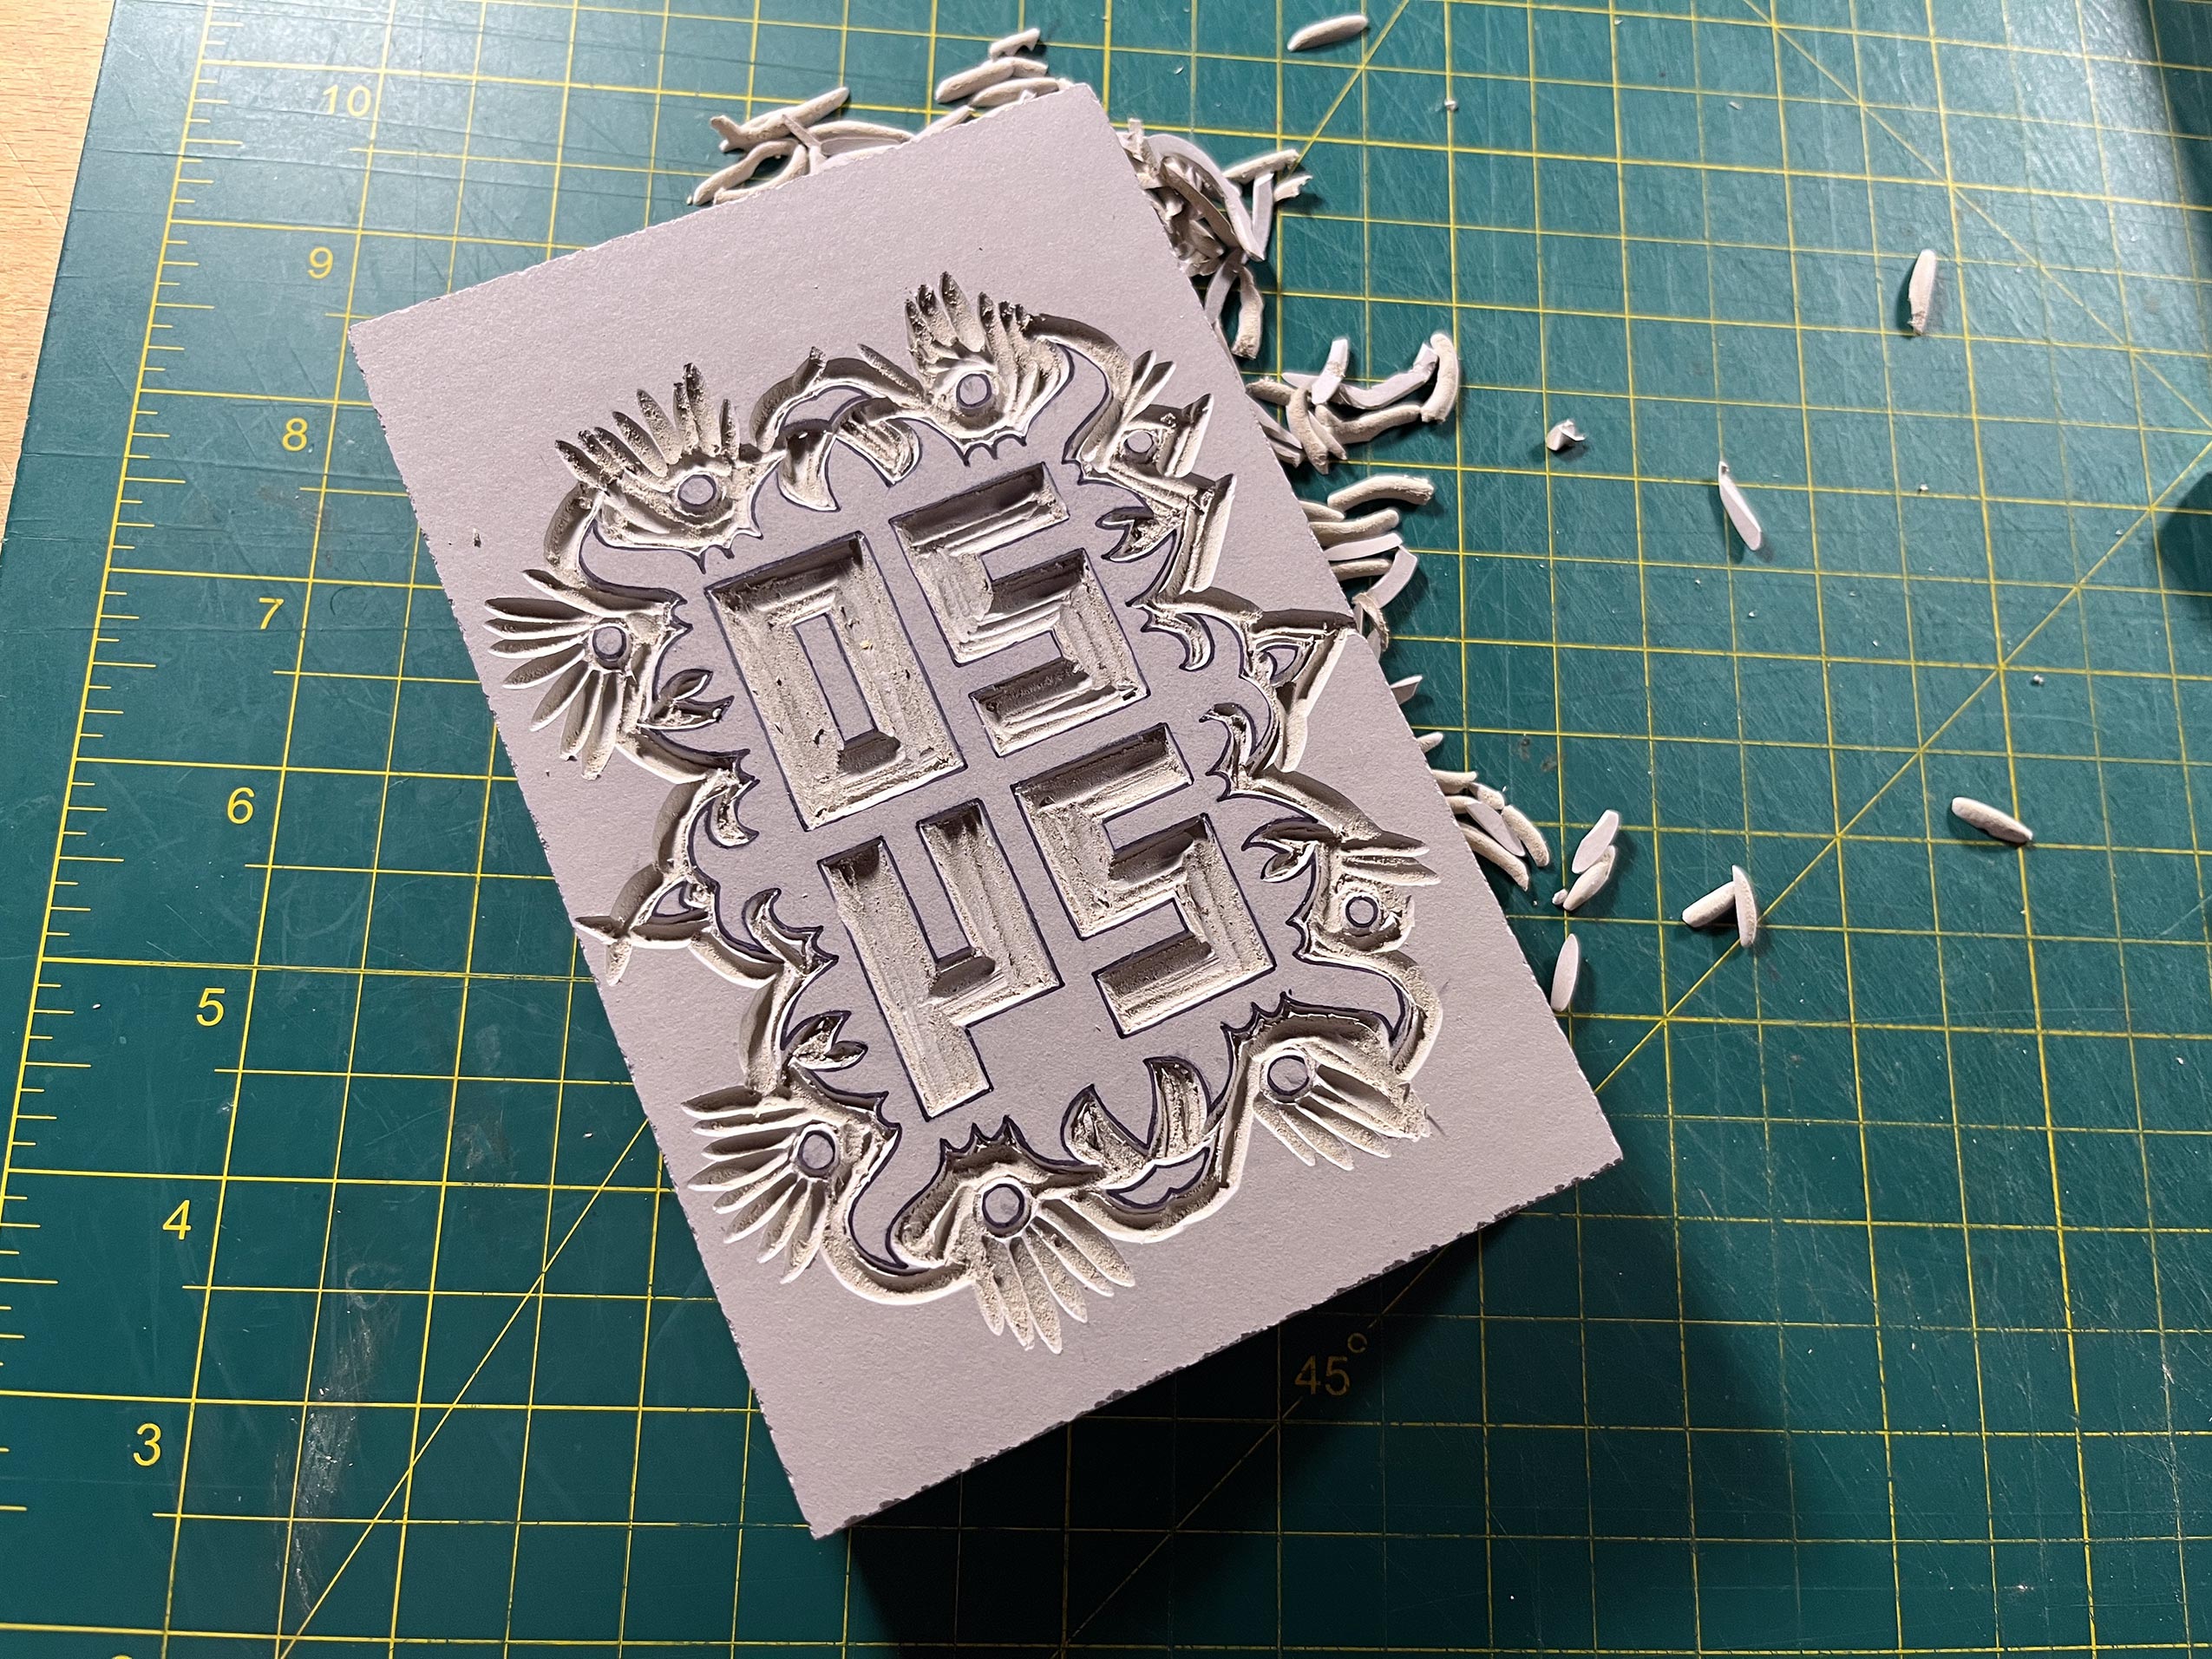
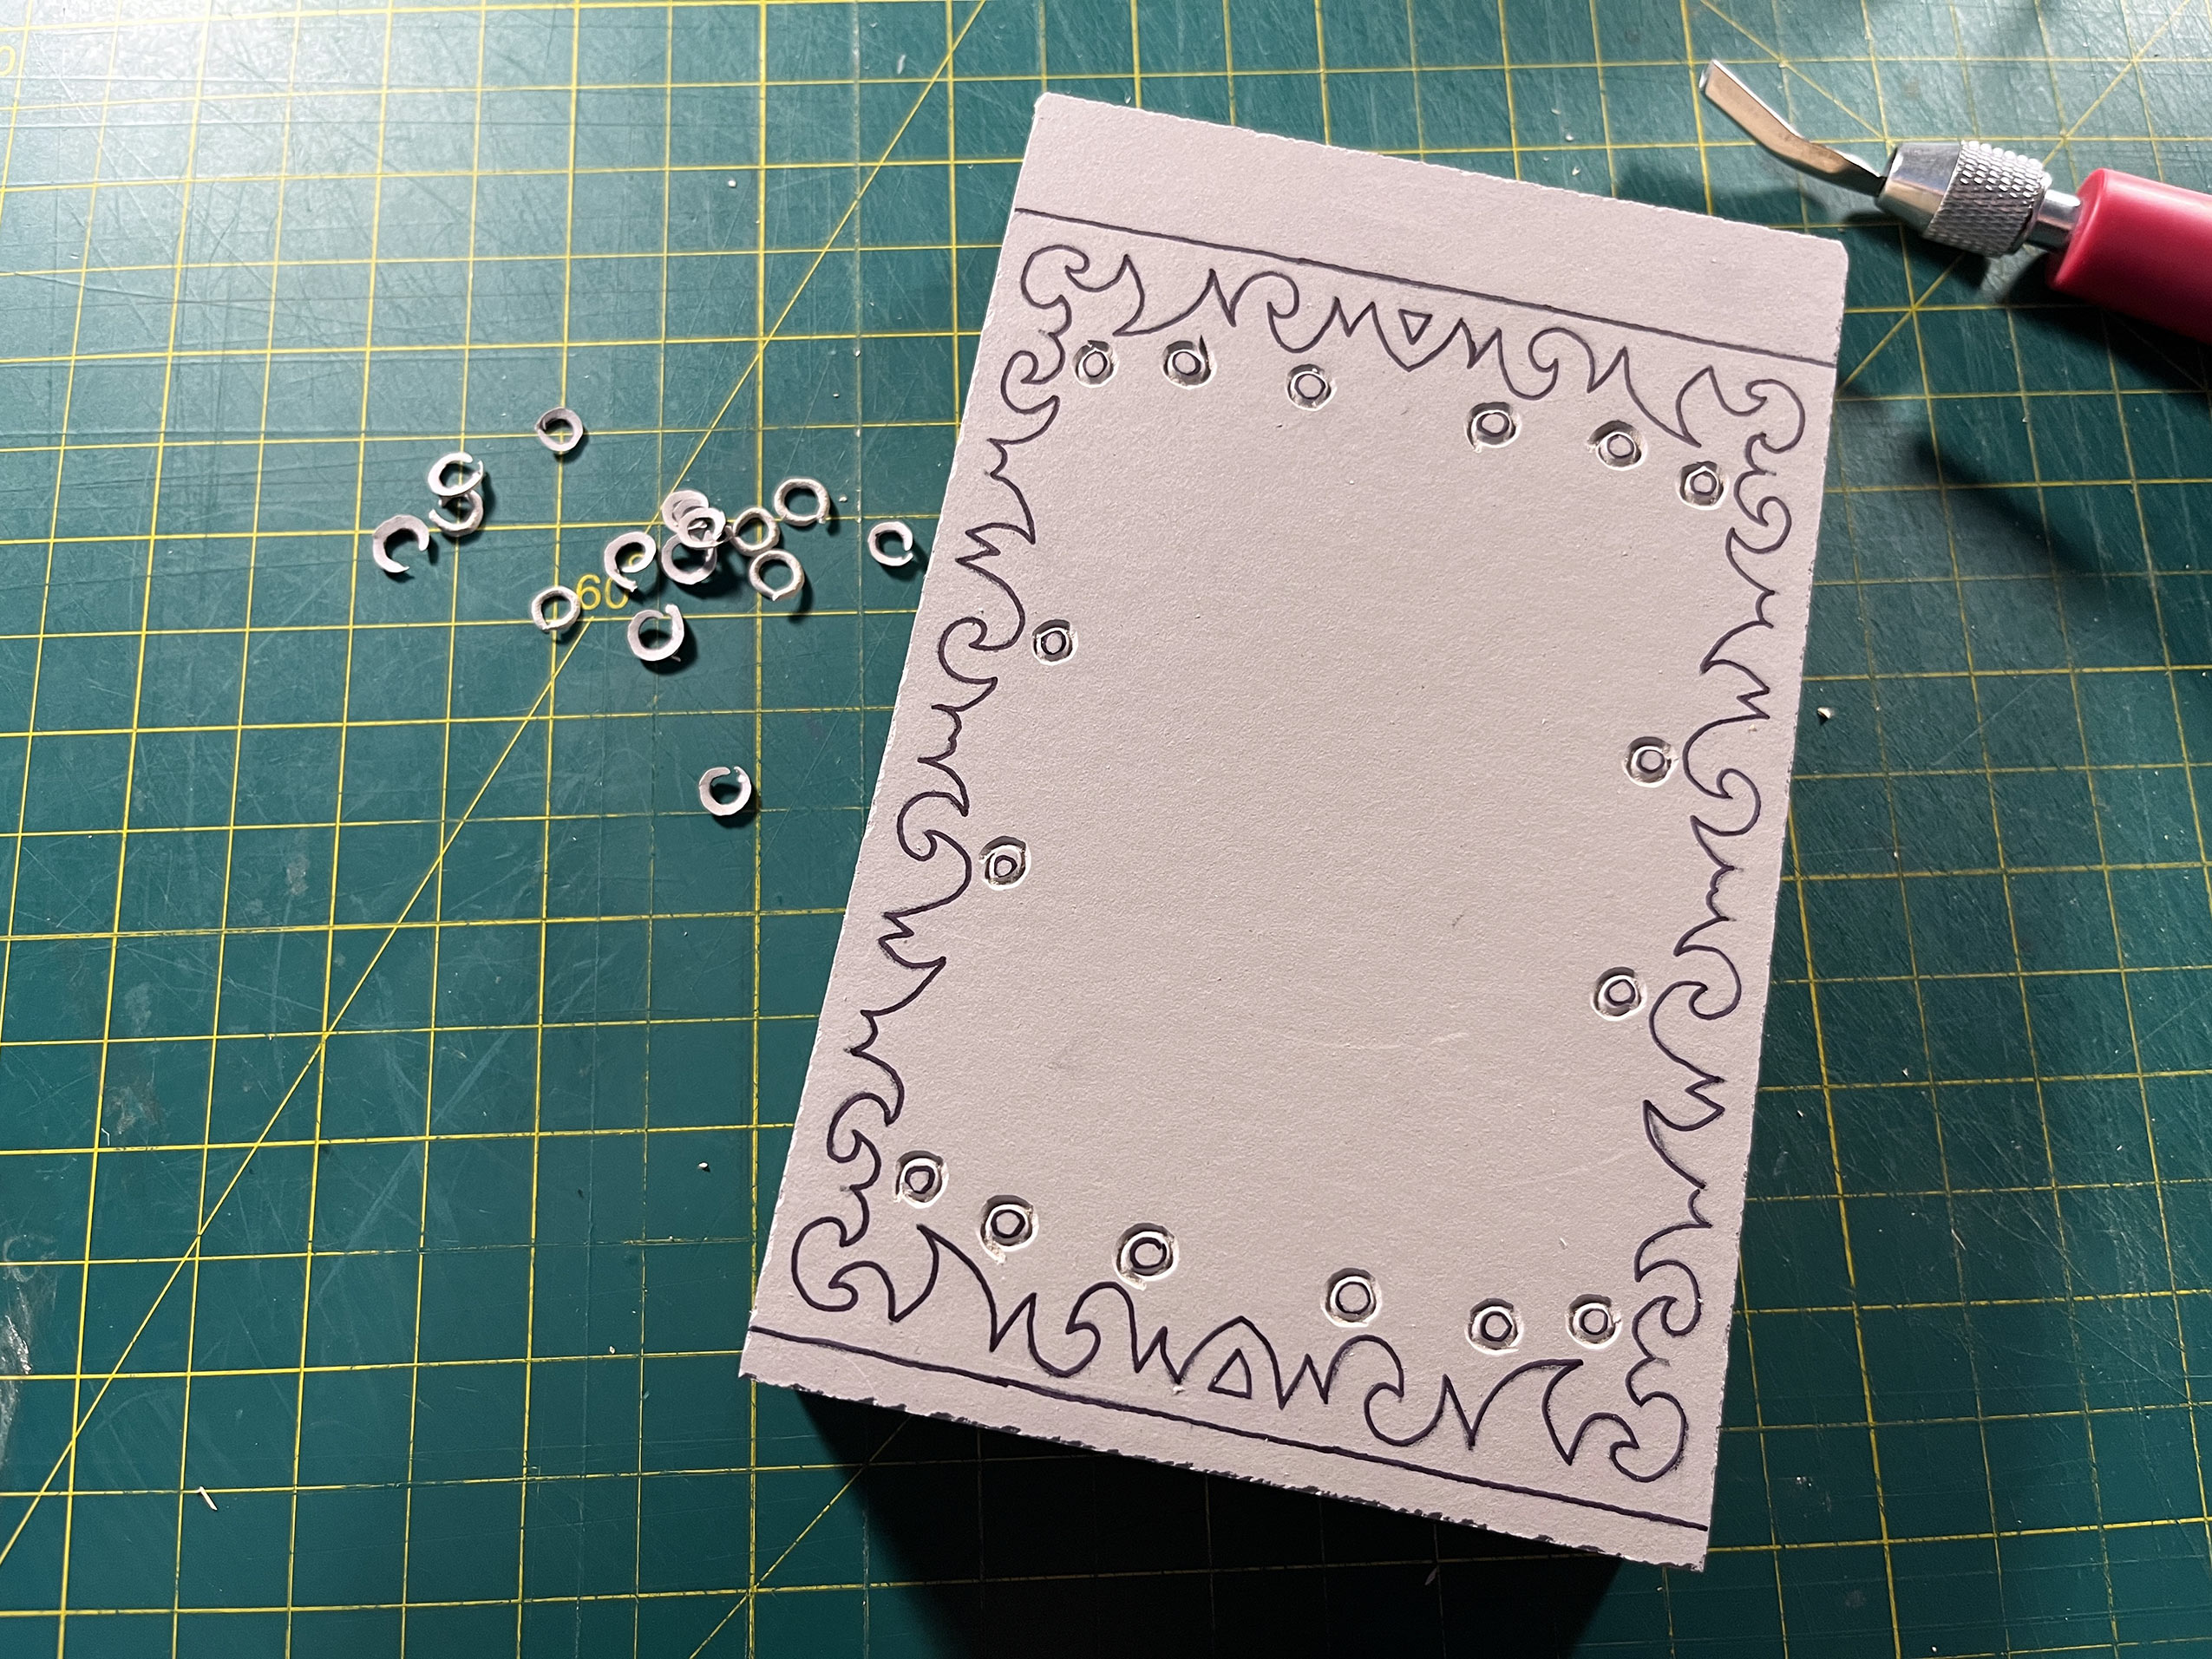
- Circles First The circular slices of linoleum were strangely satisfying, even if they weren't very precise.
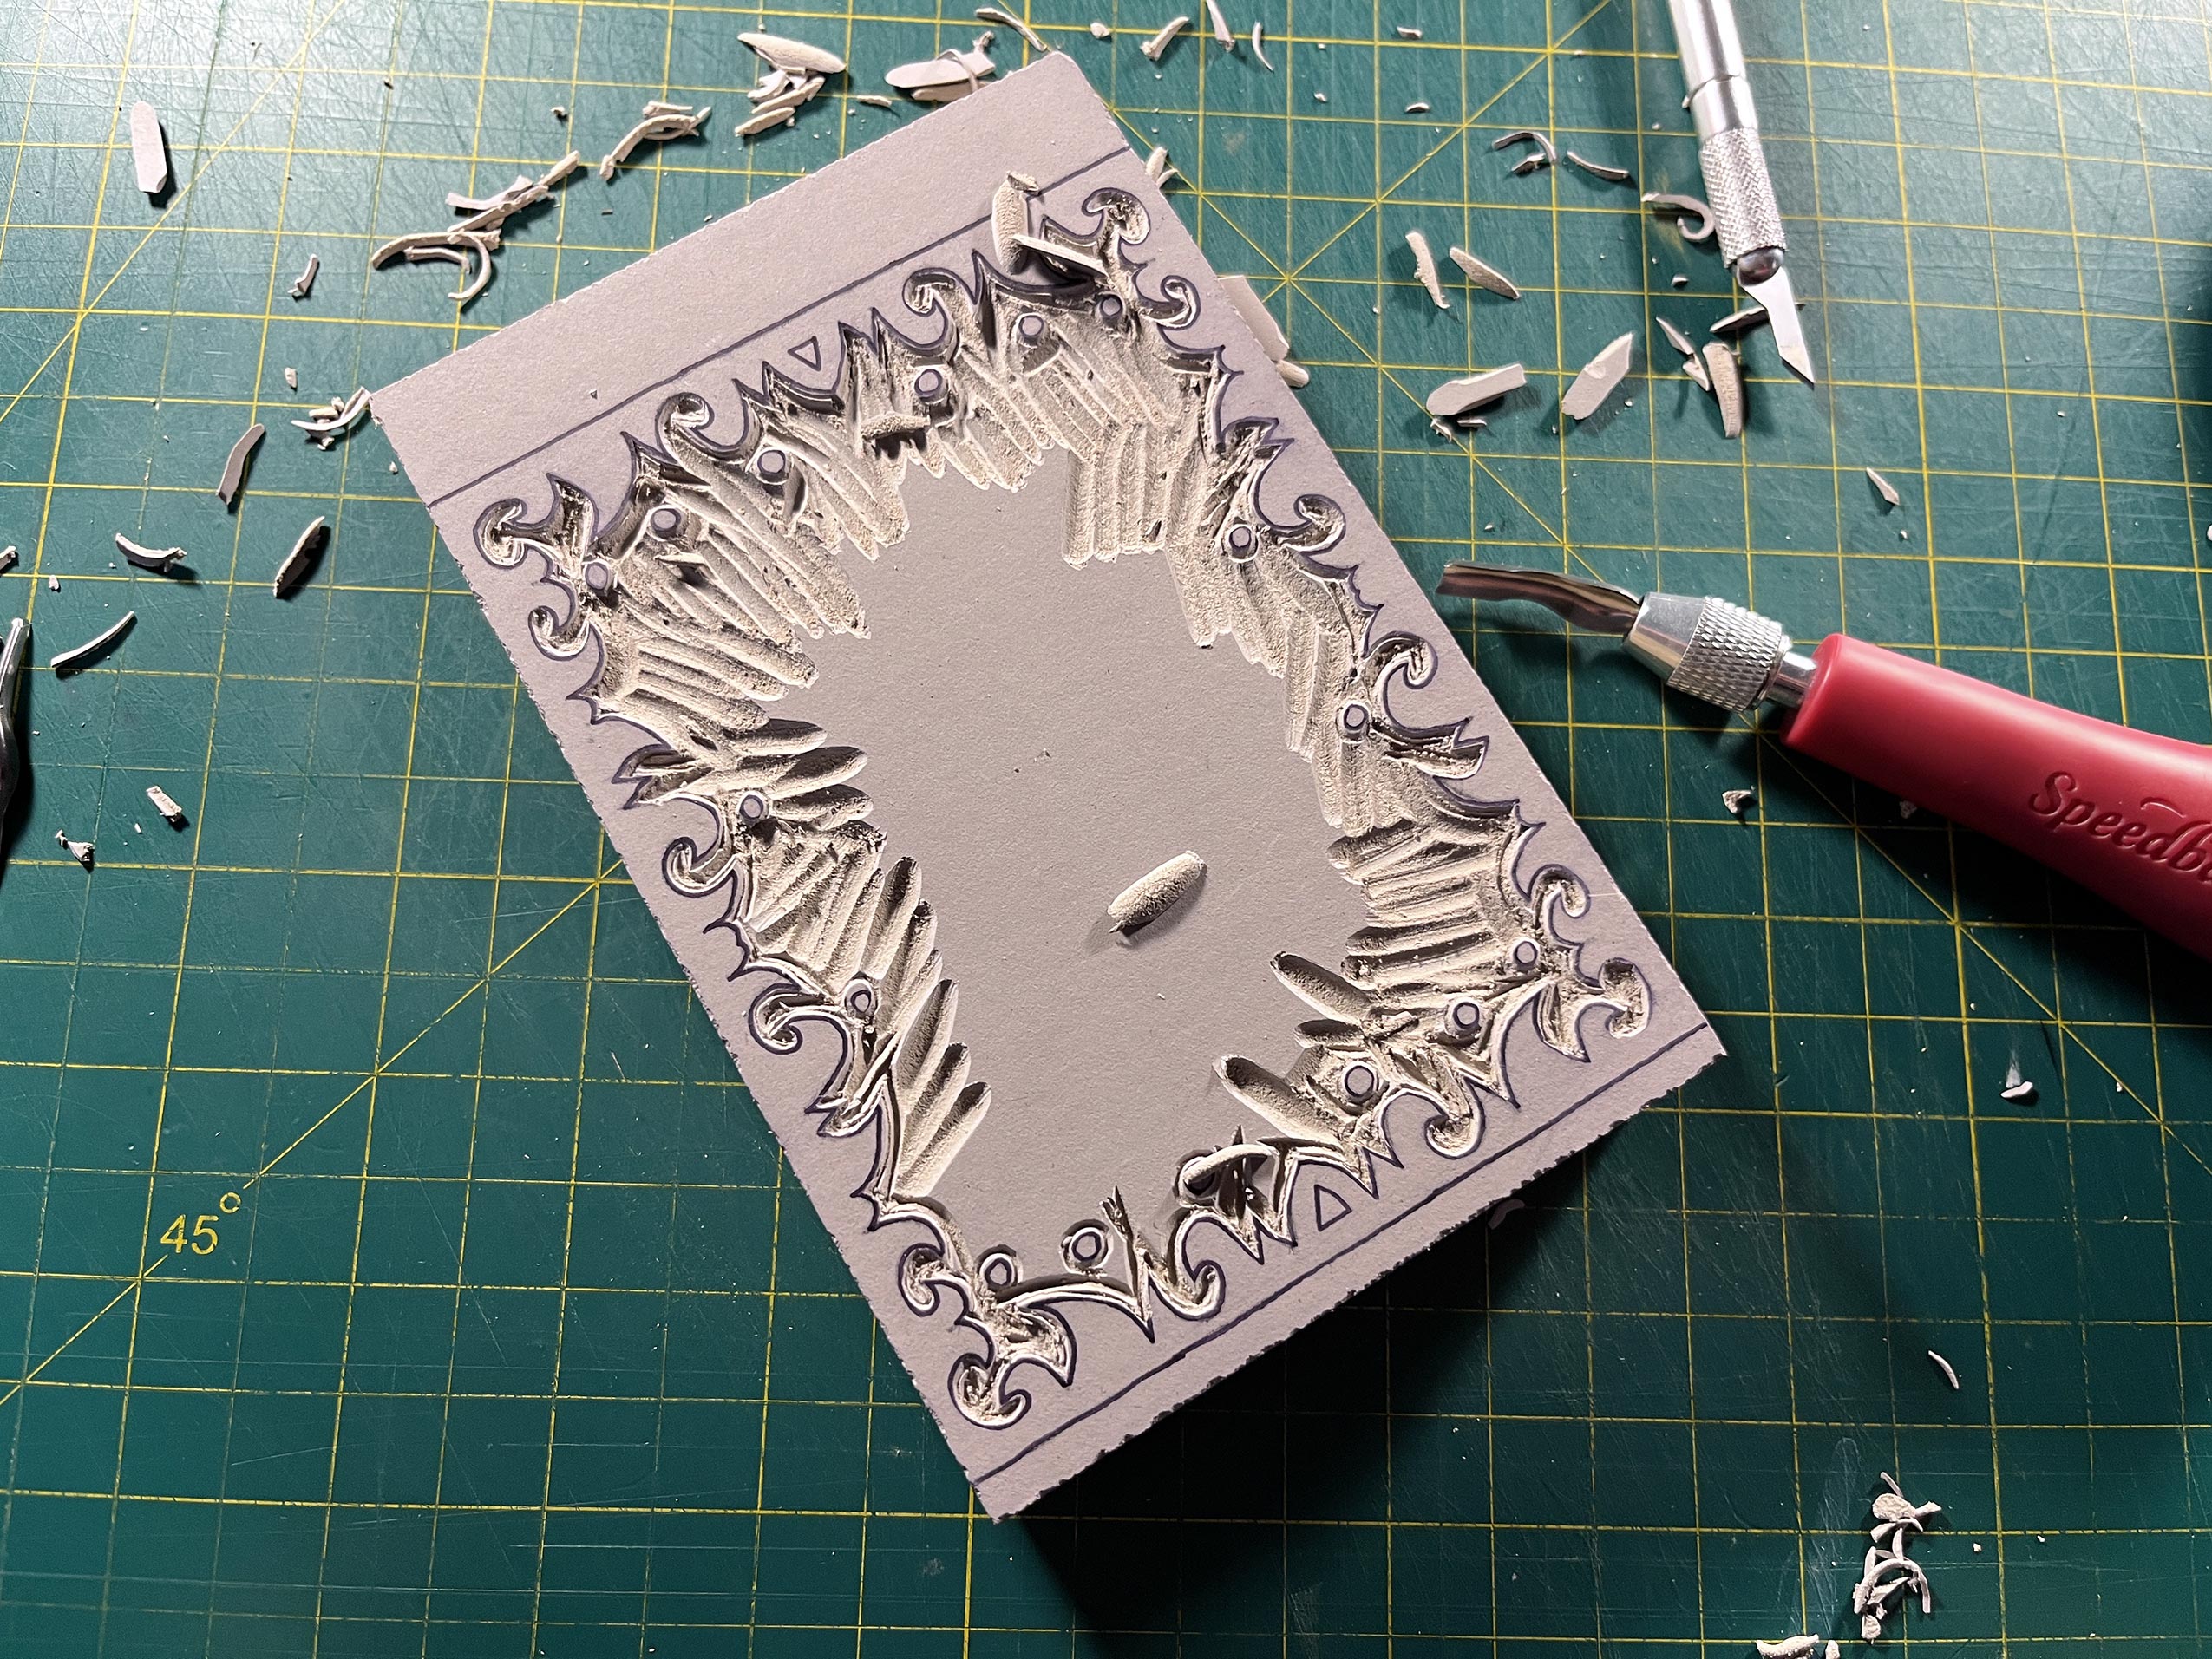
- Chaos This... was the most difficult plate I've ever cut. It was hard to determine where to start and how to proceed. Utter pandemonium.
- Finished Plates This is when I feel a bit relieved. While I enjoy the process, the cutting portion is physically and emotionally draining.
- Test Prints Test prints allow me to see what needs to be fixed or tweaked. To be honest, I was surprised how well they turned-out given the difficulty.
- The Payoff They aren't perfect, but I was exceptionally happy with how these turned-out. This is my favorite part of the process.
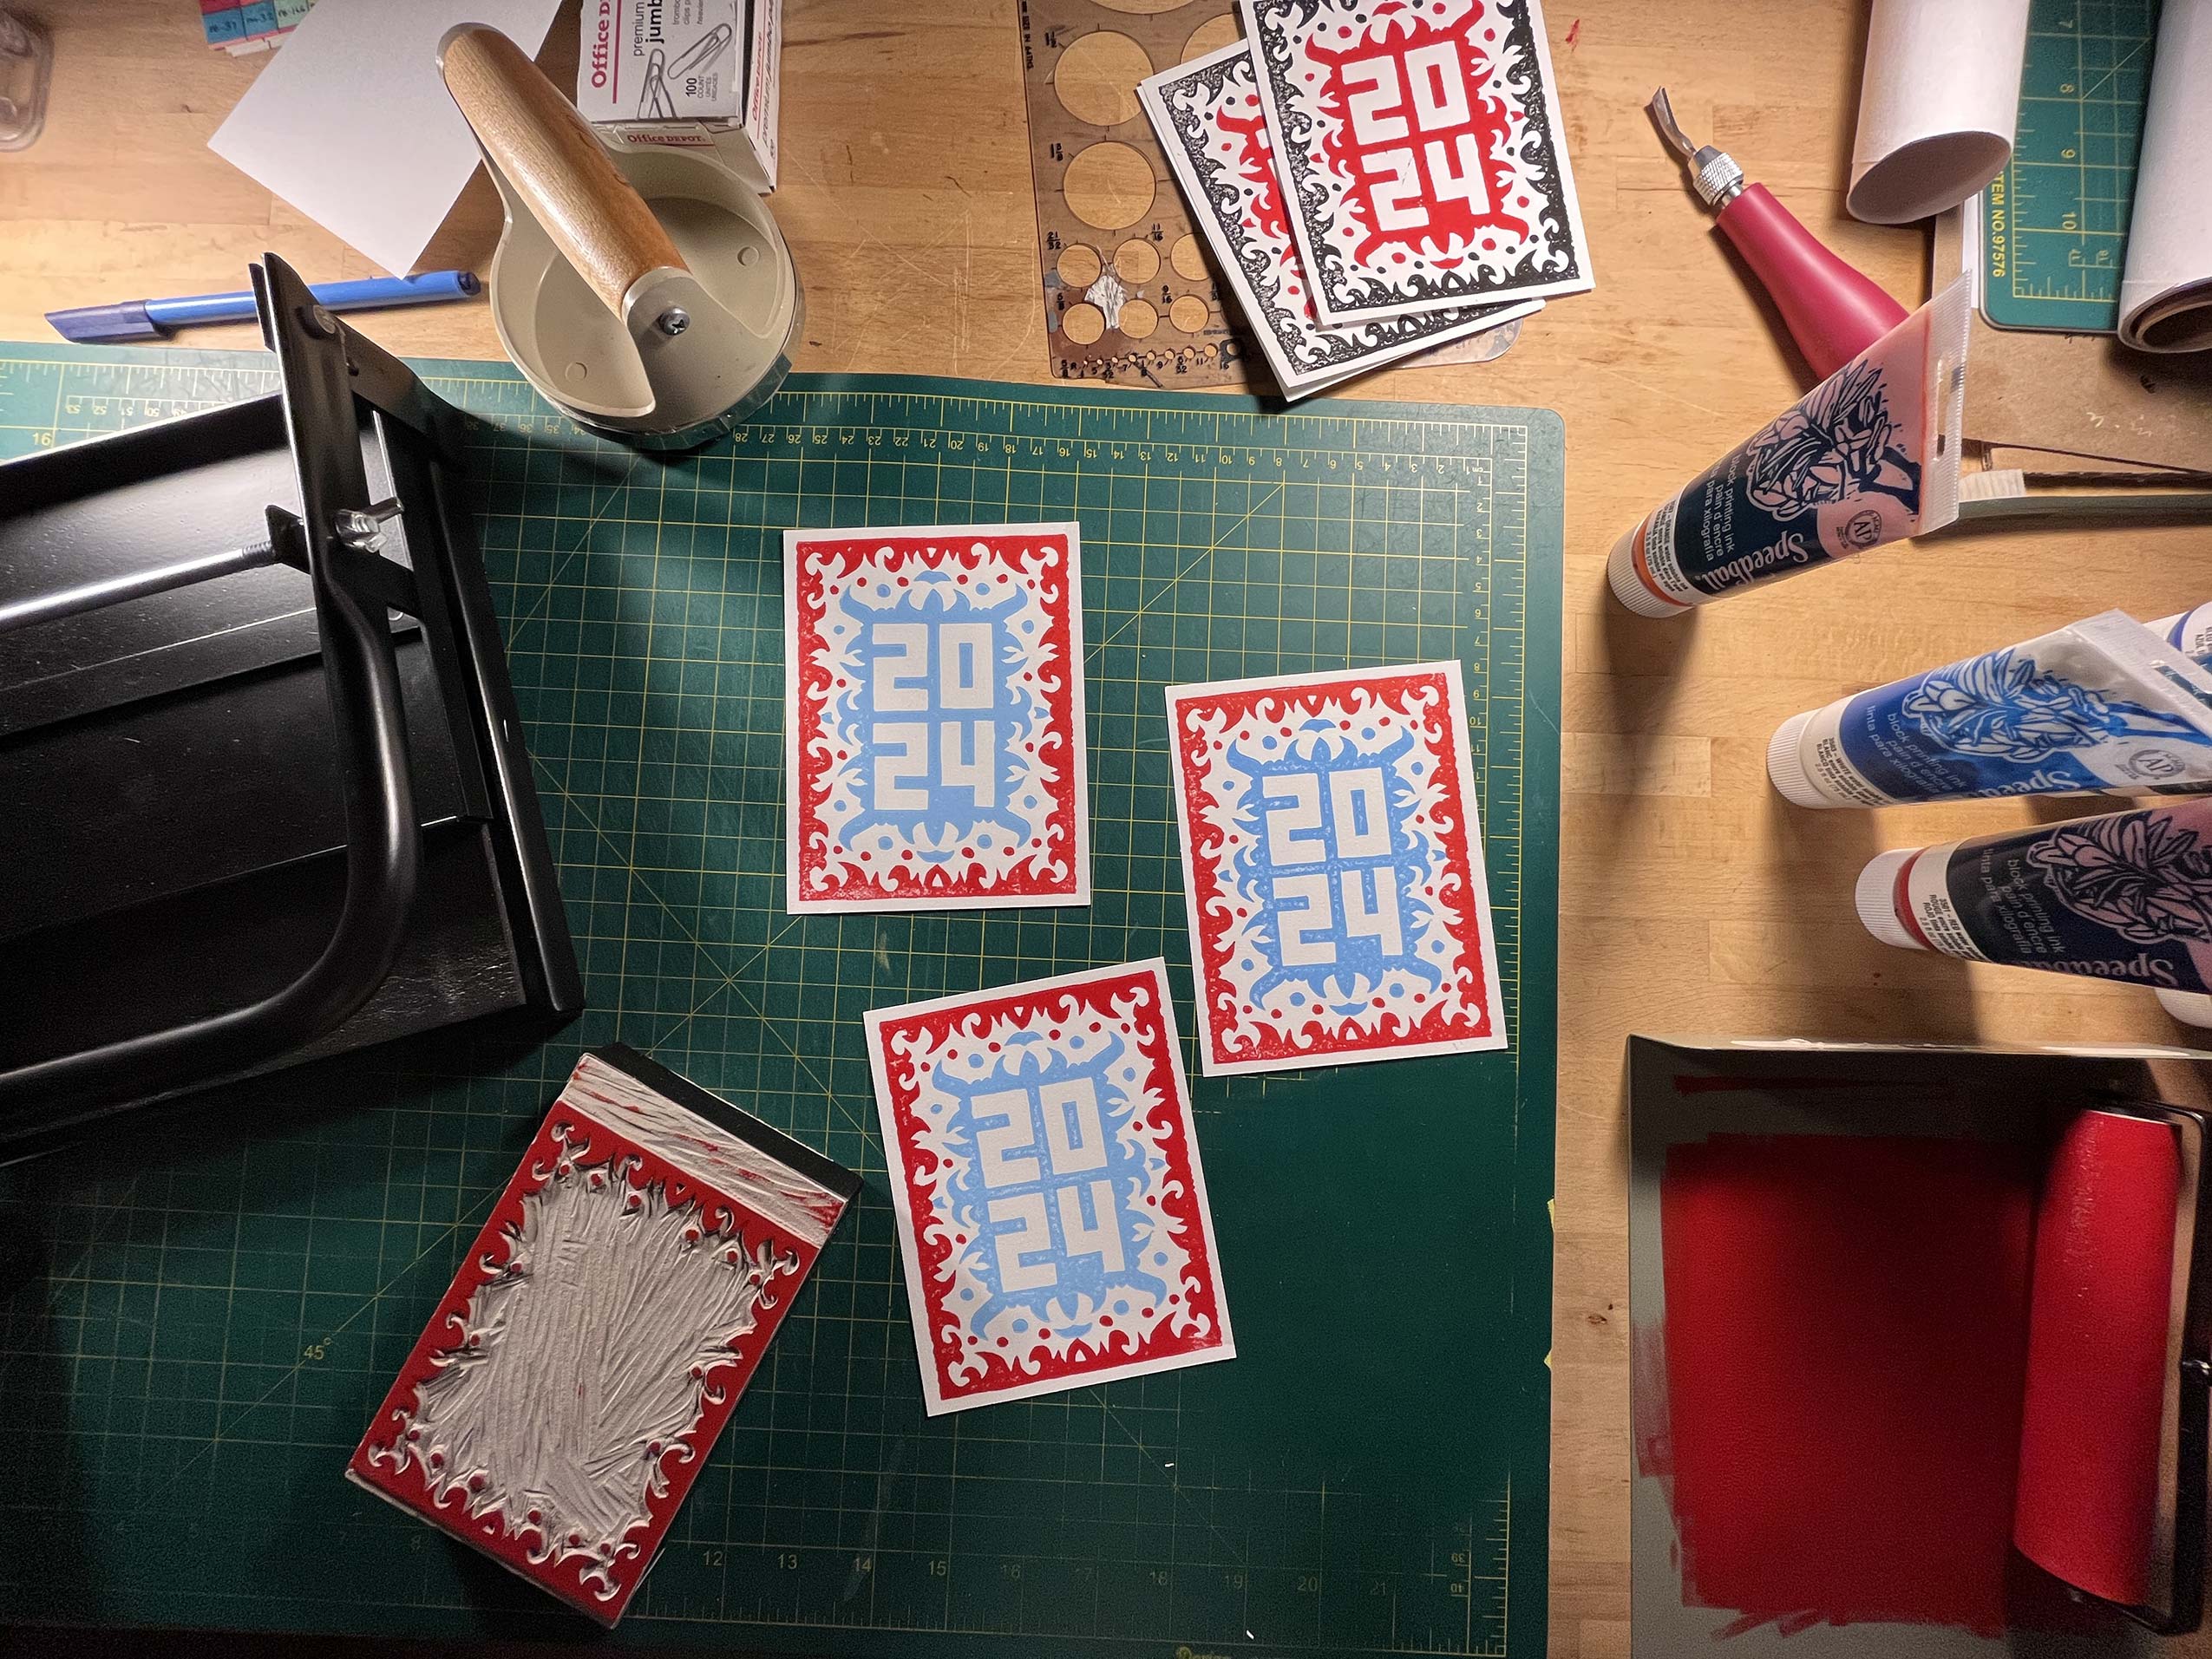
- Printing Plate #1 It was a relief to see the ink was less spotty than on the test prints.
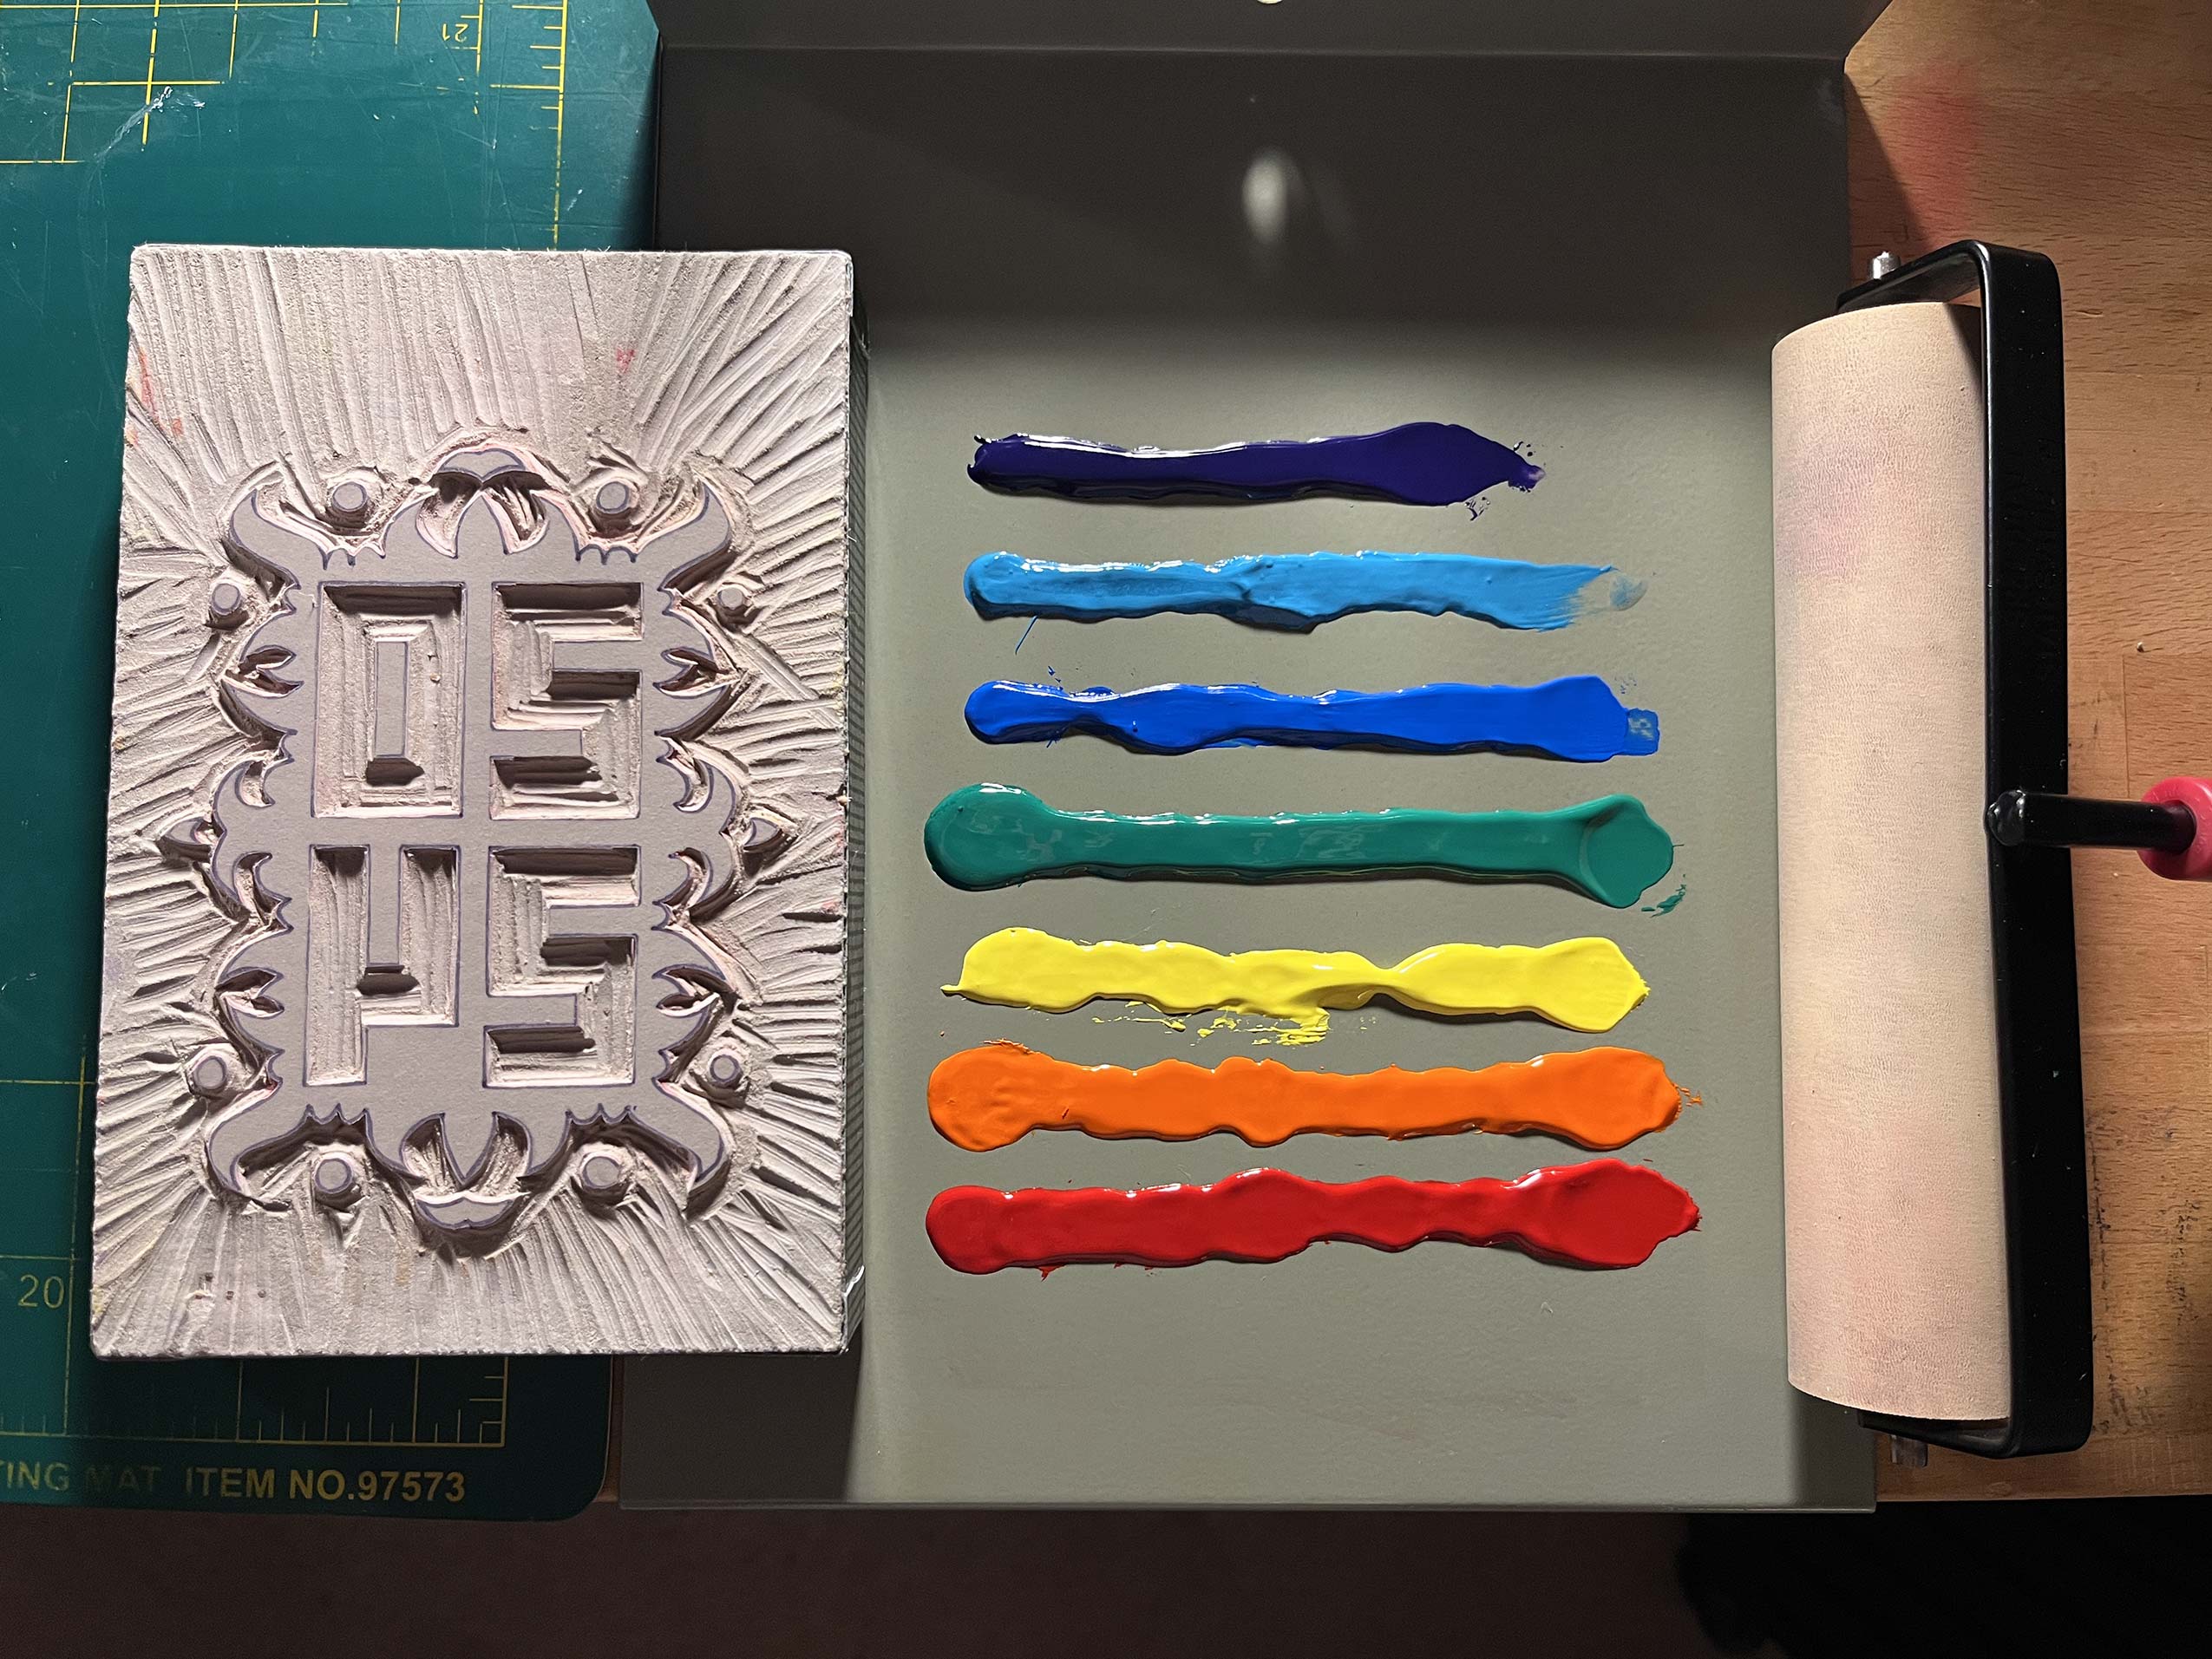
- Rainbows I decided on solid color combinations for this print, so this was the only gradient I used on the off-white cards.
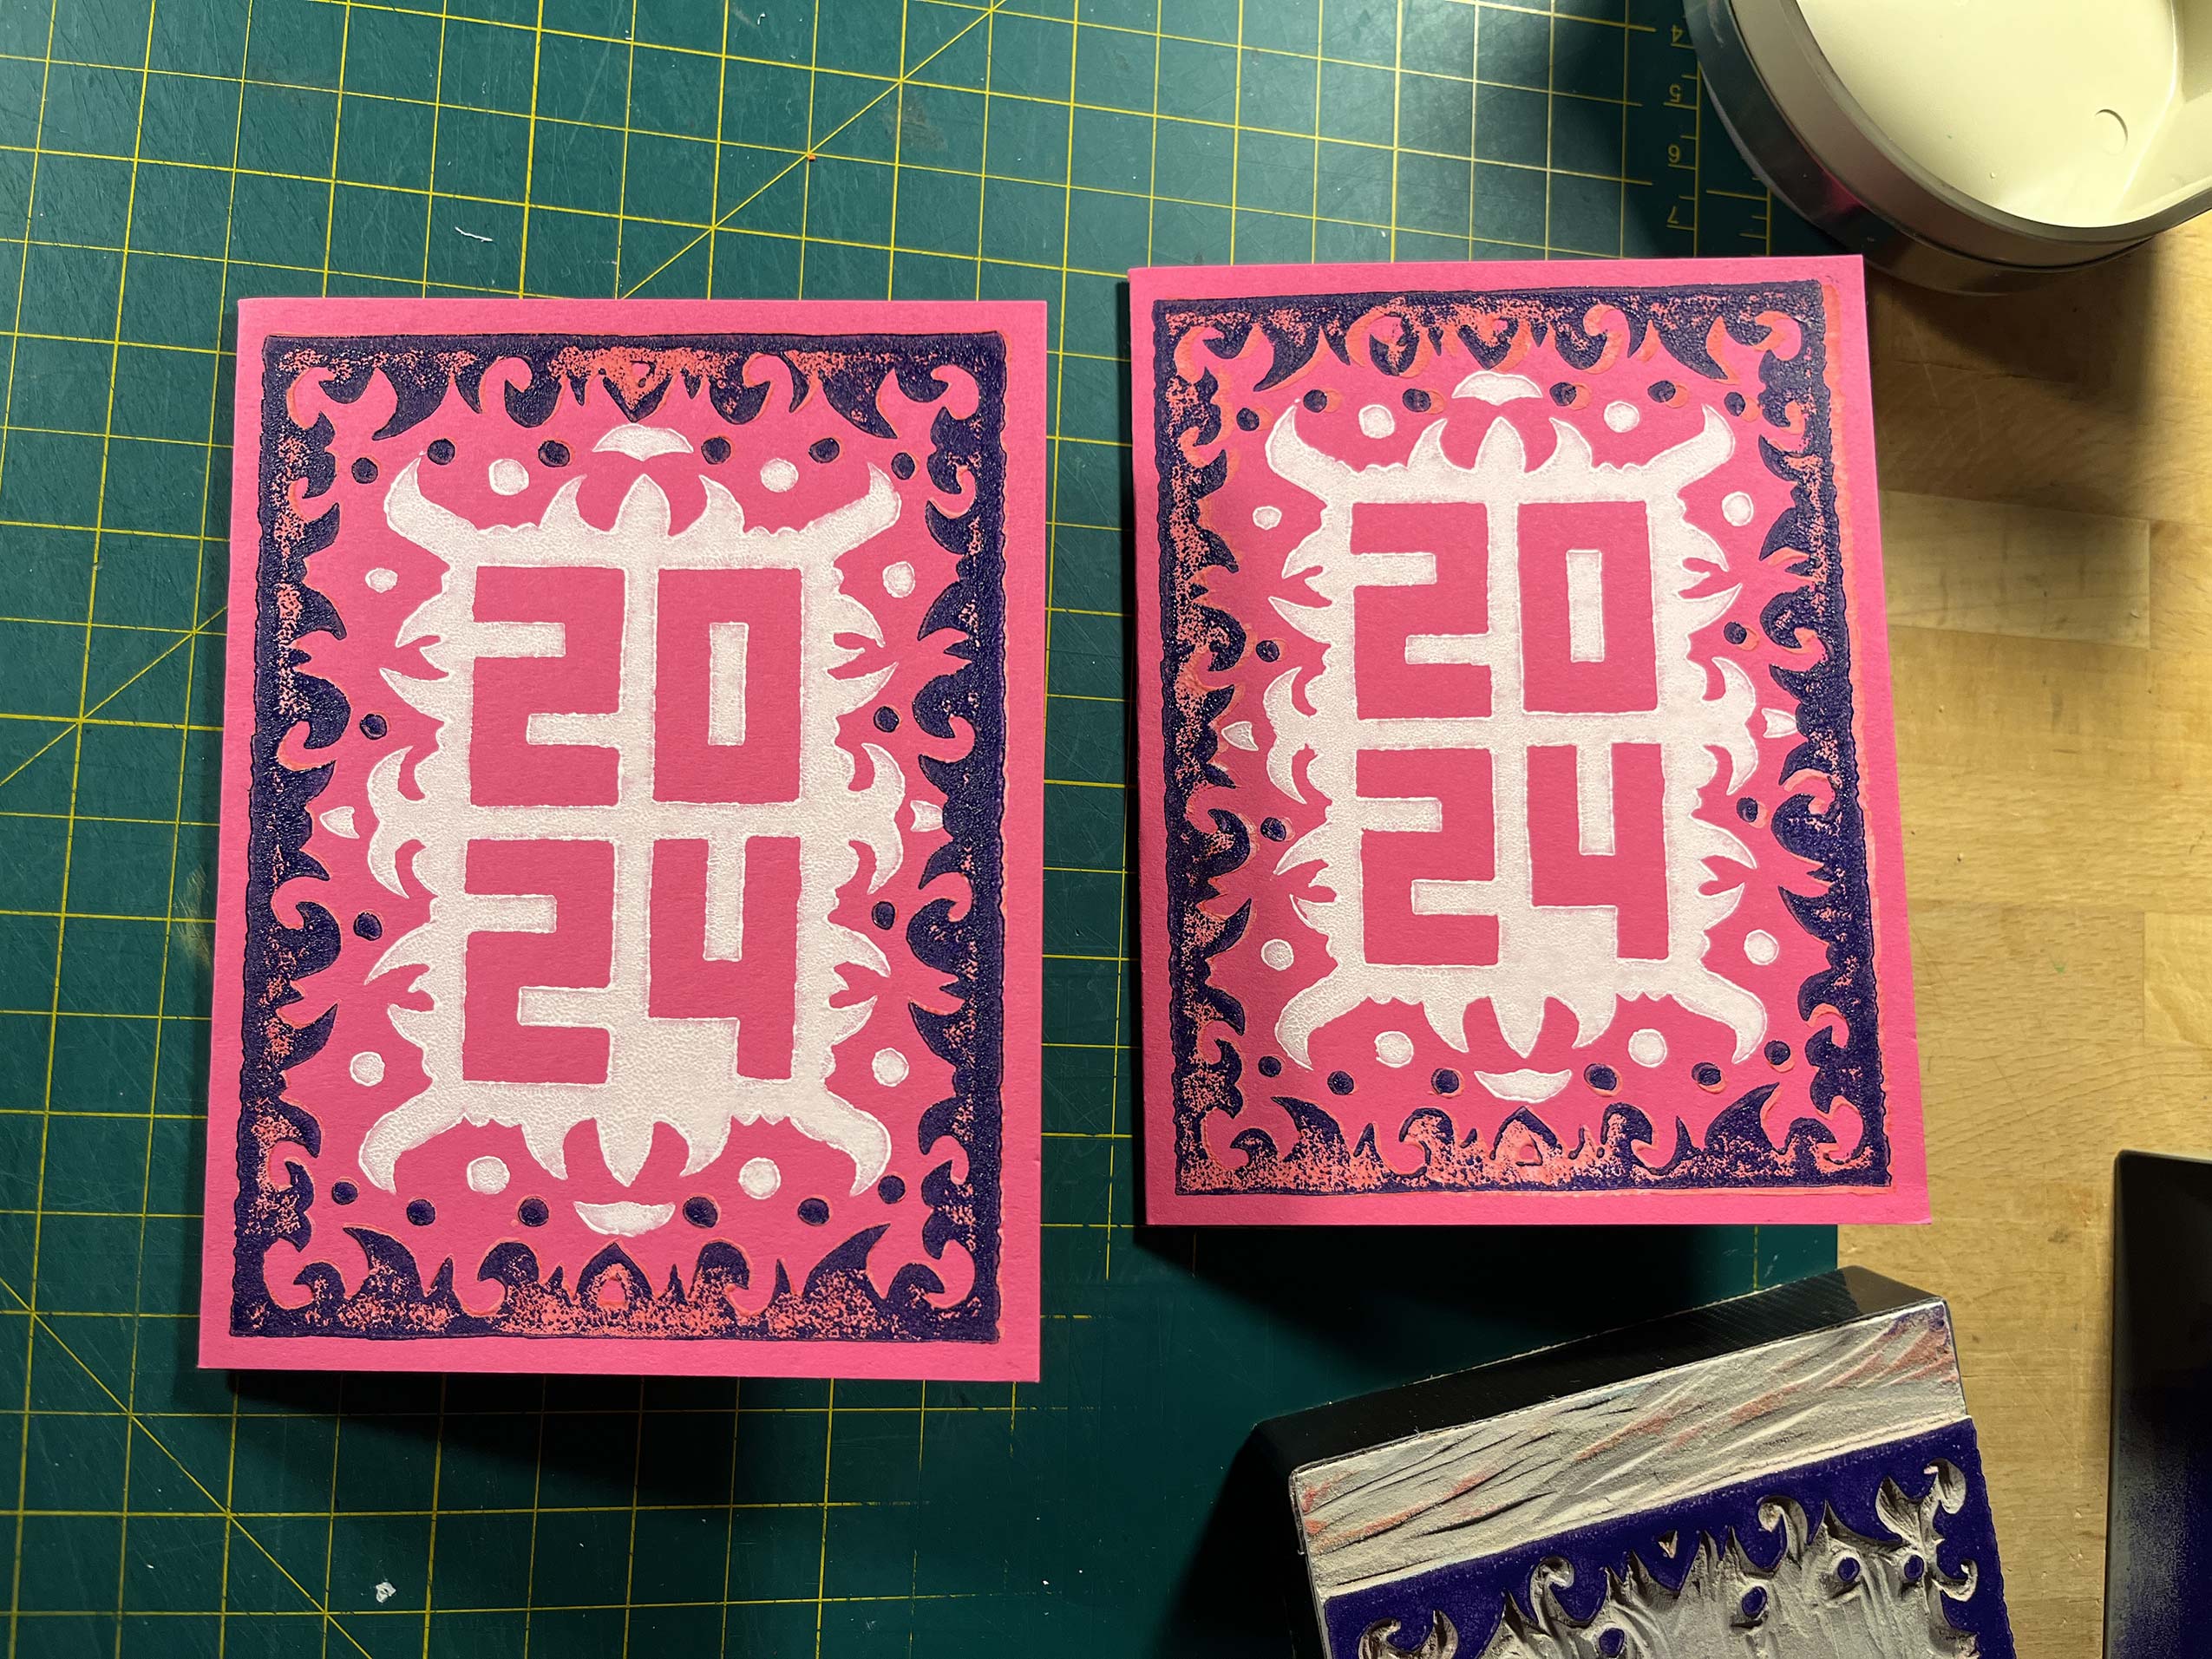
- Plate #1 Finished At this point, I'm sort of on the fence how I feel about these, and irritated how badly the pink on dark-pink card failed.
- A Problem While printing the first plate, I realized, while I'd made multi-plated prints on card before, they were pre-folded cards. This made the second plate a challenge to apply accurately.
- Printing Plate #2 Fortunately, given the fact the second plate only made contact in the middle of the card, I was able to keep the card closed with a finger while positioning it. Difficult, but not impossible!
- Full Rainbow This looks cool, but it was an aweful waste of ink. That... is WAY too much ink! Not to mention it's backwards and I had to clean the plate, shelf and roller completely.
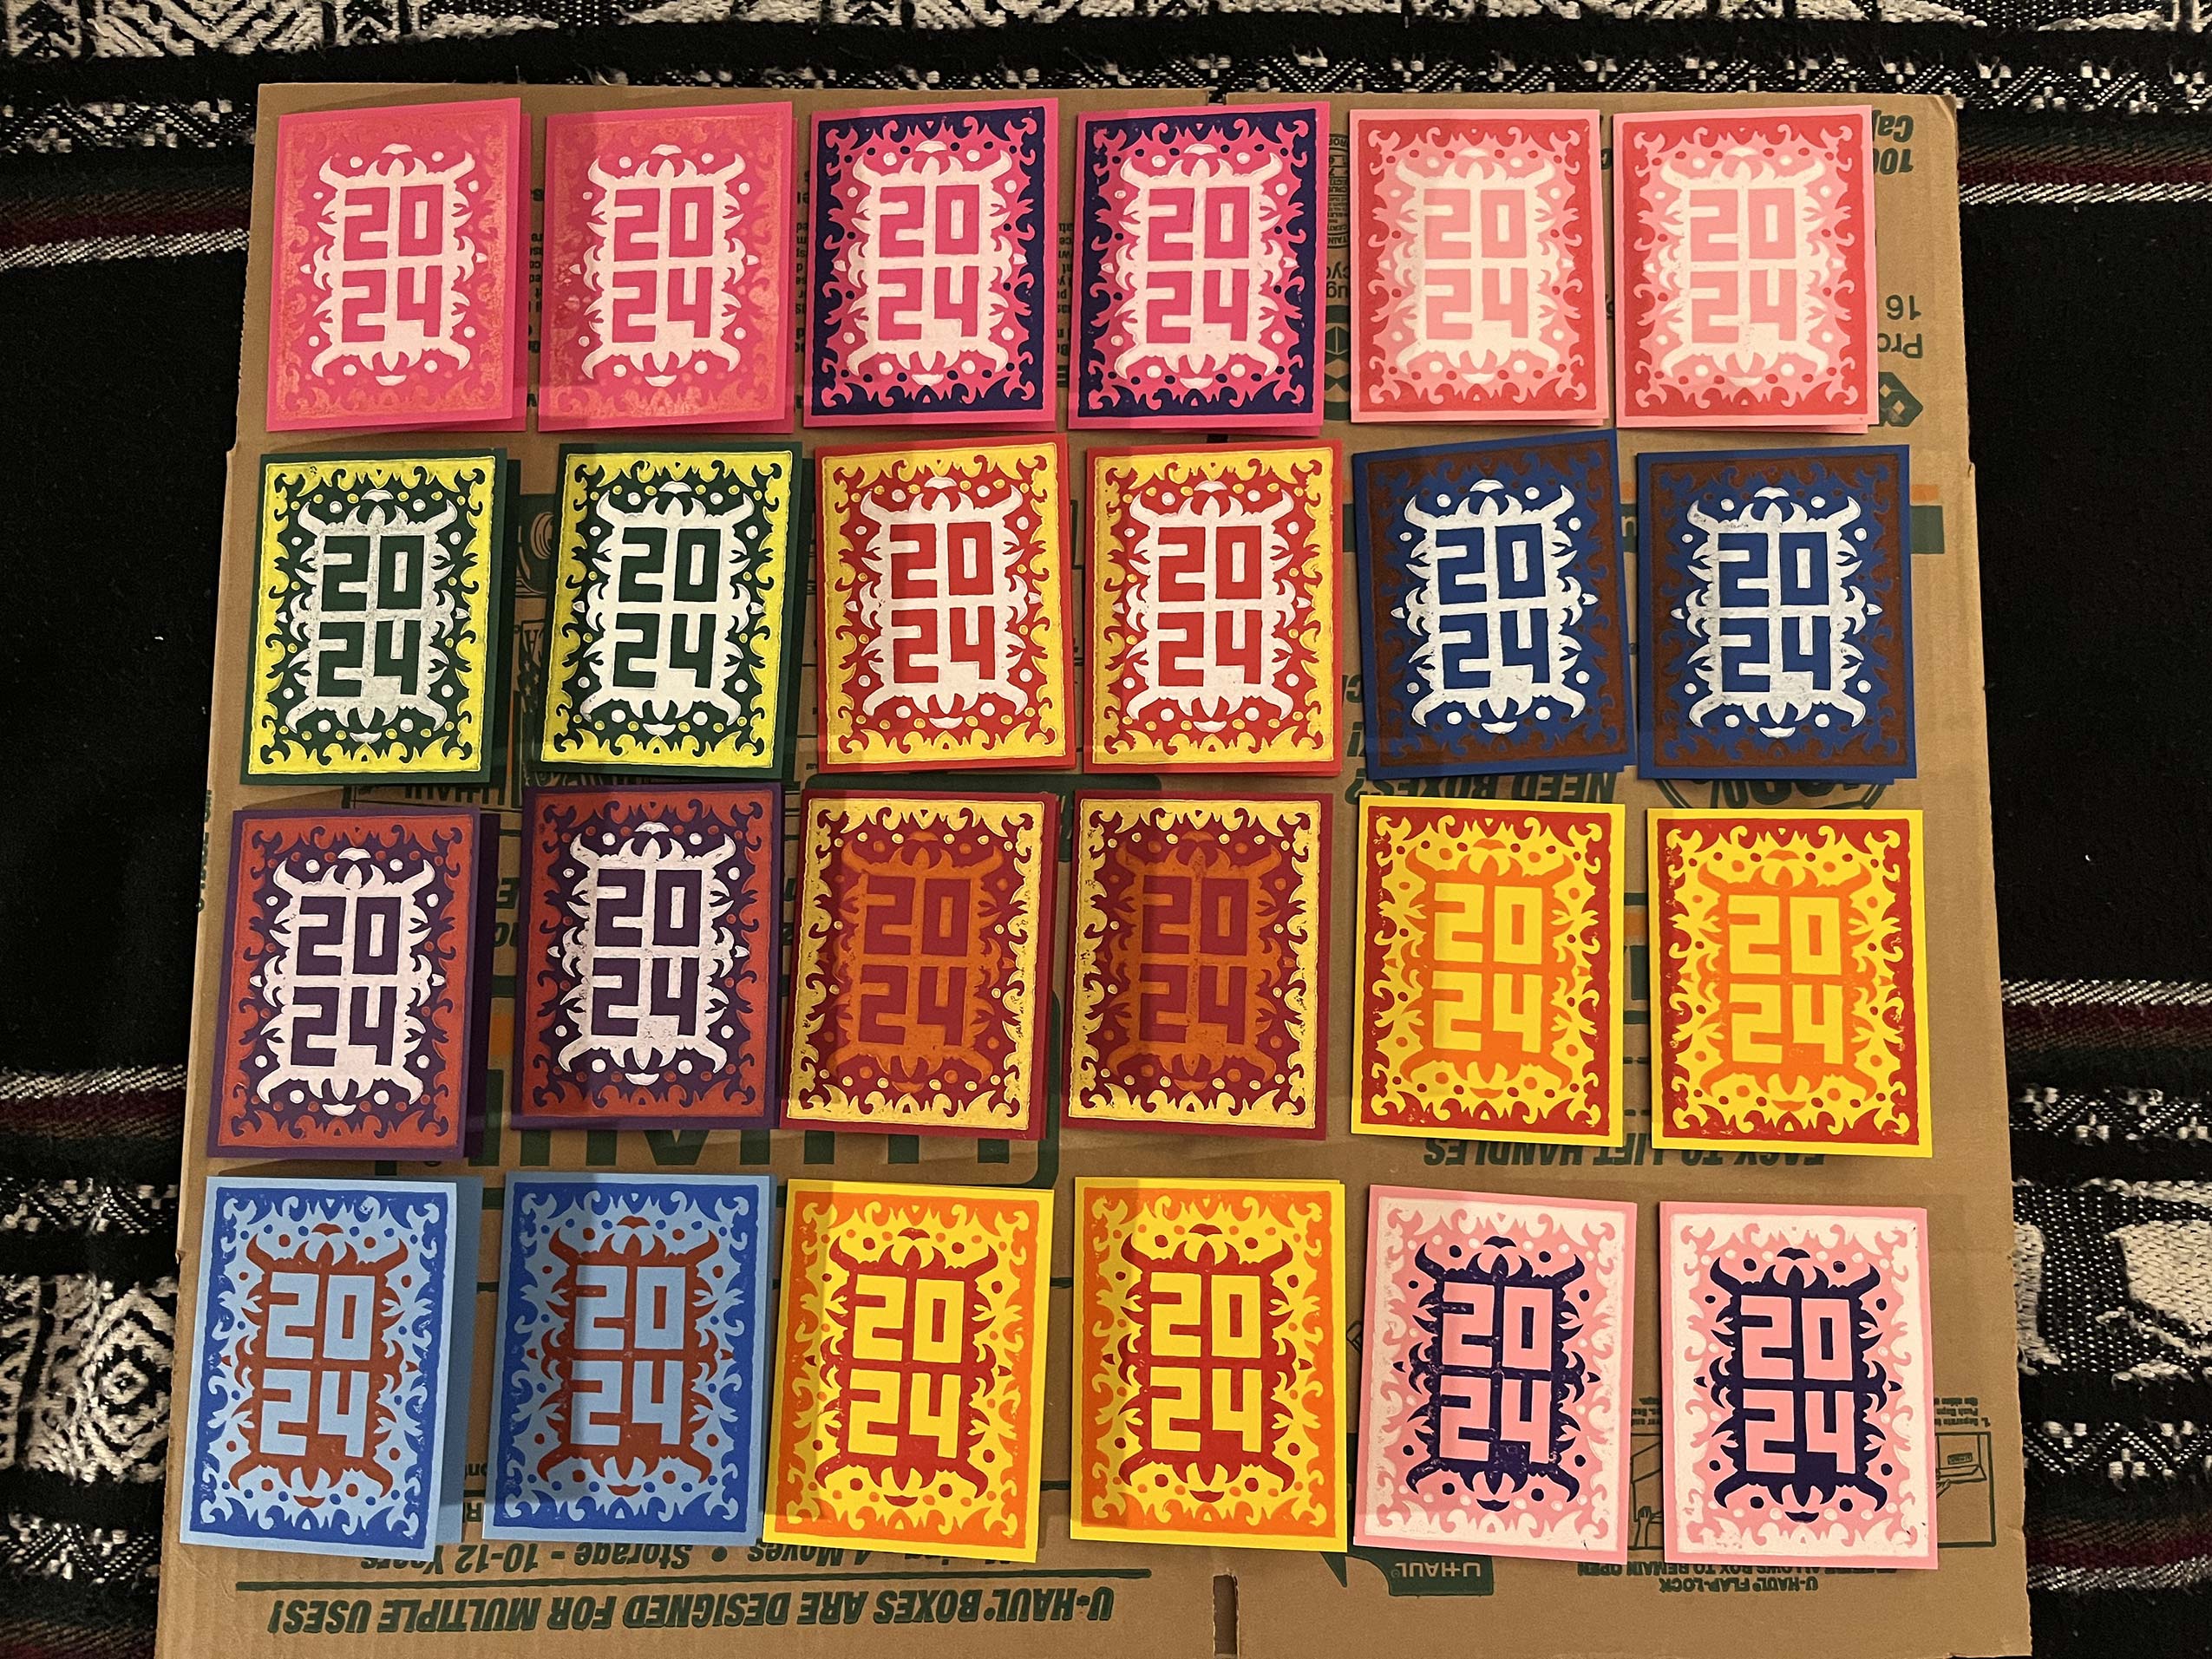
- Twenty-Four Down, Sixteen To Go I was thrilled at this point and was absolutely loving the combinations.
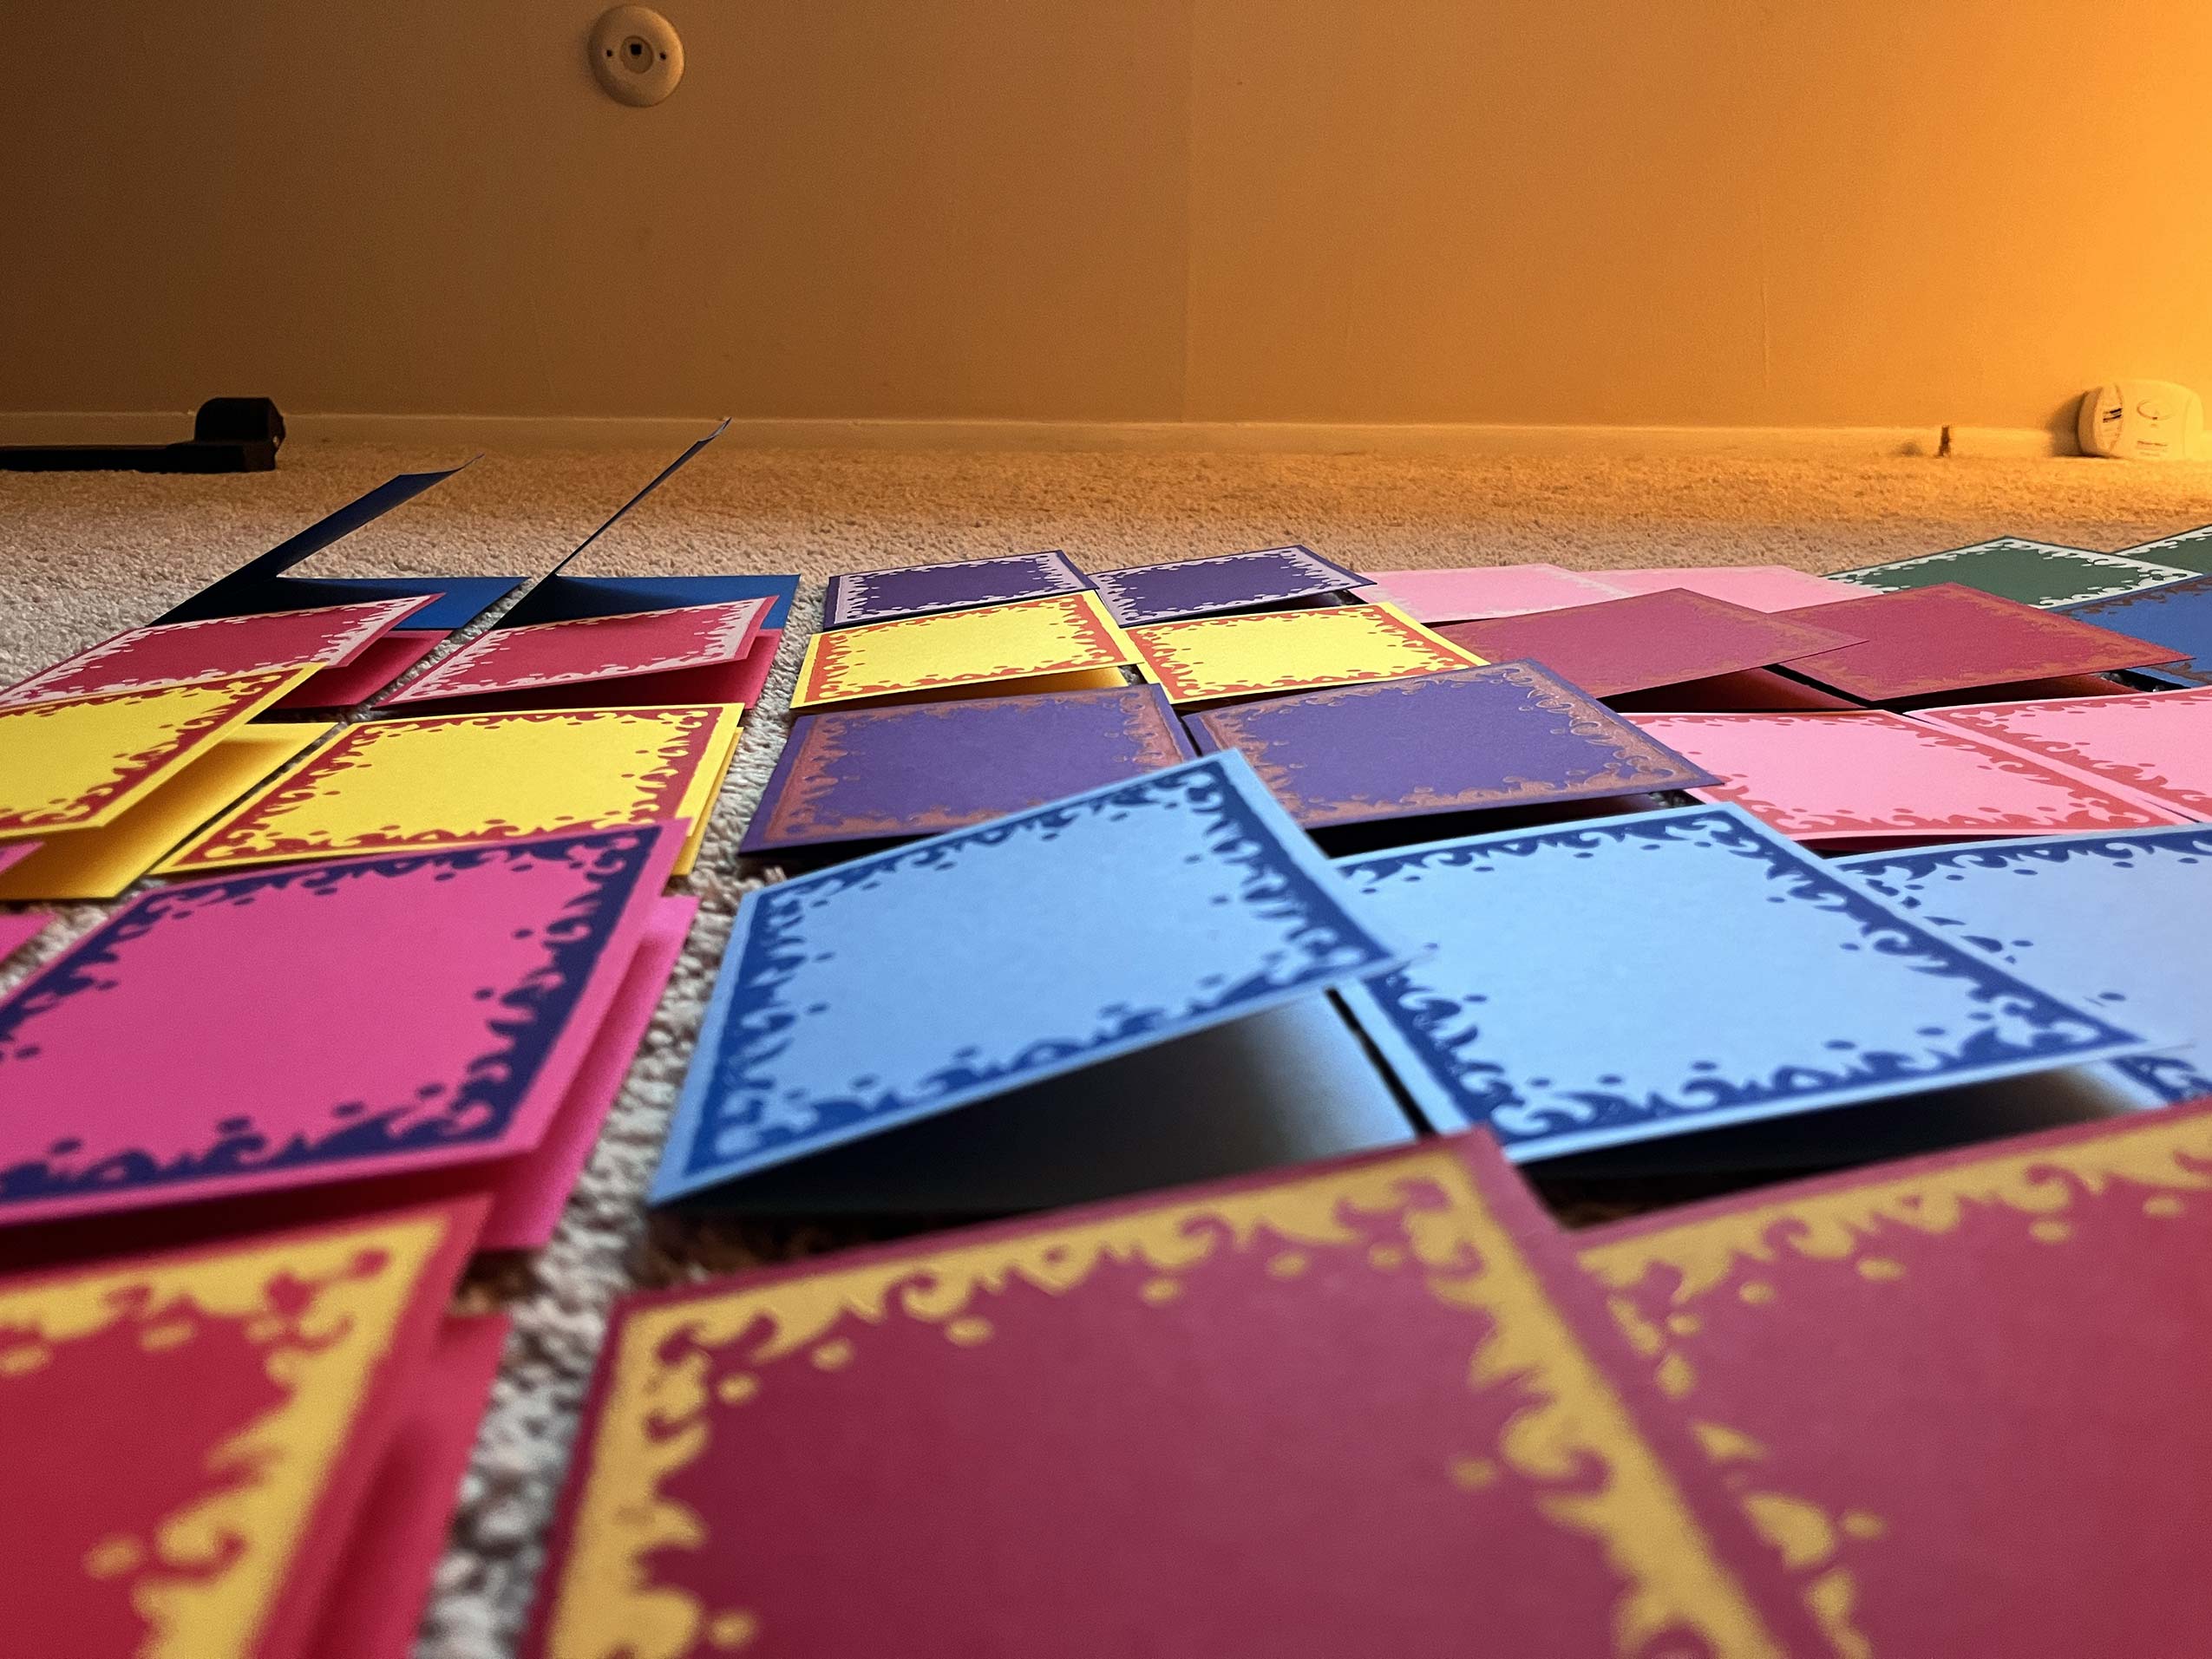
- Personal Prints The mailing list grew to 37 this year and I wasn't sure if I'd be able to keep a card for myself, so I printed a few for myself.
- Attempting To Fix Dark Pink Again, given how little room I had for mistakes, I tried to fix the pink on dark pink print, but, despite it kind of looking interesting, I couldn't send these off to anyone.
- Plates: Post Print These guys have taken a beating with 10 or so inks and washings for each. They'll now be wrapped-up and retired to my archives.
- Printing Finished The fun part is now finished and I'm feeling rather proud of myself. This one turned-out great.
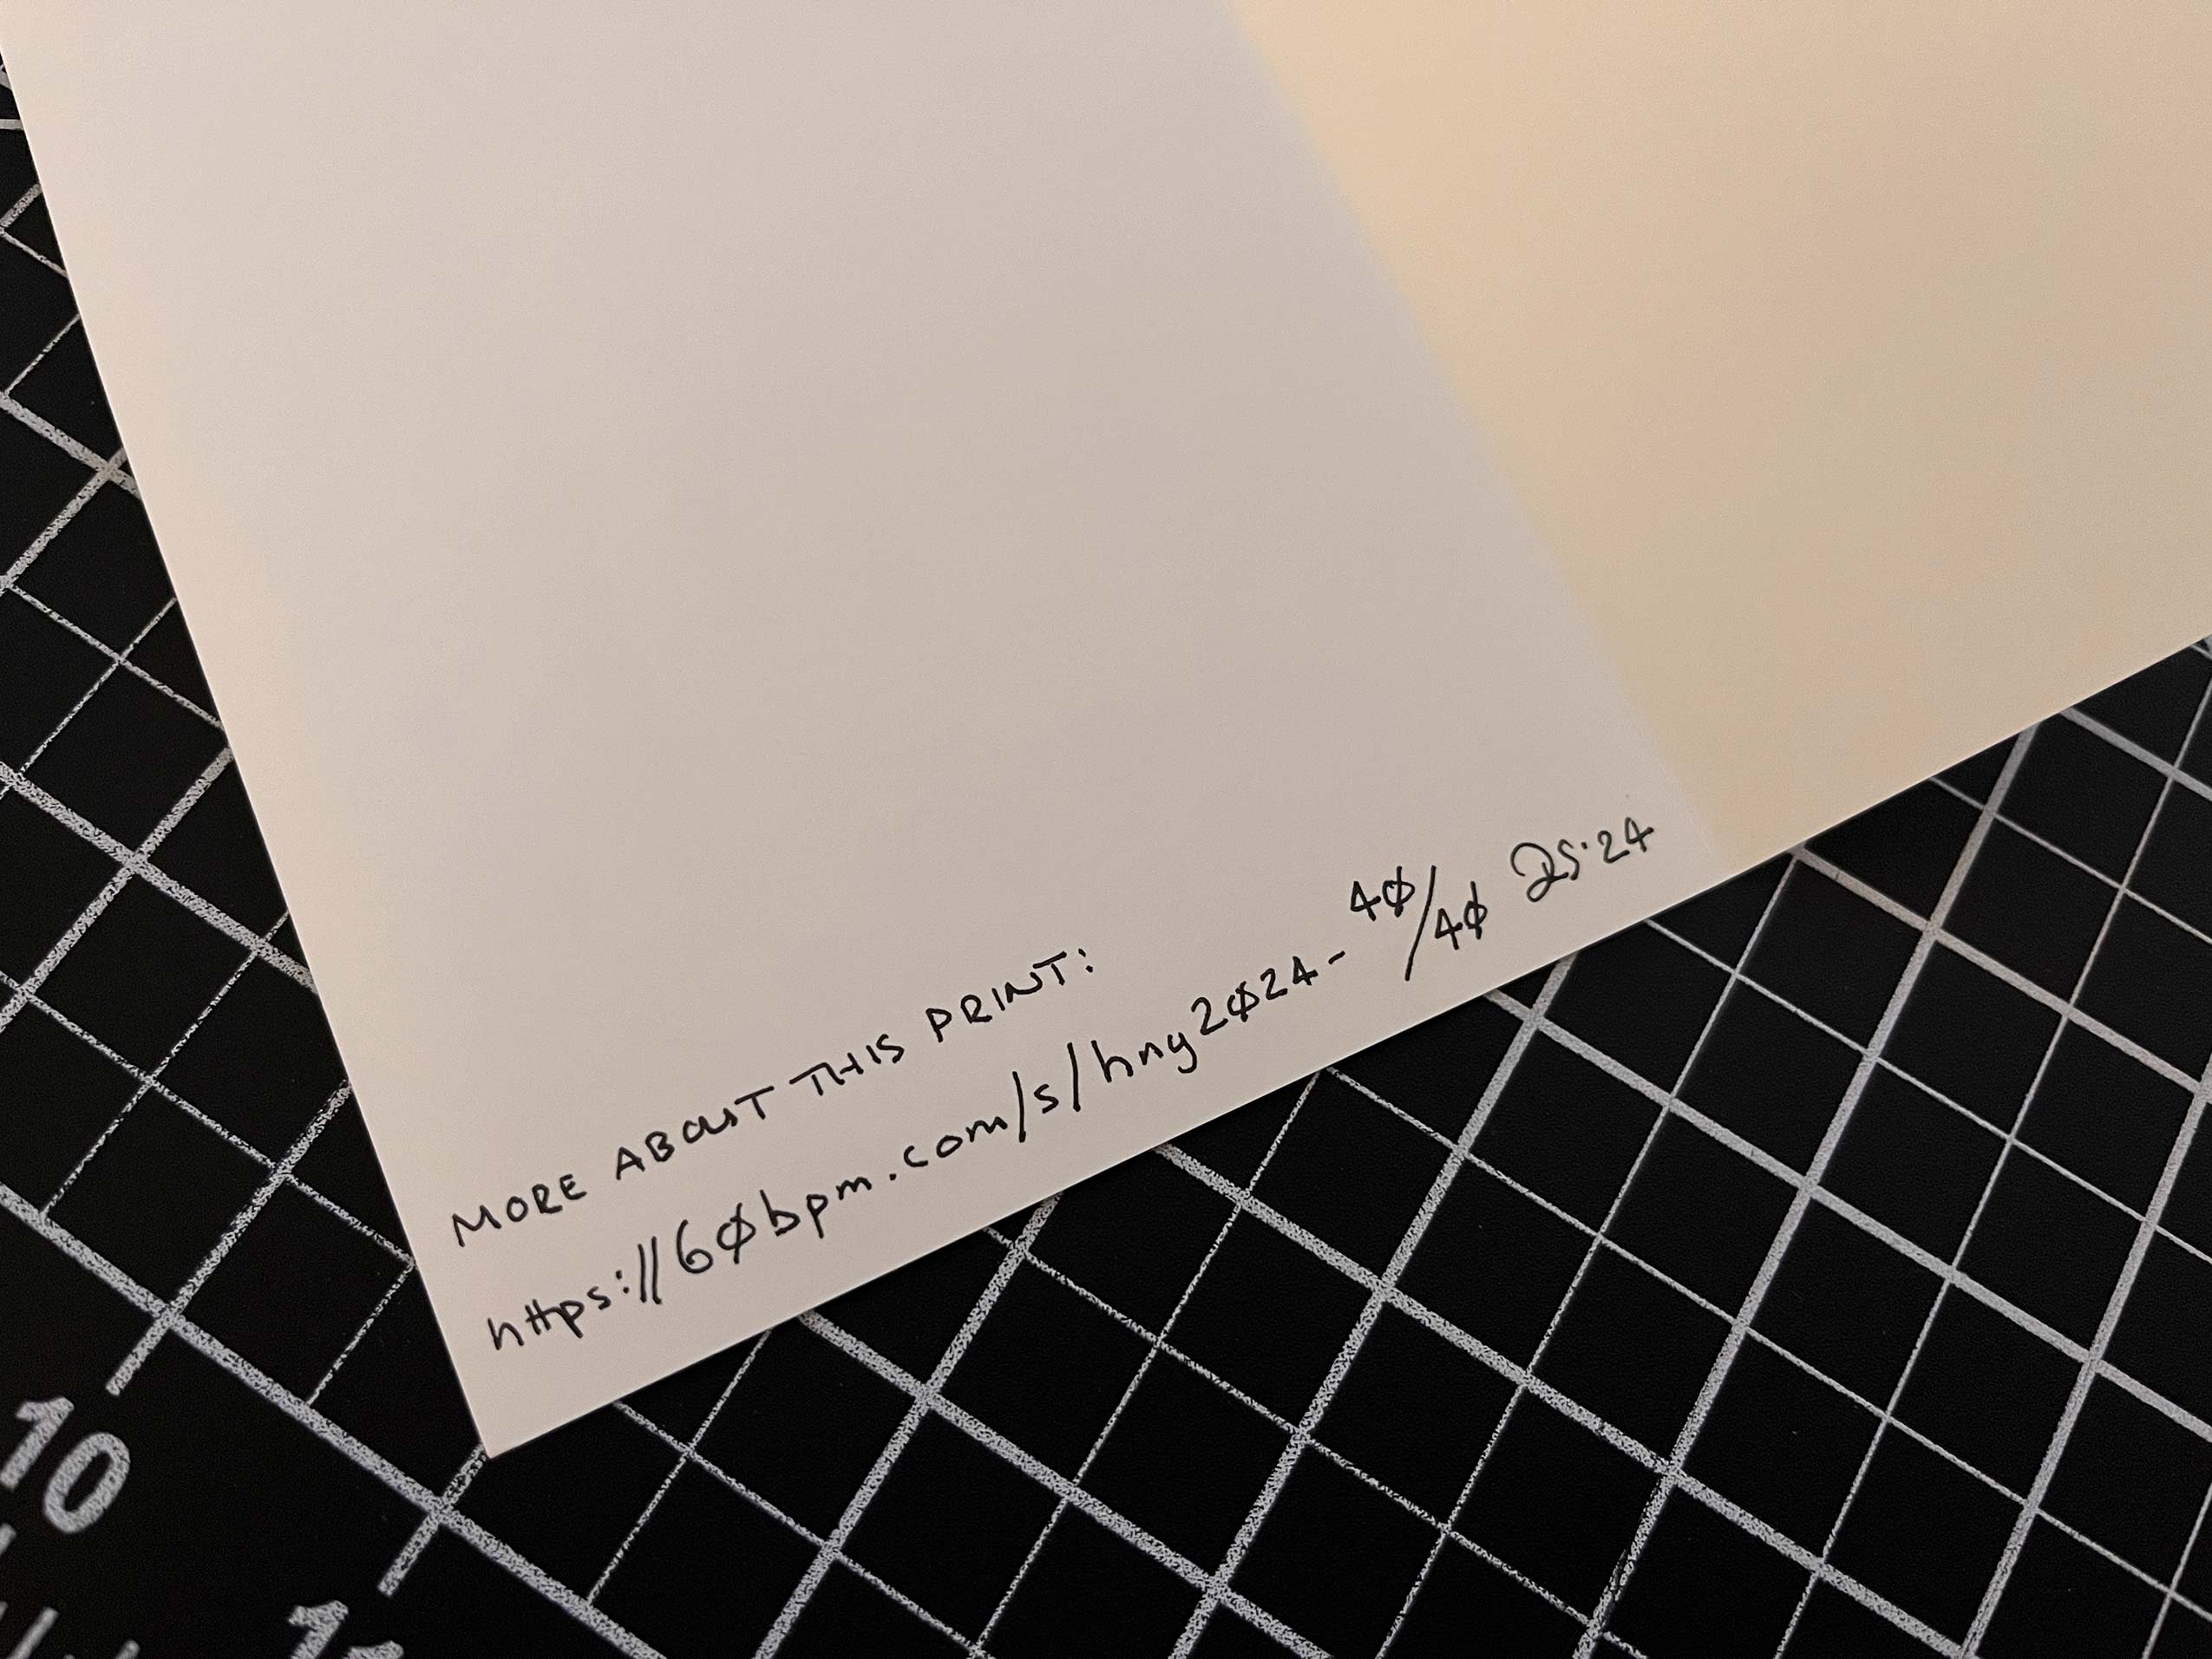
- Inscribing This is a tedious step and my hand writing has gotten bad enough that it's bordering on embarrassing. I may do these with a printer in the future.
- Ready To Mail All wrapped-up with a bow. That's a wrap. Onto the Happy Birthday 2024 print!!!
Video Gallery
- HNY2024 Each version of this print in sequence and back.
© 2026 60bpm