Linocut Printmaking: Happy Birthday 2025
January 31, 2025
Usually, the creation of this print comes hot on the heels of the Happy New Year print, which I’d been procrastinating on doing. While this year was no different, I had a better time making this one because I learned a bit from having to embellish the previous Happy New Year print with additional media. That was the plan from the beginning for this print, so the process was a lot less stressful.
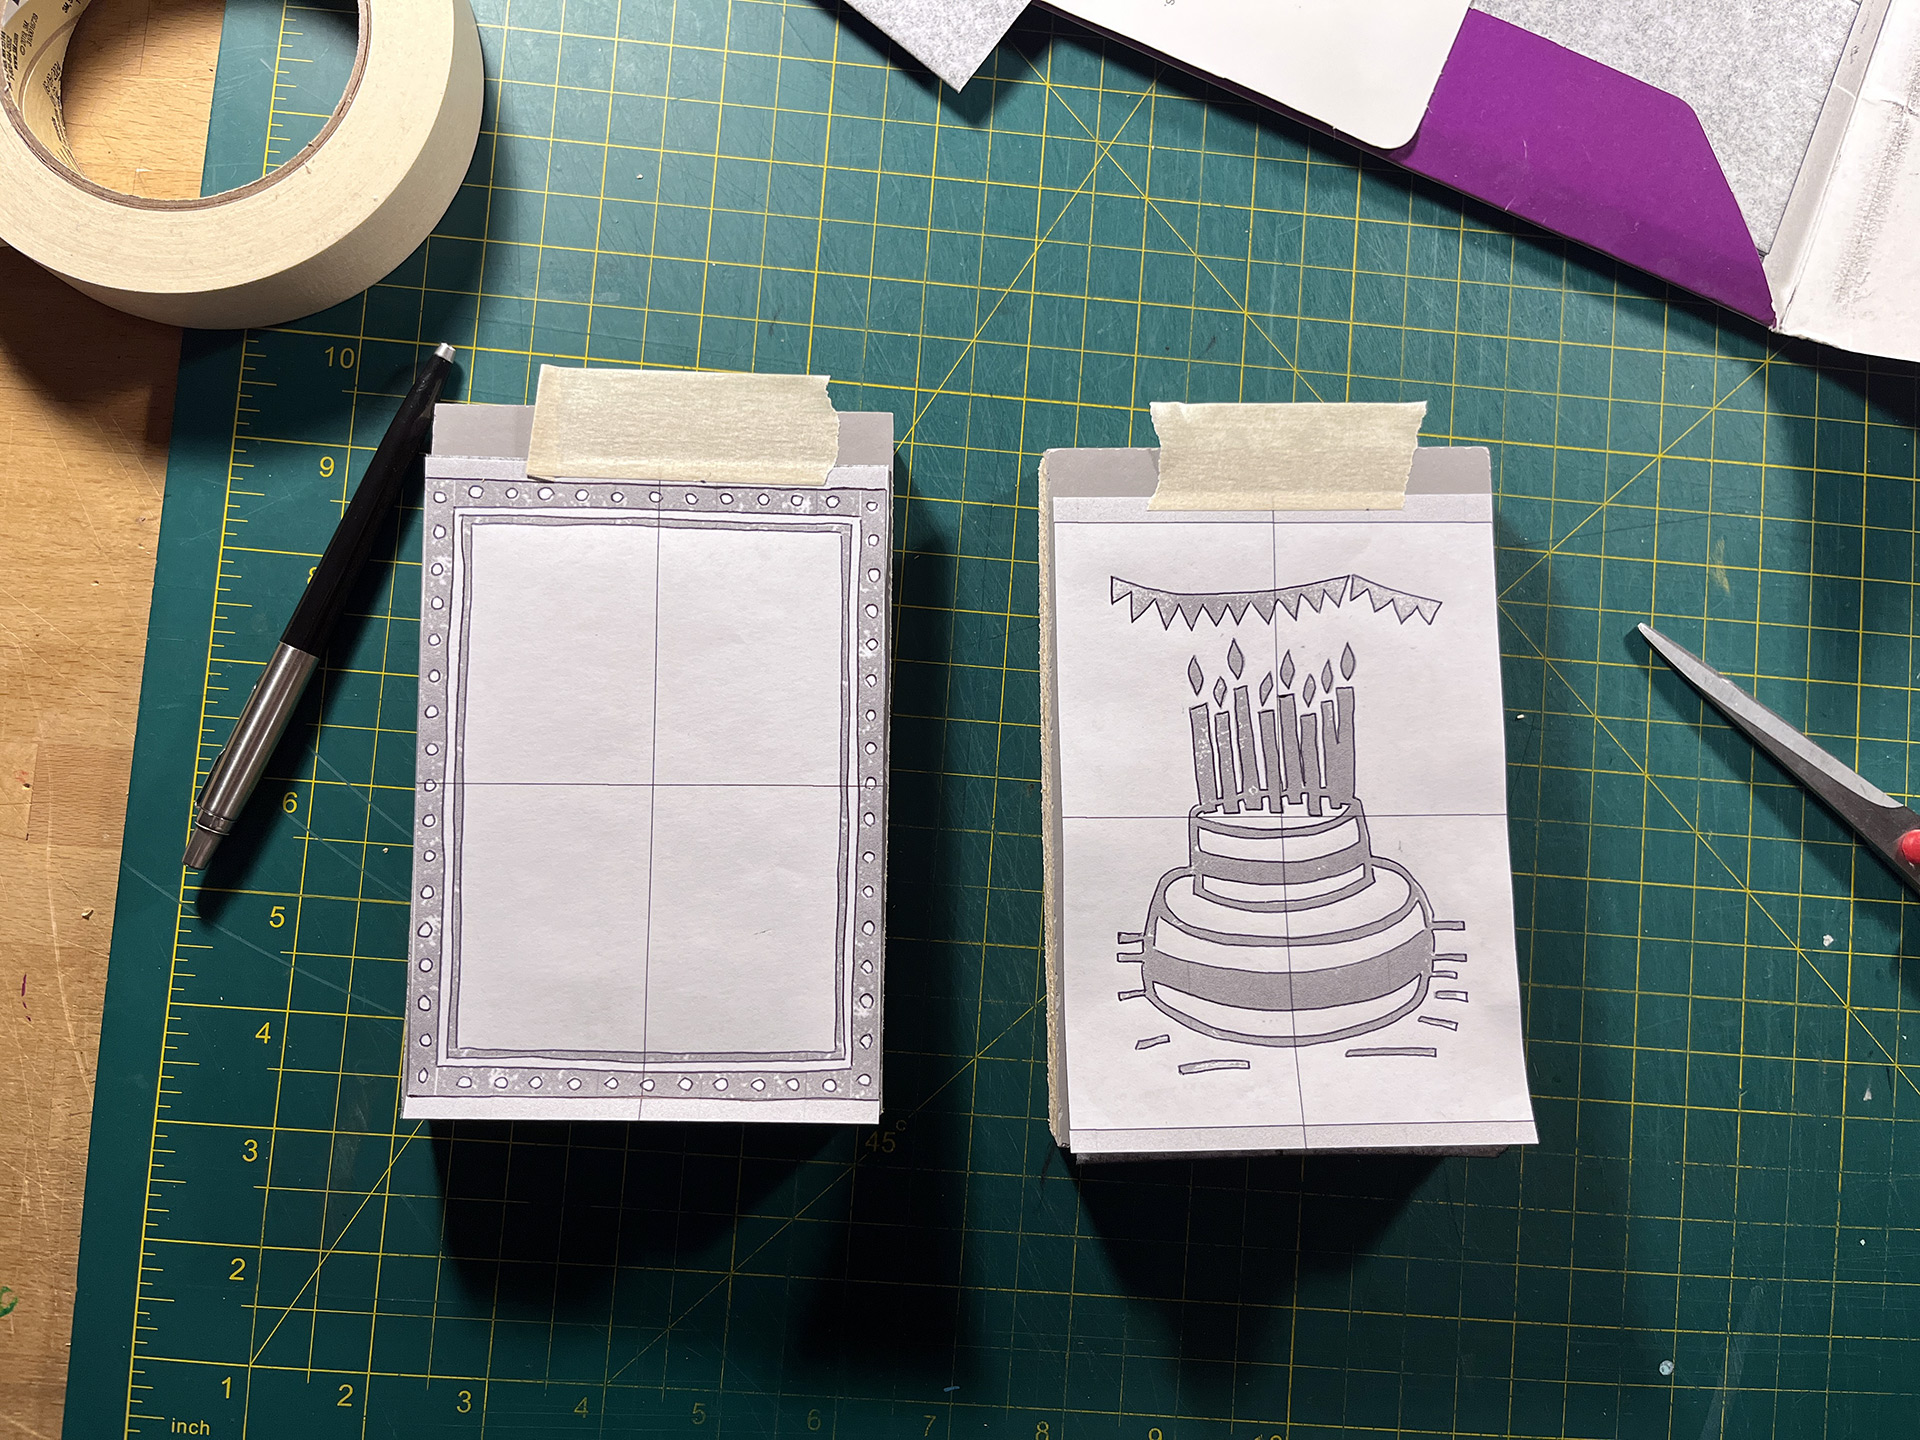
This year’s print is similar to last year’s, featuring a cake inside a border. The inspiration came from a print I found online that you can see here. While I usually hate copying myself, I needed something simple that I could produce quickly and get out the door given I’ve already missed three birthdays already!
This was the first birthday card since 2002 which I used colored cards for, and, to make things easier on me, I went back and studied the color combinations from last year’s Happy New Year print. It helped to see which combinations worked well and make a spreadsheet detailing what colors to use for which plates on which cards on the first and second day of printing.
The plates came along well and, as I said already, the printing process went smoothly as well because I wasn’t sweating the results of the print, knowing that I’d be embellishing them afterward. The first six cards that I worked on turned out better than expected. Rather than do them all at once, my plan is to finish them as I send them out, which probably means anyone receiving them will get them even later than usual!
Anyway, see the pictures of the process below and view the final cards (as they’re finished) on the gallery page.
Image Gallery
- Transferring the Designs Carbon paper is used to transfer the design to the linocut blocks.
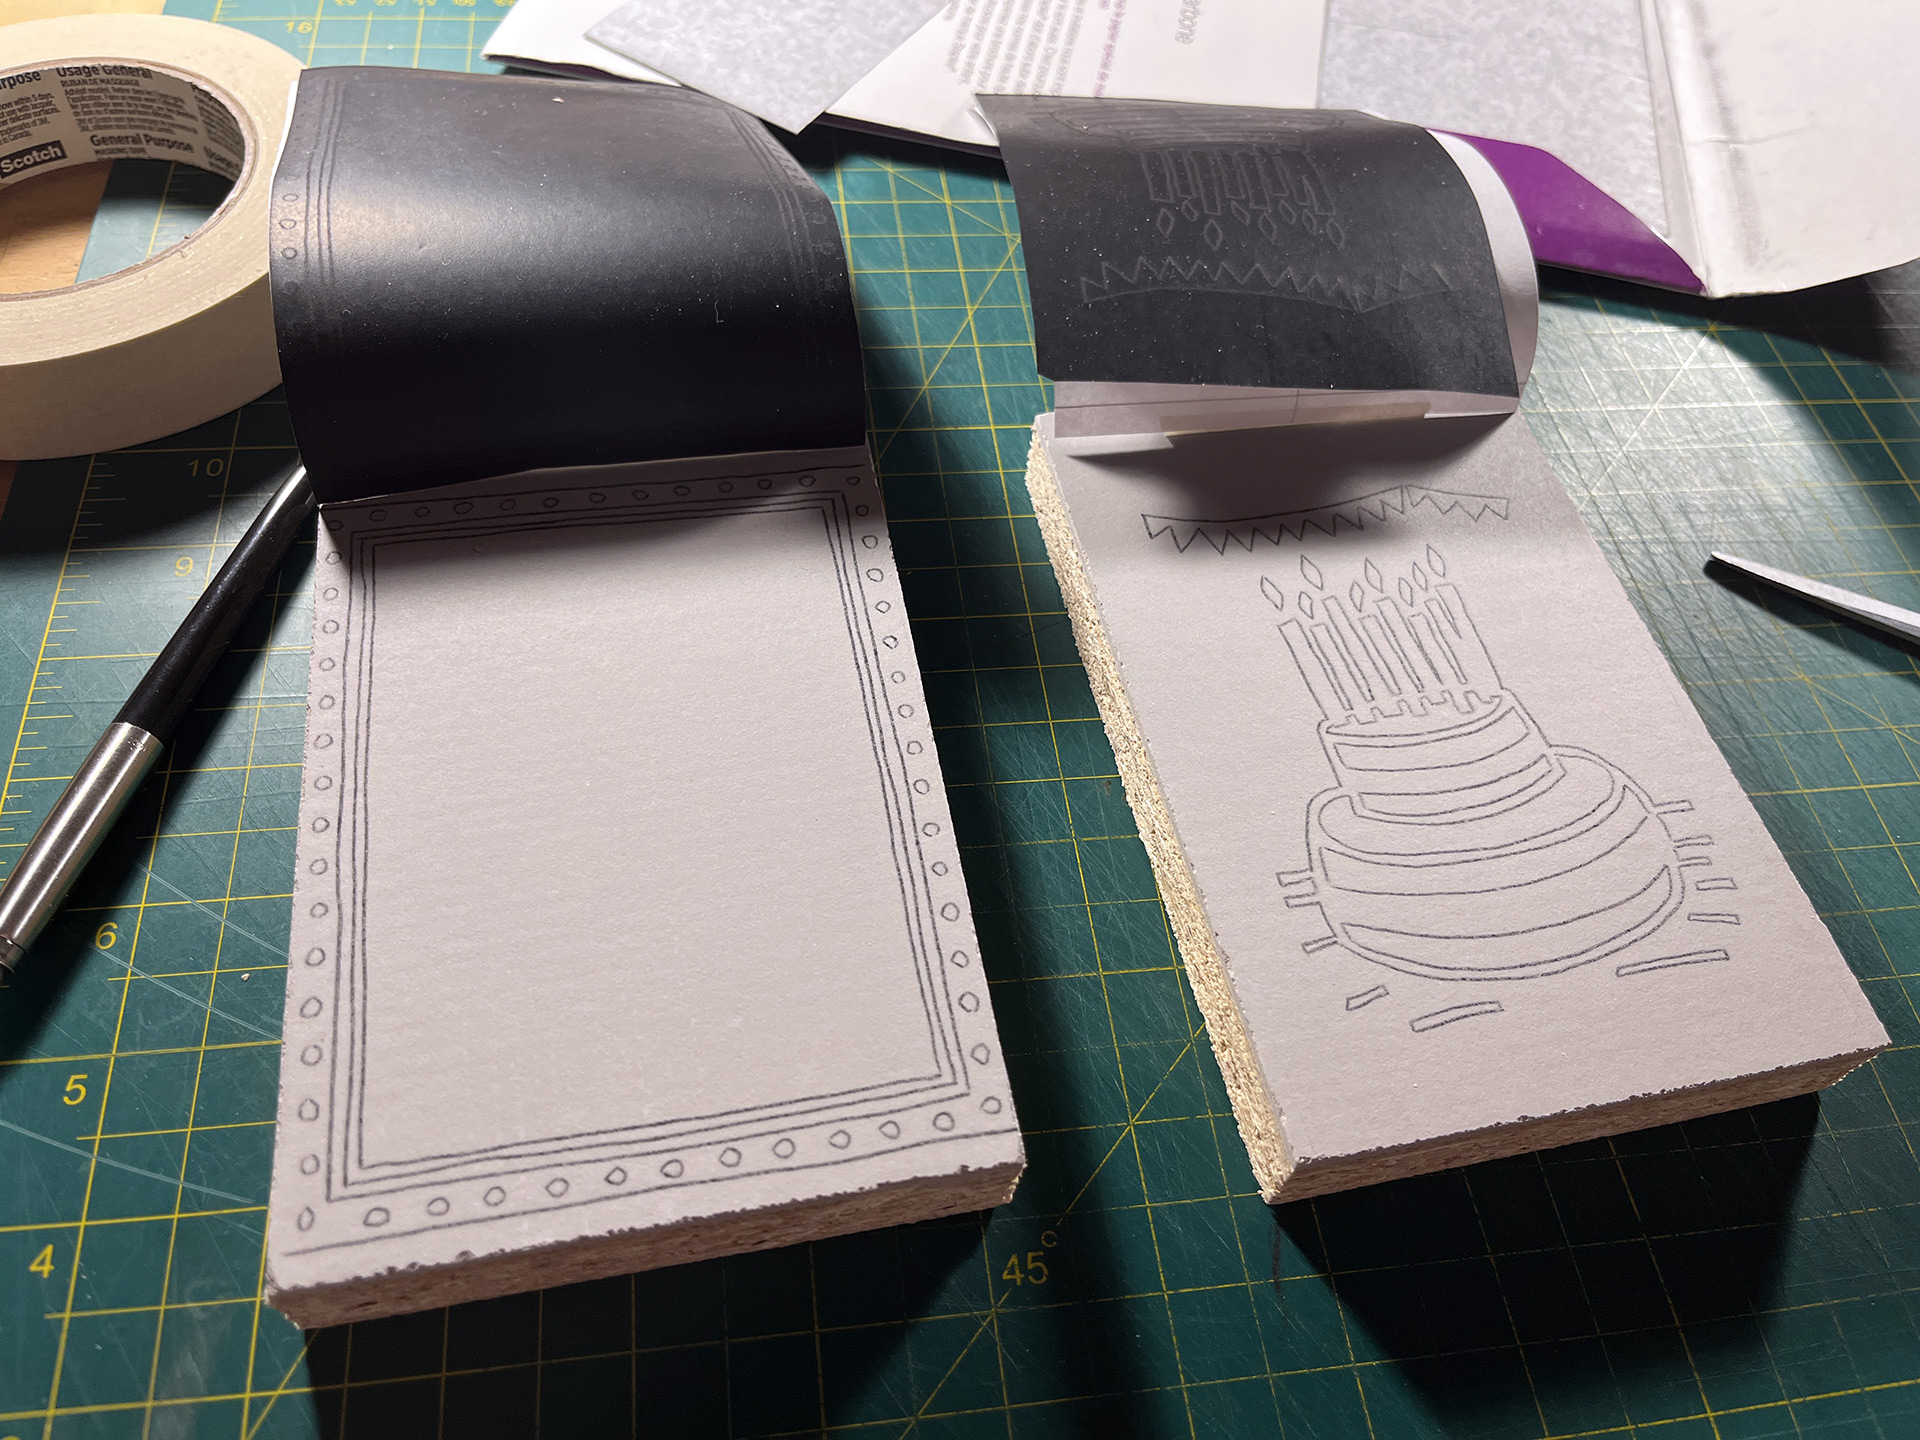
- Transferred Design Once the carbon transfer is complete, the lines are made permanent with a Sharpie marker to help prevent them from being smudged away during the cutting process.
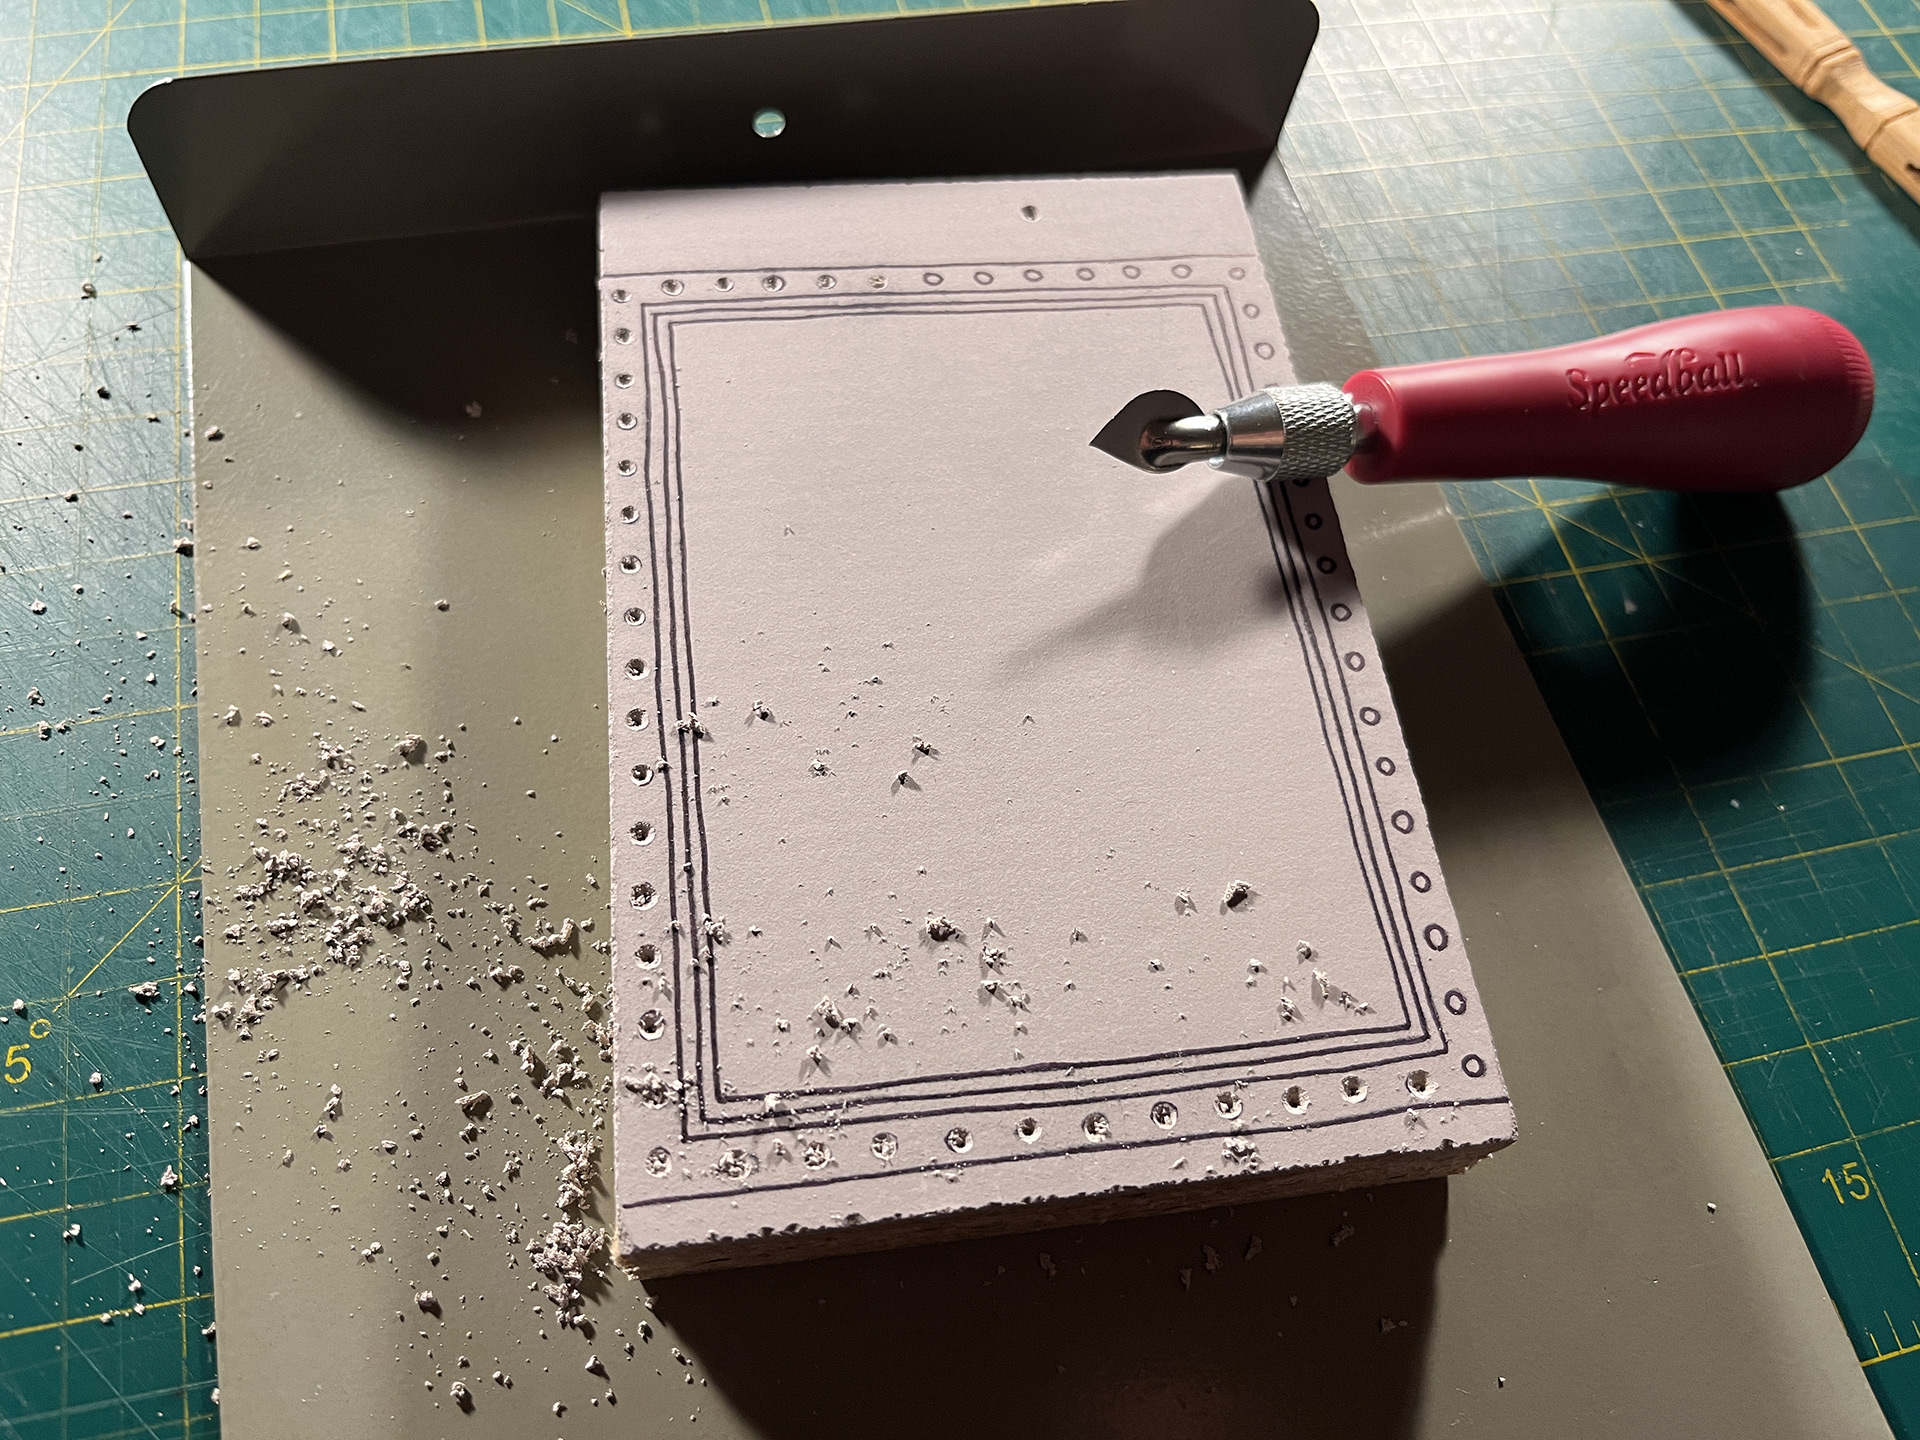
- Finally Using this Tool In the past, I've used my Dremel tool with a drill bit to create holes in my blocks, but discovered this tool (which I've never used before) can make holes as well.
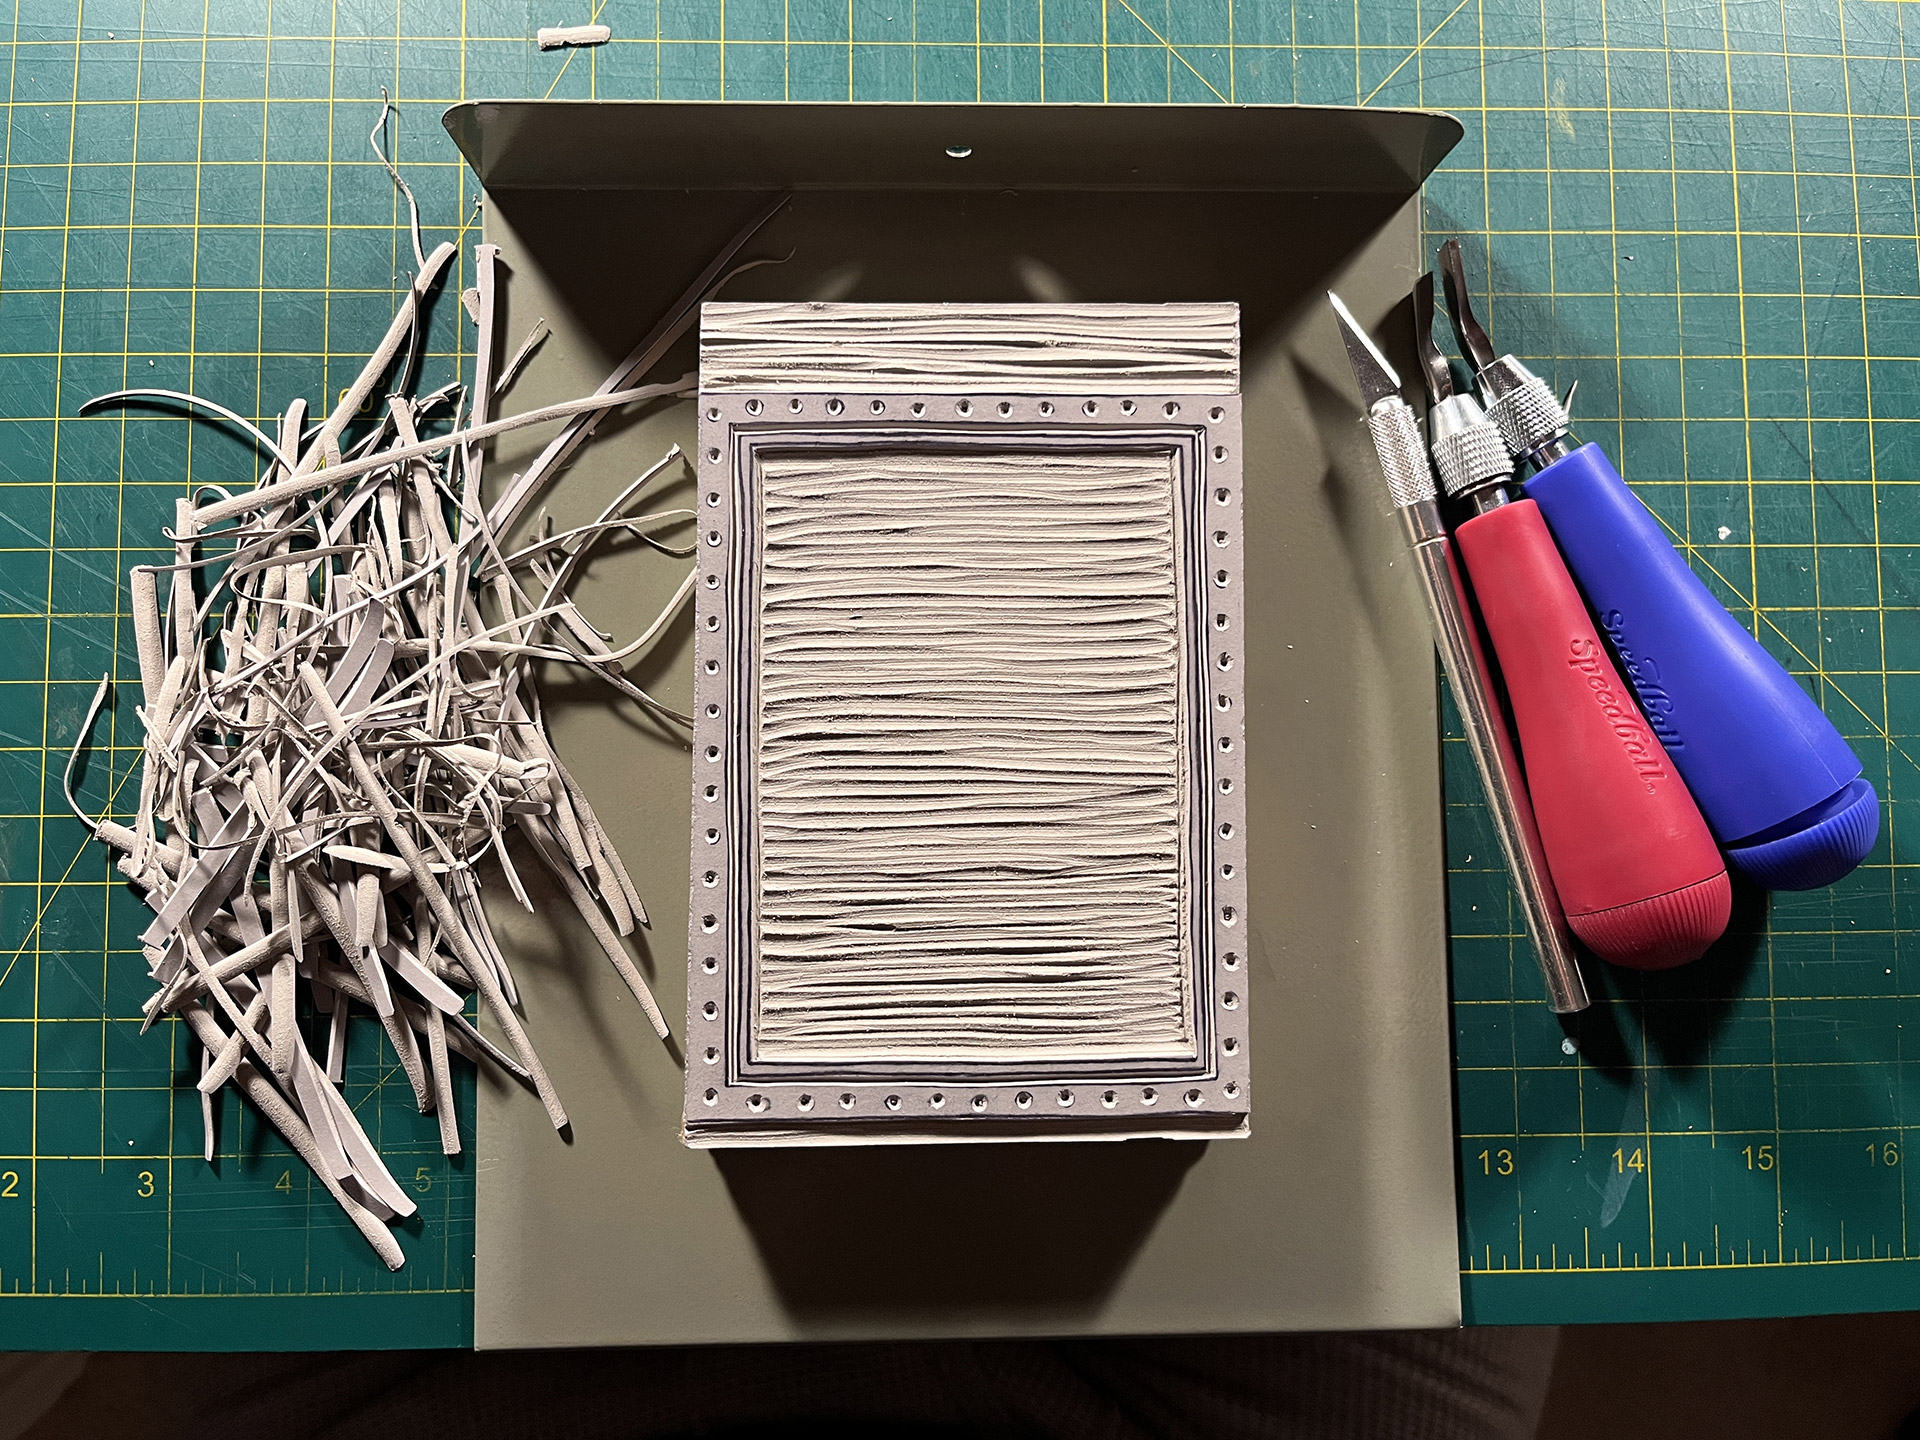
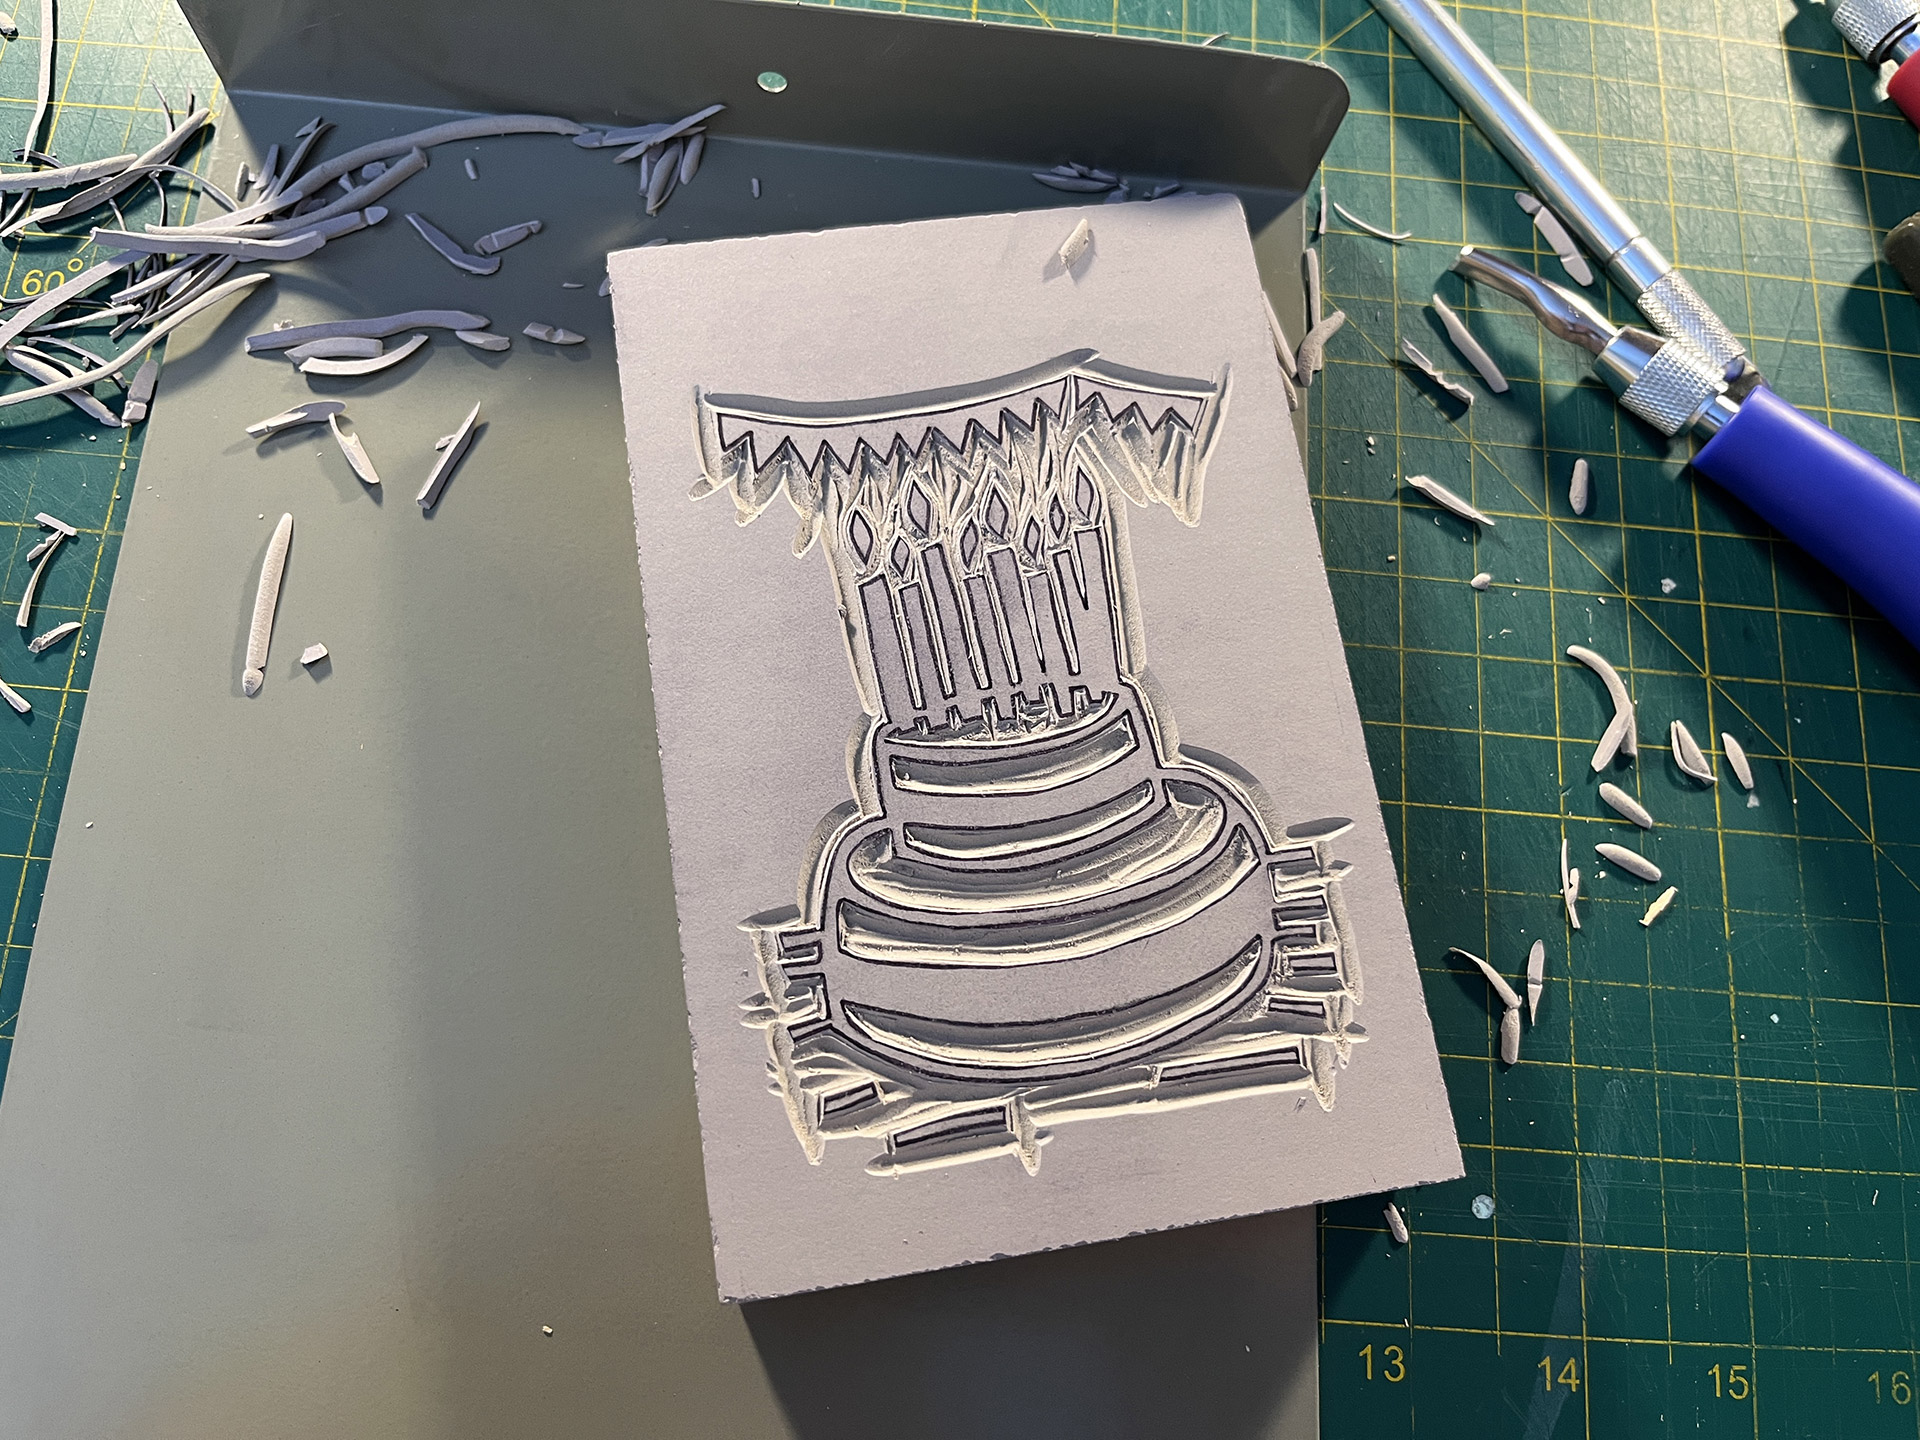
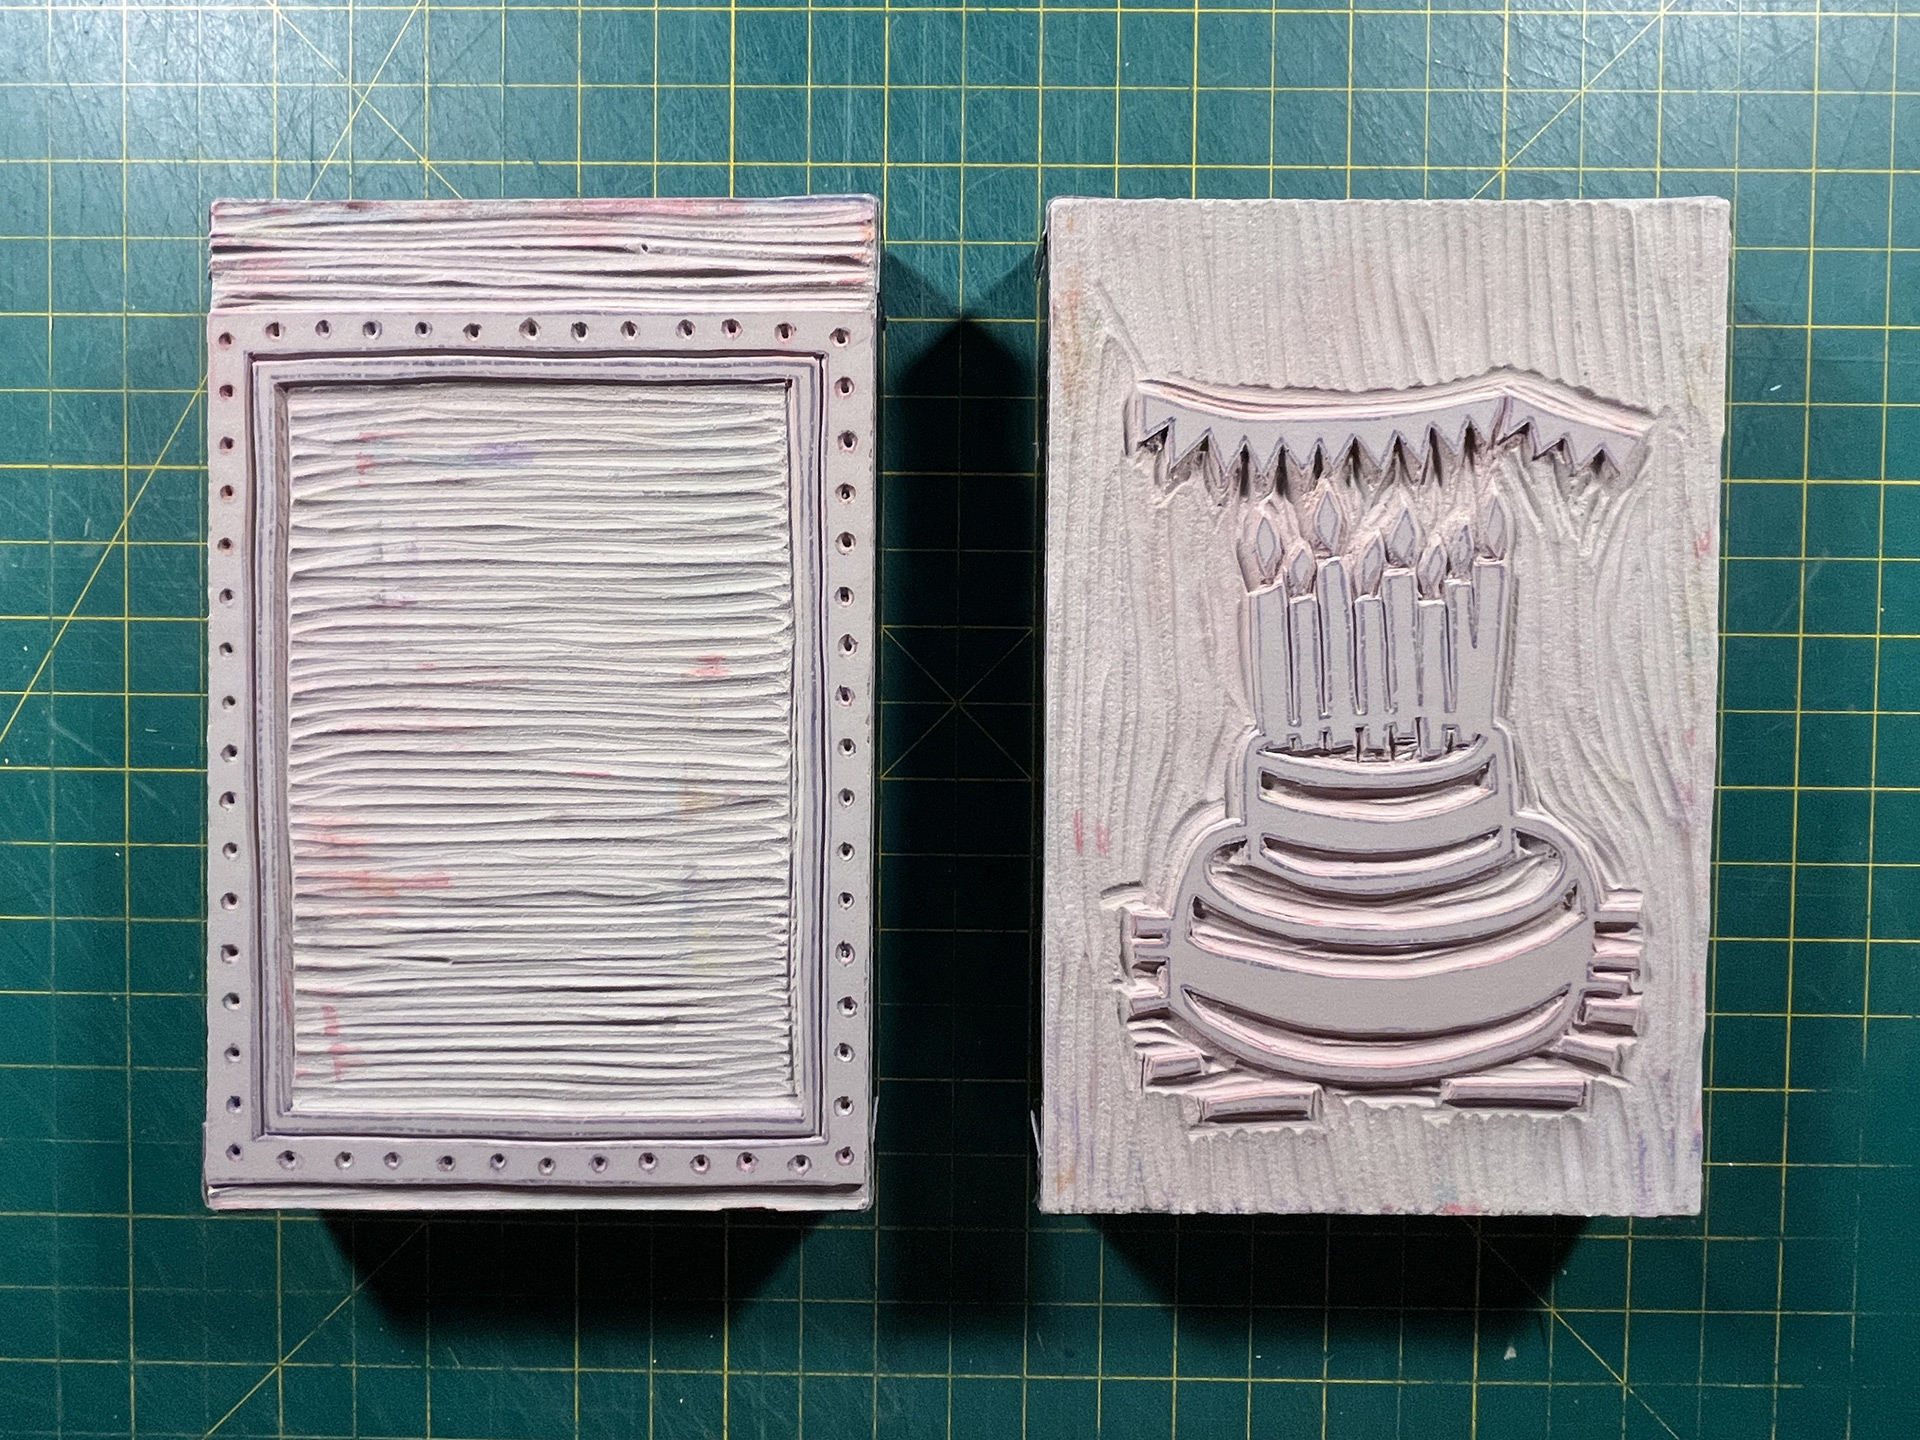
- Plate #1 Finished The horizontal lines were a pleasure to cut.
- Beginning Plate #2 First, the details are cut-out, then the heavy duty removal can begin.
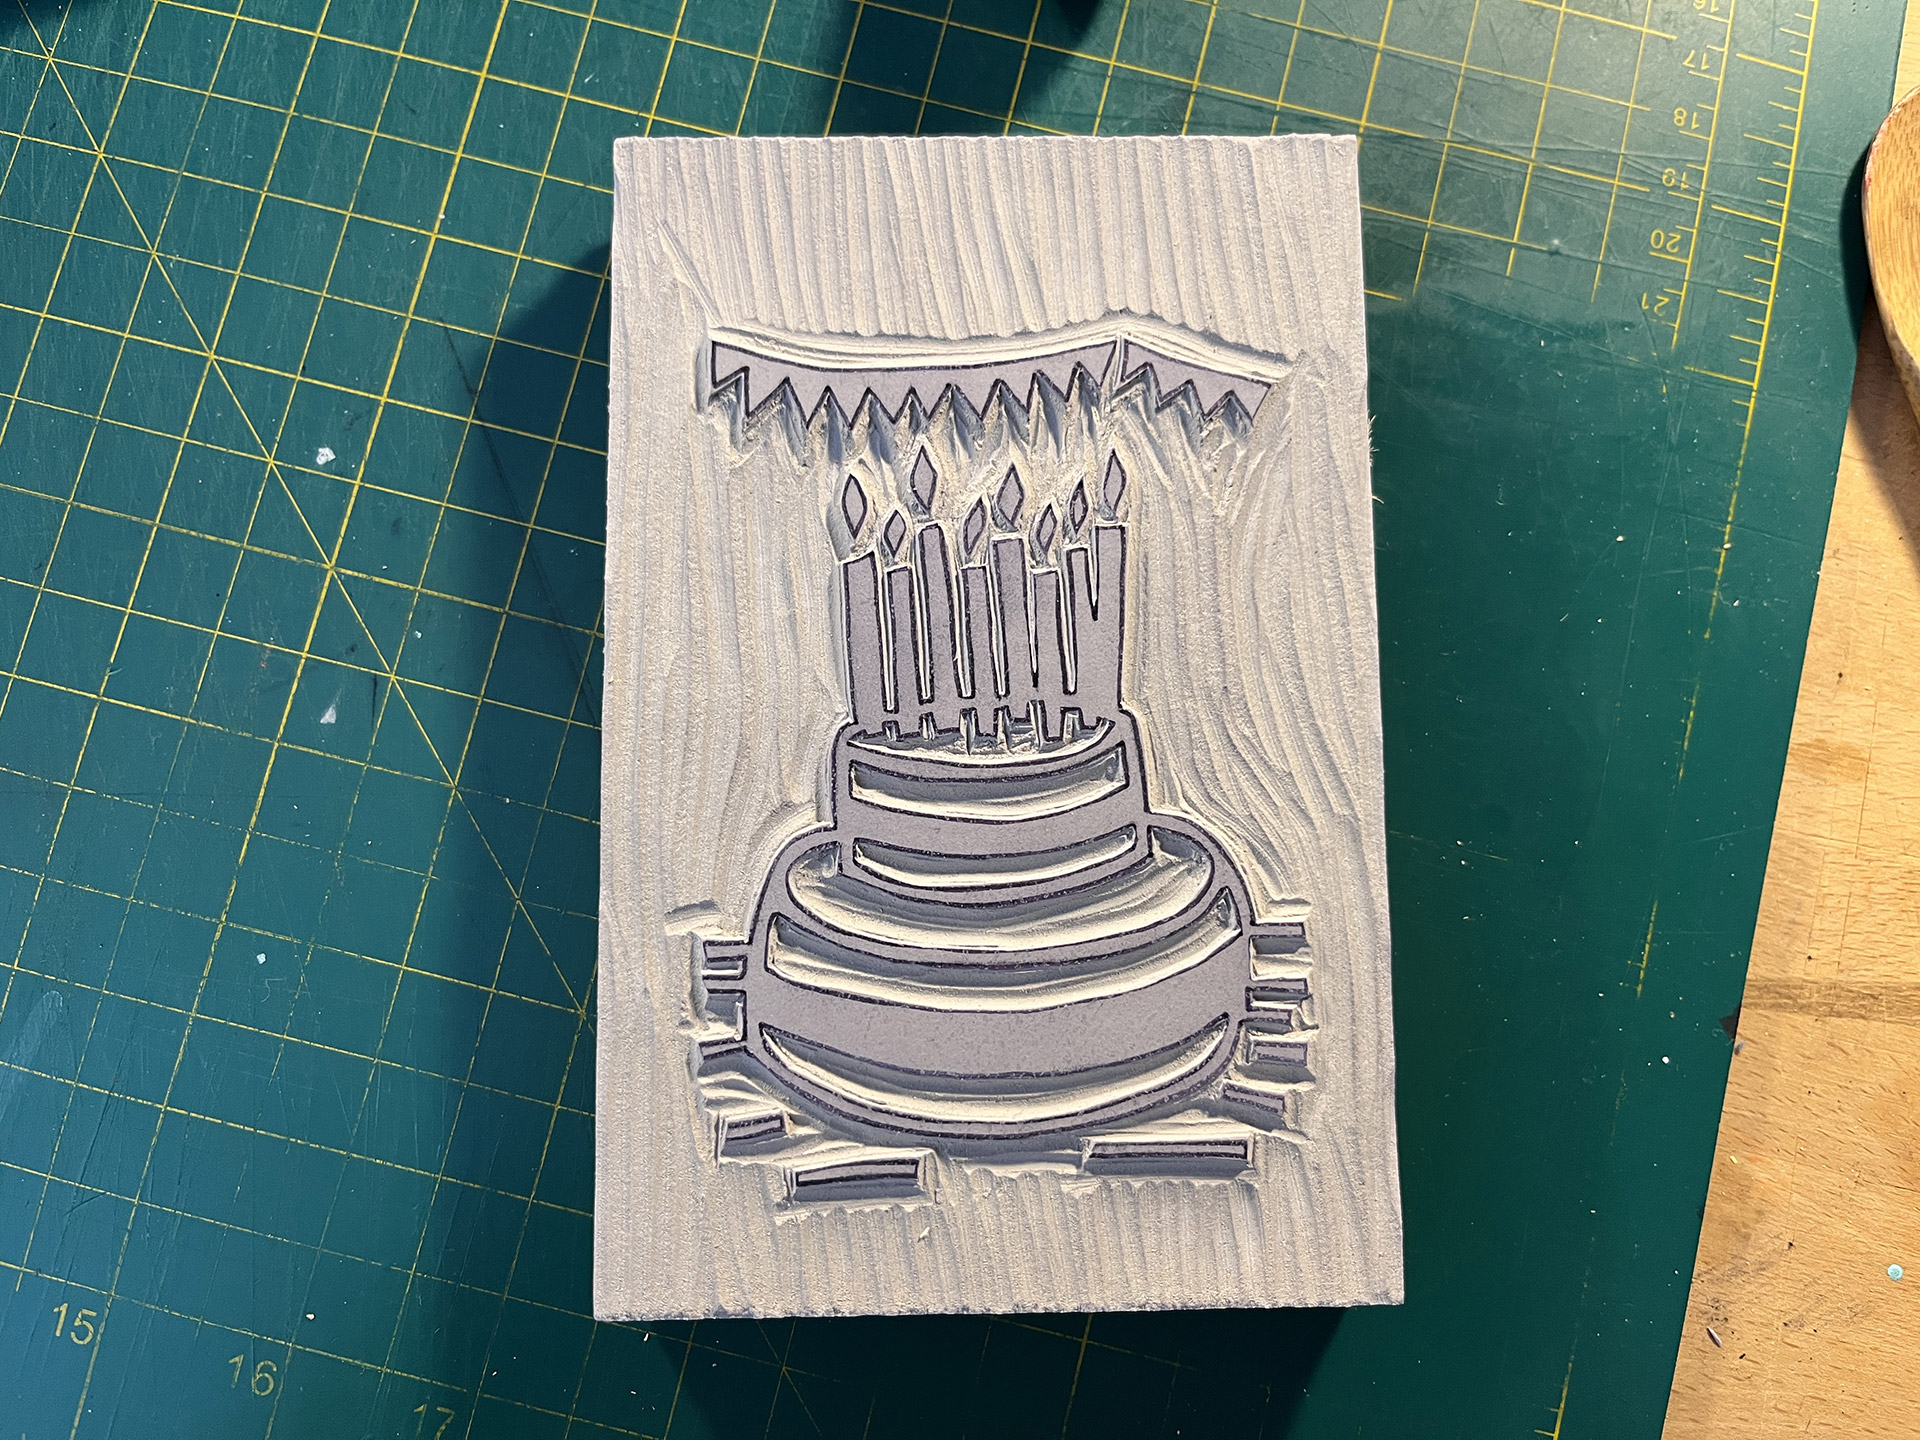
- Plate #2 Finished
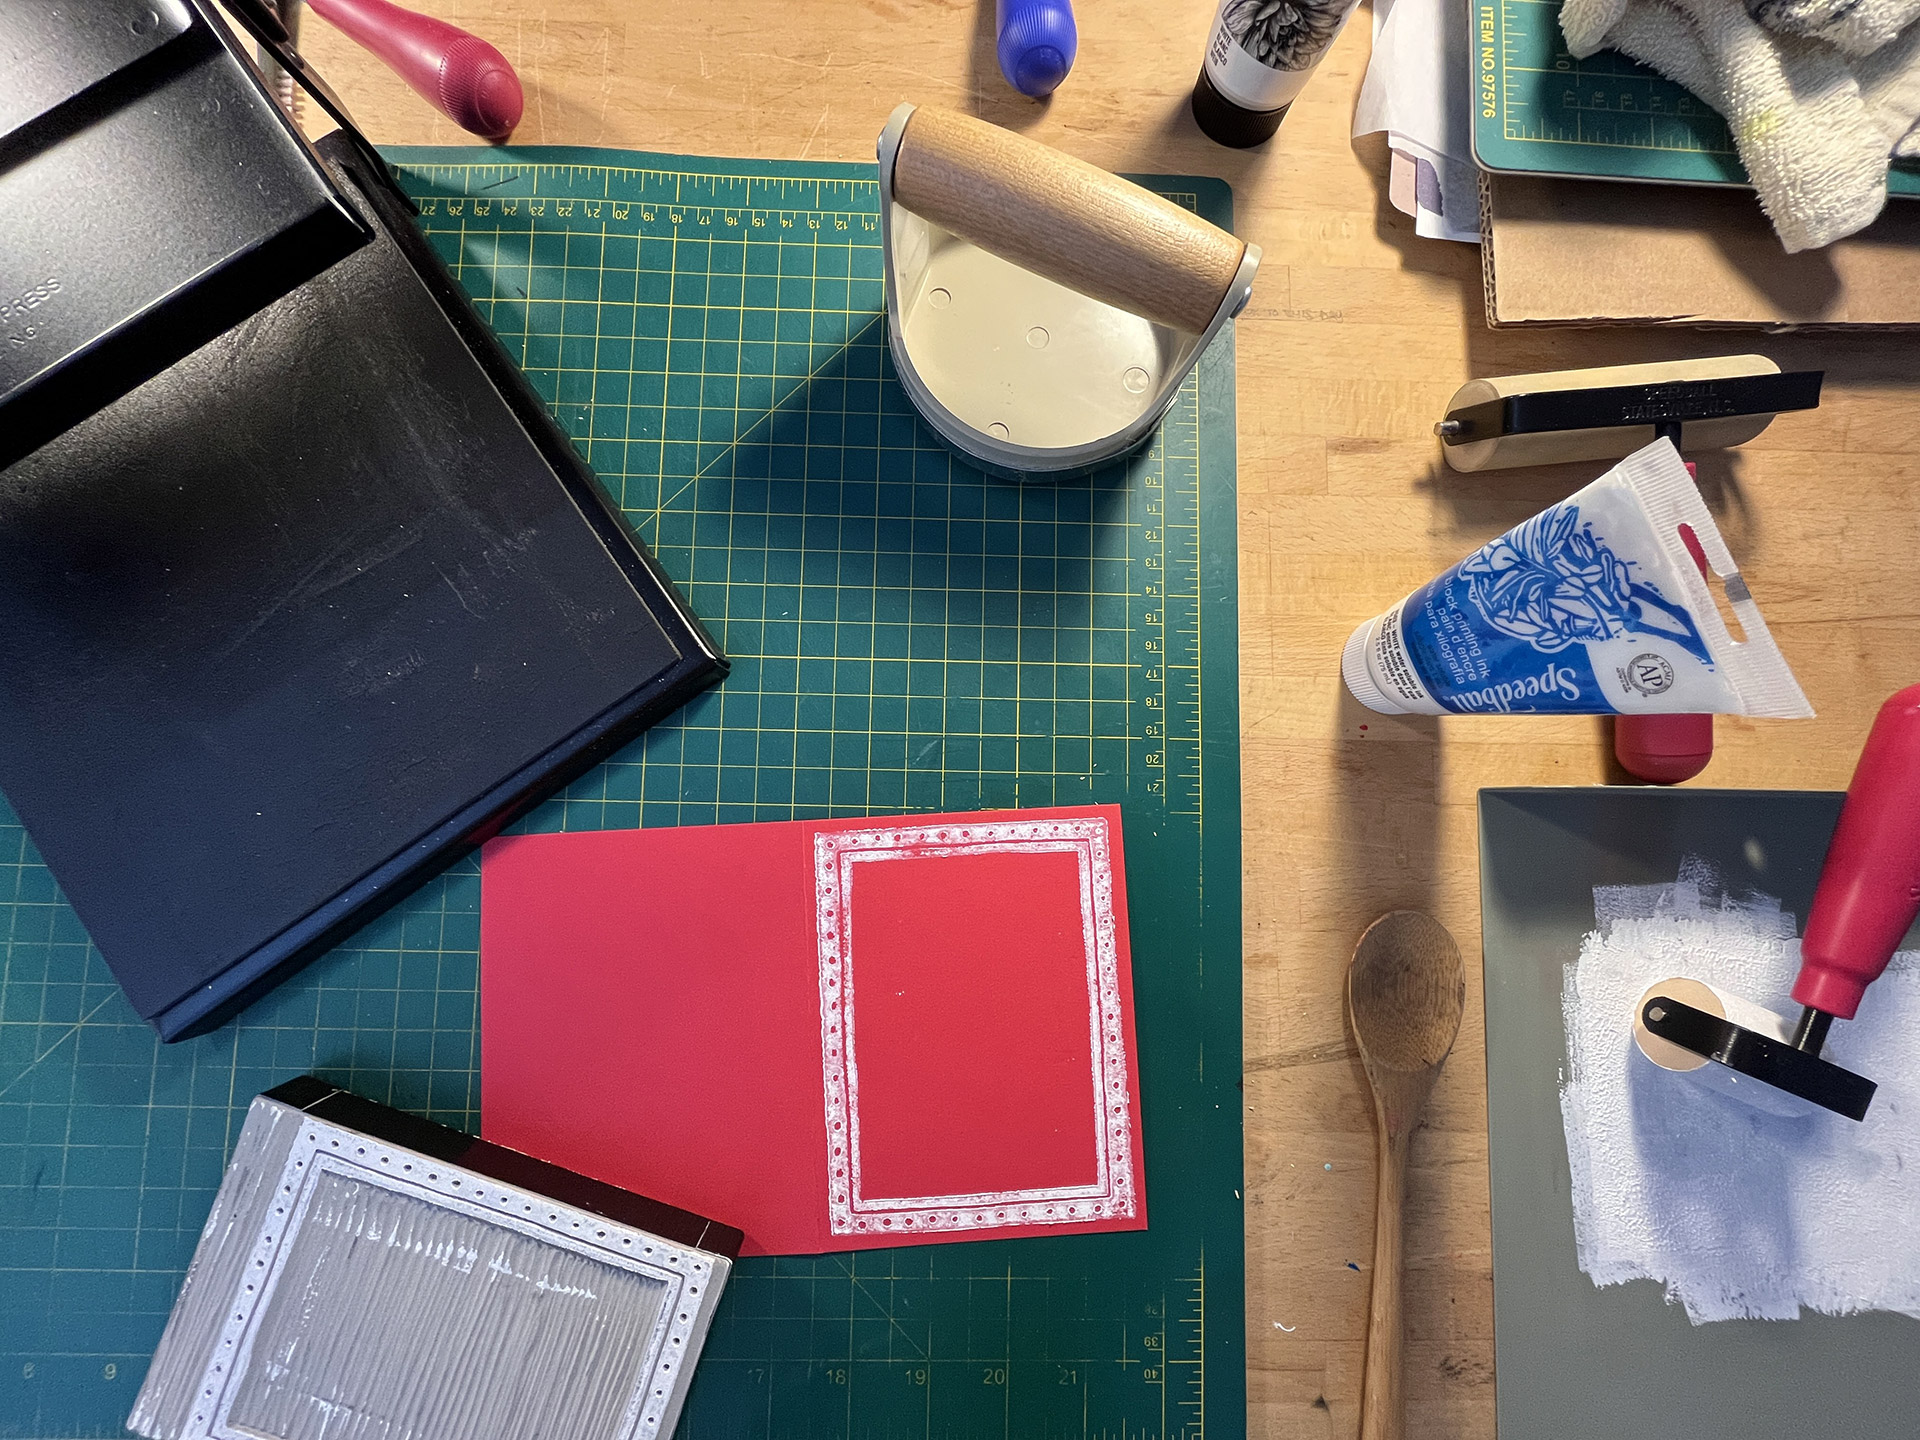
- Test Prints Usually, I'd be stressed-out about the uneven transfer you see here, but planning on embellishing them afterwards had me relatively calm.
- Step #1 A combination of borders and cakes were printed on each day.
- Step #1 Complete A spreadsheet was made so that I could efficiently print-out a combination of the first plate with minimal changes in ink.
- Finished Print The second step for each card turned-out a lot better than the first.
- Beaten-Up Plates The plates end-up looking rather beat by the end of the printing and washing process.
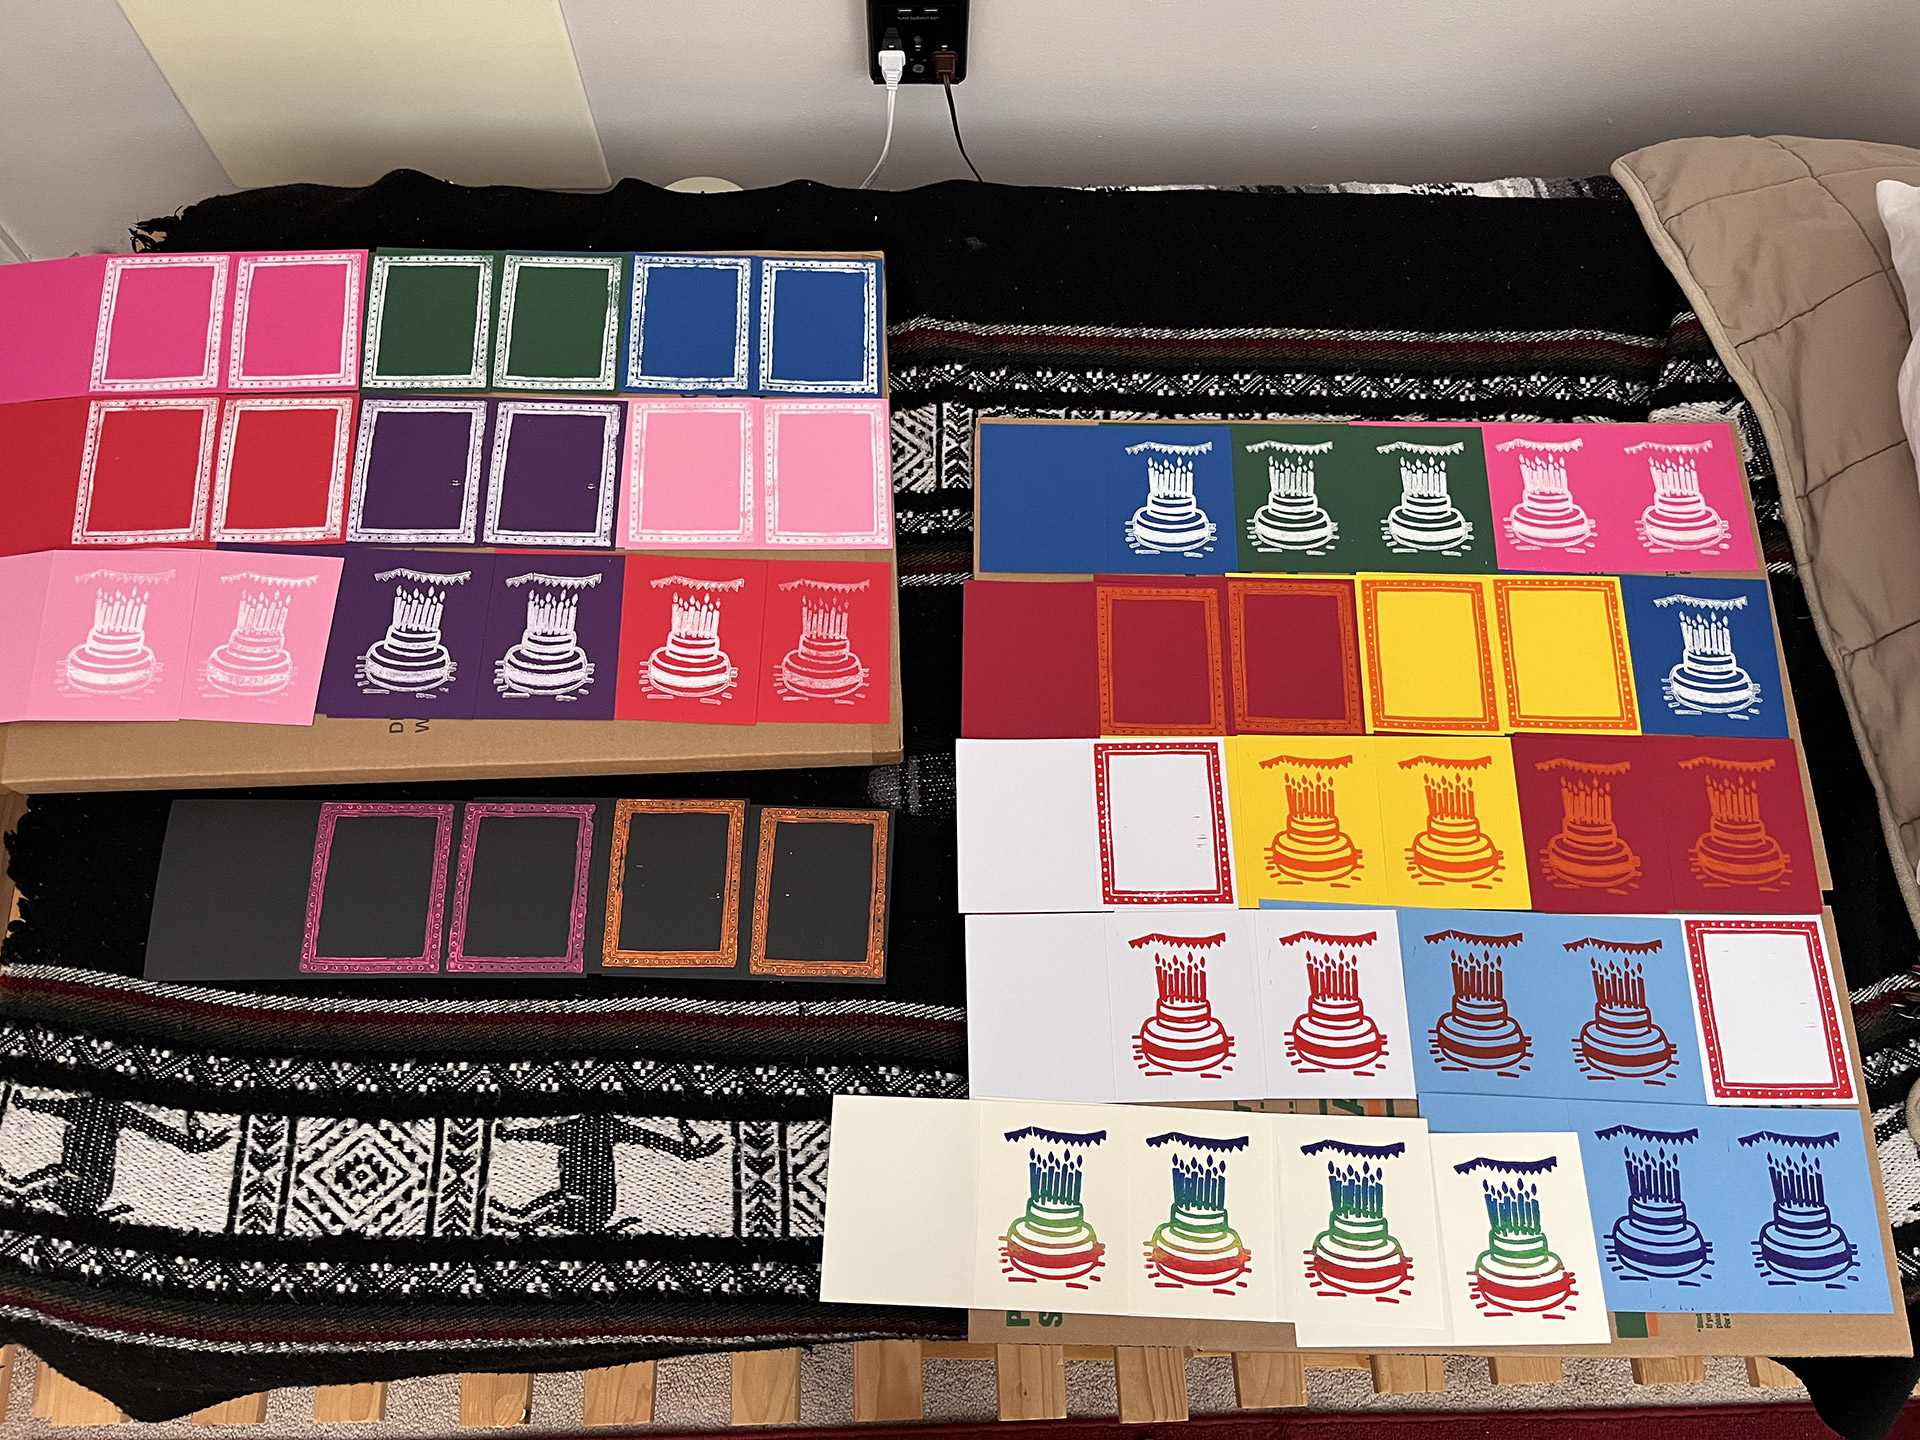
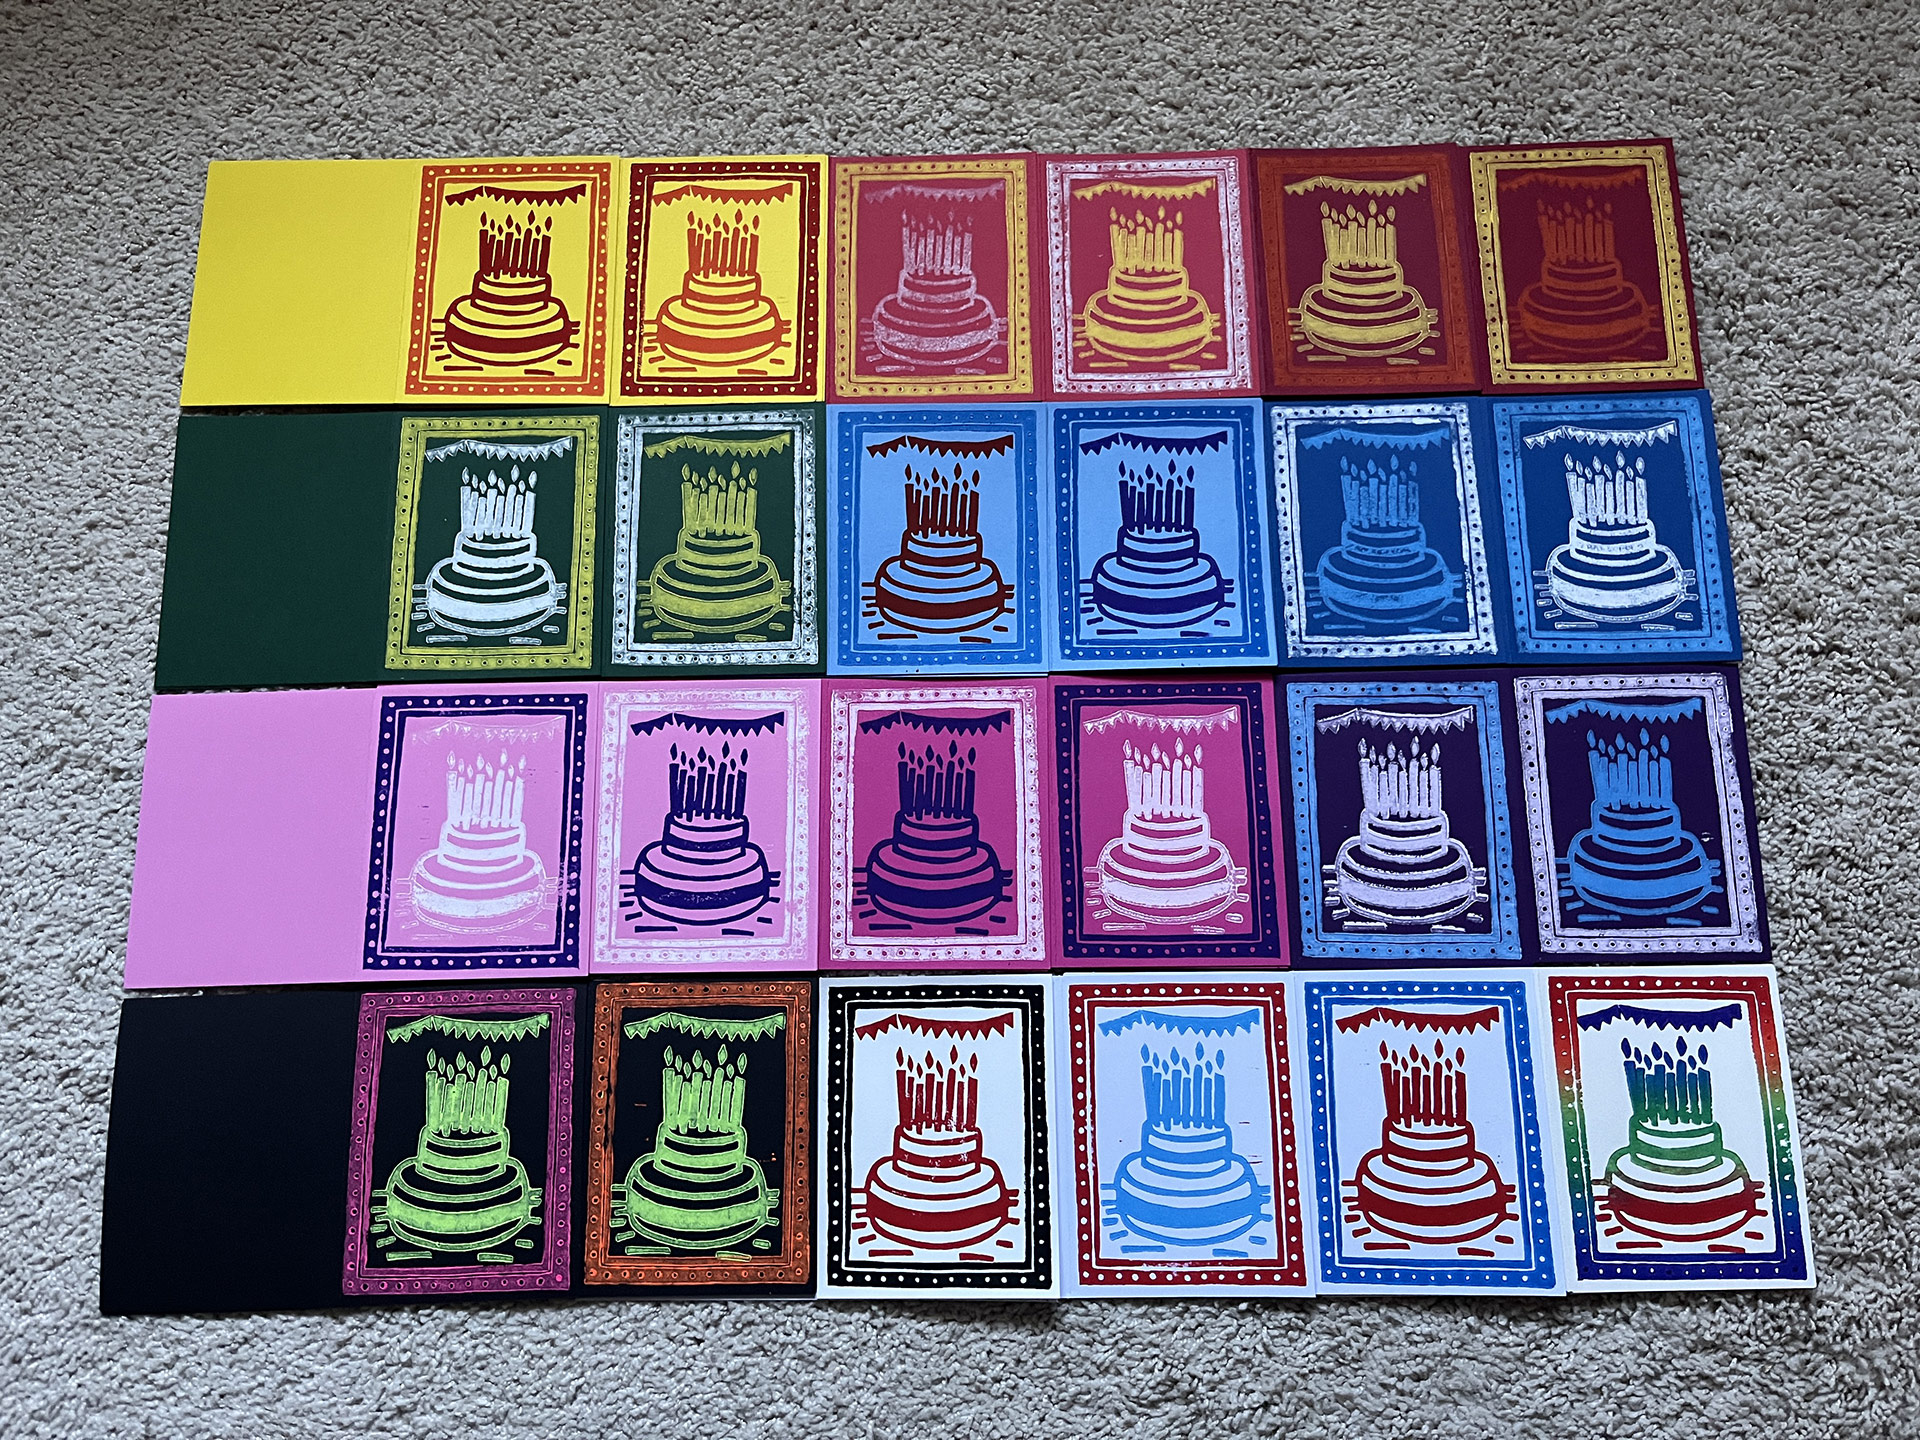
- "Finished" Cards Here you can see each color combination represented which are now ready for embellishment.
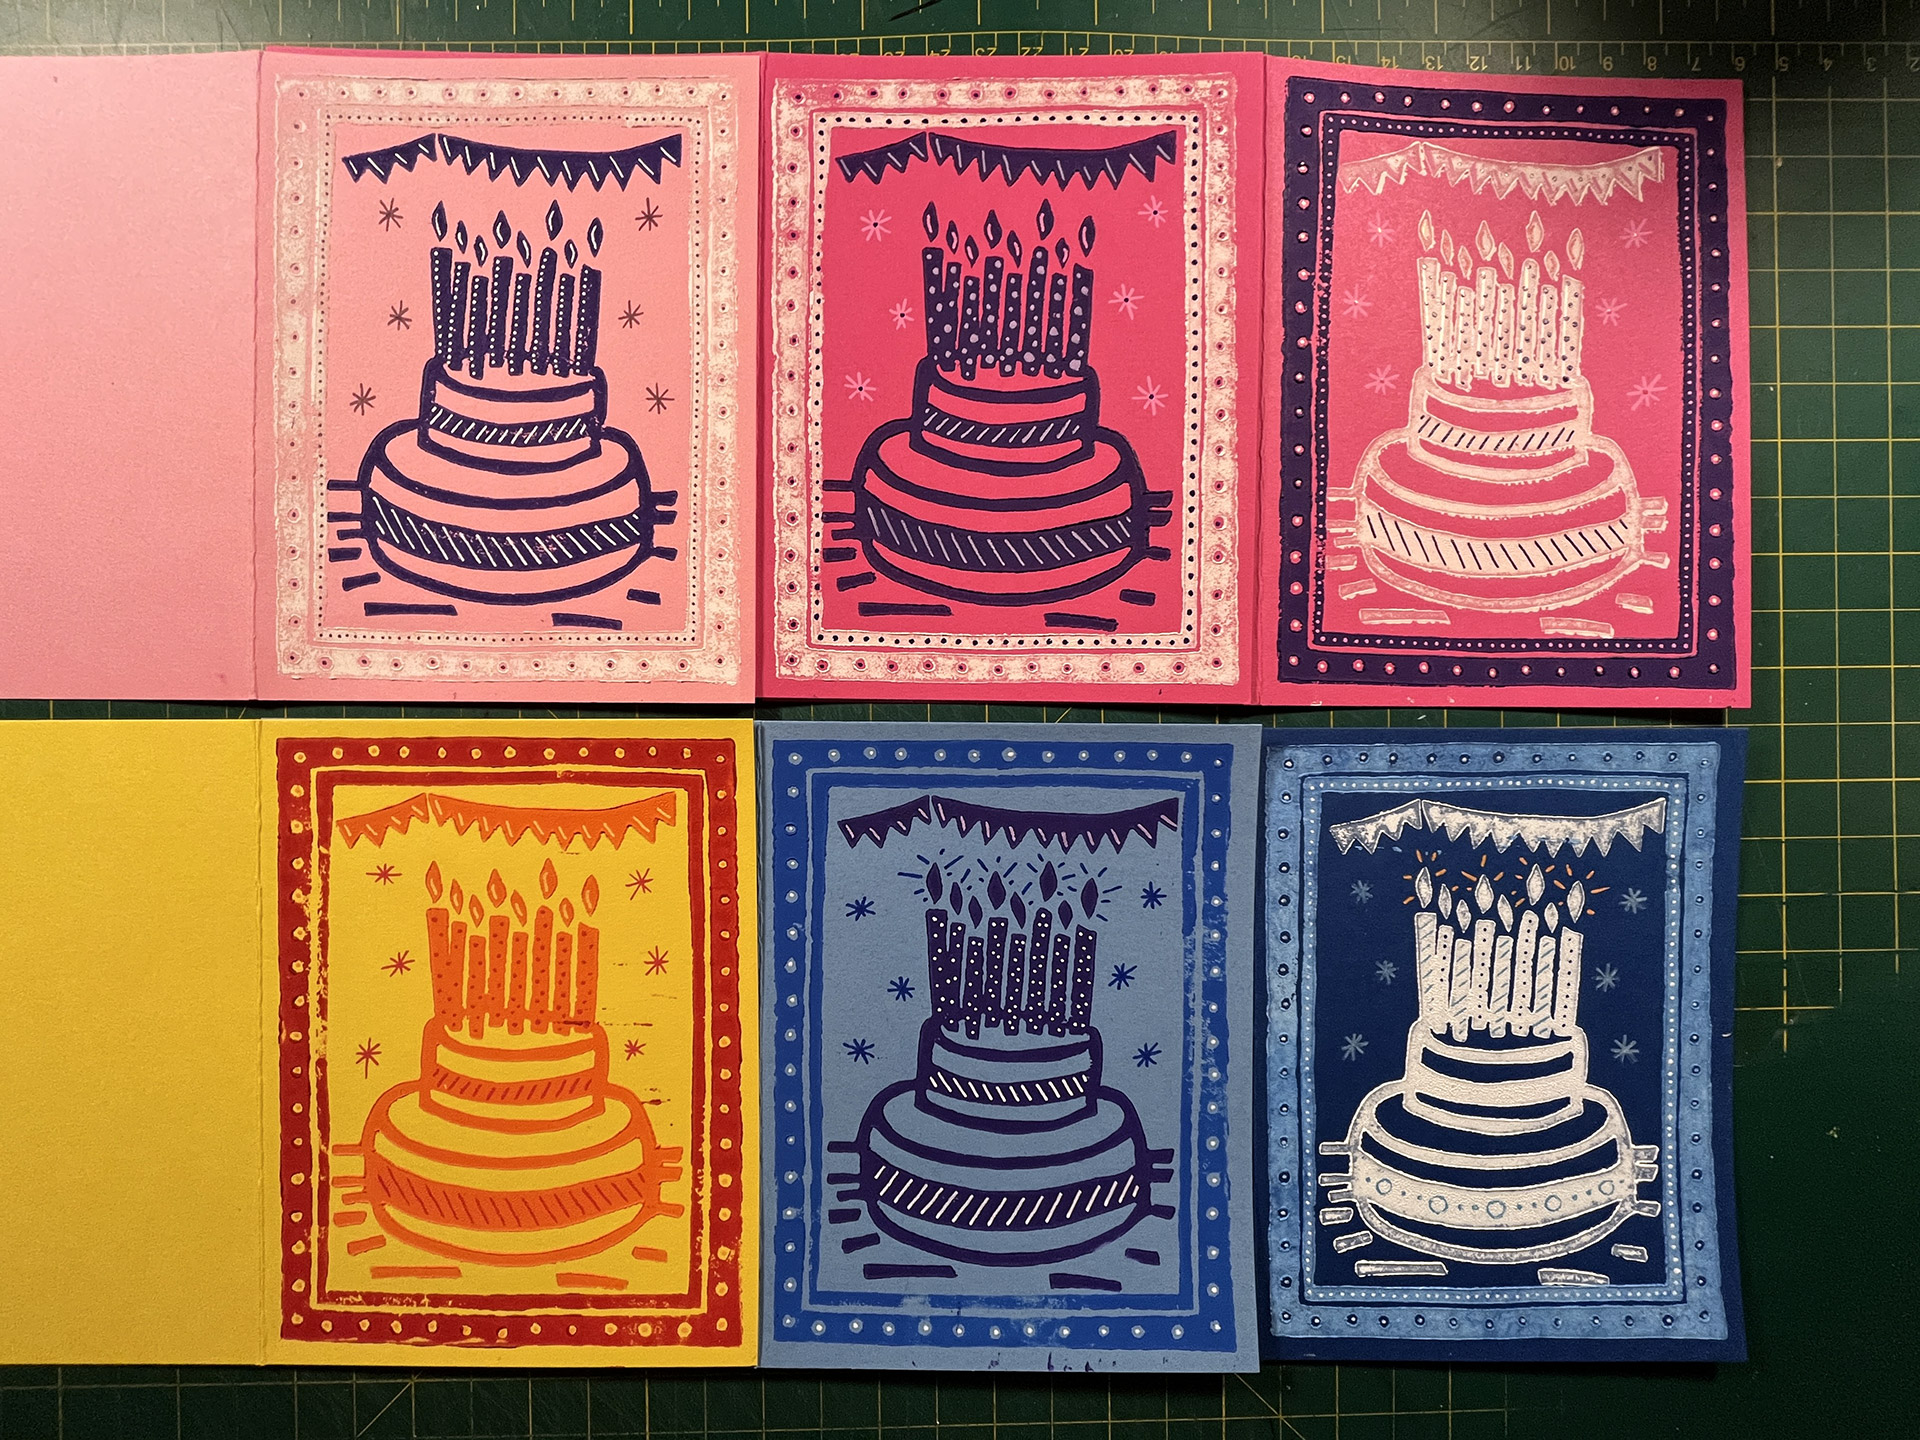
- Finished Cards Here are the first six cards after embellishment.
© 2026 60bpm